Removing the display assembly
NOTE:
Before working inside your computer, read the safety information that shipped with your computer and follow
the steps in
Before working inside your computer
. After working inside your computer, follow the instructions in
. For more safety best practices, see the Regulatory Compliance home page at
.
Prerequisites
1. Remove the
.
2. Remove the
.
Procedure
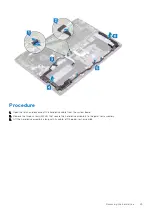
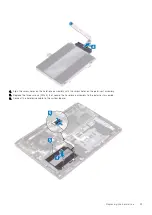
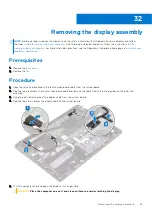
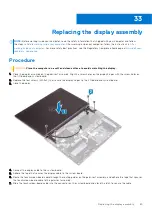
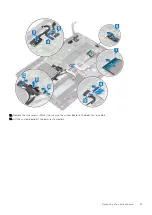
1. Open the latch and disconnect the touchscreen-board cable from the system board.
2. Peel the tape to release the touchscreen-board cable and remove the cable from the routing guides on the palm-rest
assembly.
3. Using the pull tab, disconnect the display cable from the system board.
4. Peel the tape that secures the display cable to the system board.
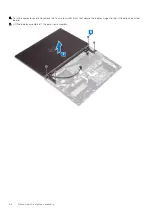
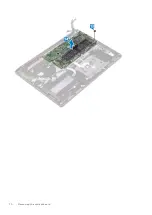
5. Turn the computer over and open the display as far as possible.
CAUTION:
Place the computer on a soft and clean surface to avoid scratching the display.
32
Removing the display assembly
63
Summary of Contents for Inspiron 7590 2in1
Page 17: ...Removing the base cover 17 ...
Page 22: ...22 Removing the battery ...
Page 24: ...Post requisites Replace the base cover 24 Replacing the battery ...
Page 26: ...26 Removing the memory modules ...
Page 28: ...Post requisites Replace the base cover 28 Replacing the memory modules ...
Page 30: ...30 Removing the wireless card ...
Page 32: ...Post requisites Replace the base cover 32 Replacing the wireless card ...
Page 36: ...36 Removing the I O board ...
Page 38: ...Post requisites Replace the base cover 38 Replacing the I O board ...
Page 45: ...Post requisites Replace the base cover Replacing the solid state drive 45 ...
Page 51: ...Removing the hard drive 51 ...
Page 56: ...56 Removing the touchpad ...
Page 58: ...58 Replacing the touchpad ...
Page 66: ...Post requisites 1 Replace the fan 2 Replace the base cover 66 Replacing the display assembly ...
Page 70: ...70 Removing the system board ...
Page 81: ...Removing the power button with fingerprint reader 81 ...
Page 85: ...Removing the palm rest and antenna assembly 85 ...

