Replacing
the
Palm
Rest |
51
Replacing the Palm Rest
WARNING: Before working inside your computer, read the safety information
that shipped with your computer and follow the steps in "Before Working Inside
Your Computer" on page 7. After working inside your computer, follow the
instructions in "After Working Inside Your Computer" on page 9. For more
safety best practices, see the Regulatory Compliance home page at
dell.com/regulatory_compliance
Procedure
1
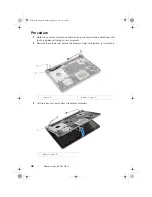
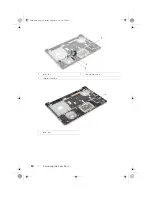
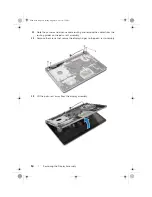
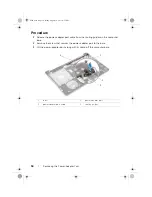
Route the hard drive cable through the routing guides on the palm-rest assembly.
2
Connect the USB board cable to the USB board latch on the palm rest assembly
3
Align the slots on the computer base to the tabs on the palm-rest assembly.
4
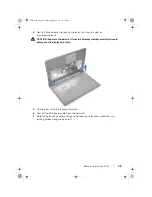
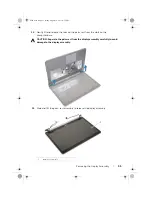
Press down on the edges of the palm rest to snap it into place and close the
palm-rest assembly.
5
Replace the screws that secure the display hinges to the palm-rest assembly
6
Route the camera and antenna cables through the routing guides on the palm-rest
assembly.
Postrequisites
1
Replace the power-adapter port. See "Replacing the Power-Adapter Port" on
page 59.
2
Replace the system board. See "Replacing the System Board" on page 45.
3
Replace the speakers. See "Replacing the Speakers" on page 40
4
Replace the coin cell battery. See "Replacing the Coin-Cell Battery" on page 31.
5
Replace the cooling assembly. See "Replacing the Cooling Assembly" on page 36.
6
Replace the USB board. See "Replacing the USB Board" on page 38
7
Replace the wireless minicard assembly. See "Replacing the Wireless Card" on
page 33.
8
Replace the base cover. See "Replacing the Base Cover" on page 29.
9
Replace the keyboard. See "Replacing the Keyboard" on page 26.
10
Replace the hard-drive assembly. See "Replacing the Hard Drive" on page 21.
11
Replace the optical-drive assembly. See "Replacing the Optical Drive" on page 18.
12
Replace the memory modules. See "Replacing the Memory Module(s)" on page 15.
13
Replace the battery. See "Replacing the Battery" on page 12.
book.book Page 51 Friday, August 16, 2013 4:21 PM


