background image

Dell Latitude 6430u
Owner's Manual

Regulatory Model: P36G

Regulatory Type: P36G001

Summary of Contents for Latitude 6430u

Page 1: ...Dell Latitude 6430u Owner s Manual Regulatory Model P36G Regulatory Type P36G001 ...

Page 2: ...ATA SSD Card 11 Installing the mSATA SSD Card 12 Removing the Memory 12 Installing the Memory 12 Removing the Wireless Local Area Network WLAN Card 12 Installing the WLAN Card 13 Removing the Wireless Wide Area network WWAN Card 13 Installing the WWAN Card 13 Removing the TAA Board 14 Installing the TAA Board 14 Removing the System Fan 14 Installing the System Fan 15 Removing the Keyboard 15 Insta...

Page 3: ... Installing the Smart Card Cage 29 Removing the Hall Sensor 29 Installing the Hall Sensor 30 Removing the Sniffer Board 30 Installing the Sniffer Board 31 Removing the Display Assembly 31 Installing the Display Assembly 33 Removing the Power Connector 33 Installing the Power Connector 34 Removing the System Board 34 Installing the System Board 36 Removing the Thermal Module 36 Installing the Therm...

Page 4: ...5 Specifications 53 System Setup Option 53 6 Contacting Dell 61 Contacting Dell 61 ...

Page 5: ... a card Hold a card by its edges or by its metal mounting bracket Hold a component such as a processor by its edges not by its pins CAUTION When you disconnect a cable pull on its connector or on its pull tab not on the cable itself Some cables have connectors with locking tabs if you are disconnecting this type of cable press in on the locking tabs before you disconnect the cable As you pull conn...

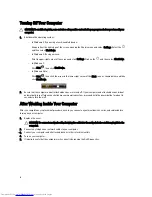
Page 6: ...n below and then click Shut Down 2 Ensure that the computer and all attached devices are turned off If your computer and attached devices did not automatically turn off when you shut down your operating system press and hold the power button for about 6 seconds to turn them off After Working Inside Your Computer After you complete any replacement procedure ensure you connect any external devices c...

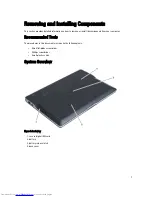
Page 7: ...stall the components from your computer Recommended Tools The procedures in this document may require the following tools Small flat blade screwdriver Phillips screwdriver Small plastic scribe System Overview Figure 1 Back view 1 secure digital SD card 2 battery 3 battery release latch 4 base cover 7 ...

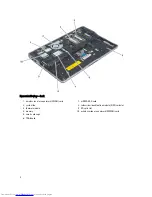
Page 8: ...wireless local area network WLAN card 2 system fan 3 thermal module 4 memory 5 smart card cage 6 TAA board 7 mSATA SSD card 8 subscriber identification module SIM card slot 9 SD card slot 10 wireless wide area network WWAN card 8 ...

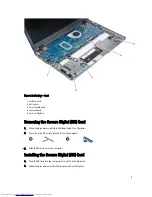
Page 9: ...l SD Card 1 Follow the procedures in Before Working Inside Your Computer 2 Press in on the SD card to release it from the computer 3 Slide the SD card out of the computer Installing the Secure Digital SD Card 1 Push the SD card into the compartment until it clicks into place 2 Follow the procedures in After Working Inside Your Computer 9 ...

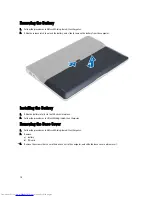
Page 10: ...computer Installing the Battery 1 Slide the battery into its slot until it clicks into place 2 Follow the procedures in After Working Inside Your Computer Removing the Base Cover 1 Follow the procedures in Before Working Inside Your Computer 2 Remove a battery b SD card 3 Remove the screws that secure the base cover to the computer and slide the base cover and remove it 10 ...

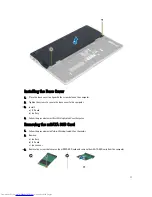
Page 11: ...to the computer 3 Install a SD card b battery 4 Follow the procedures in After Working Inside Your Computer Removing the mSATA SSD Card 1 Follow the procedures in Before Working Inside Your Computer 2 Remove a battery b SD card c base cover 3 Remove the screw that secures the mSATA SSD card and remove the mSATA SSD card from the computer 11 ...

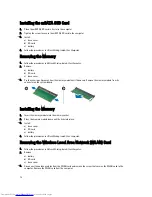
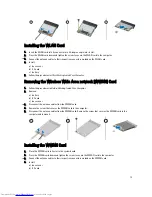
Page 12: ...le until it pops up Remove the memory module from its connector on the system board Installing the Memory 1 Insert the memory module into the memory socket 2 Press the memory module down until it clicks into place 3 Install a base cover b SD card c battery 4 Follow the procedures in After Working Inside Your Computer Removing the Wireless Local Area Network WLAN Card 1 Follow the procedures in Bef...

Page 13: ... 1 Follow the procedures in Before Working Inside Your Computer 2 Remove a battery b SD card c base cover 3 Disconnect the antenna cables from the WWAN card 4 Remove the screw that secures the WWAN card to the computer 5 Disconnect the antenna cables from the WWAN card Remove the screw that secures the WWAN card to the computer and remove it Installing the WWAN Card 1 Place the WWAN card in its sl...

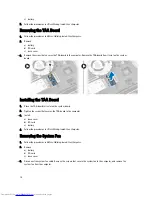
Page 14: ... Installing the TAA Board 1 Place the TAA board in its slot on the system board 2 Tighten the screw that secures the TAA board to the computer 3 Install a base cover b SD card c battery 4 Follow the procedures in After Working Inside Your Computer Removing the System Fan 1 Follow the procedures in Before Working Inside Your Computer 2 Remove a battery b SD card c base cover 3 Disconnect the system...

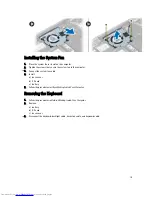
Page 15: ...3 Connect the system fan cable 4 Install a base cover b SD card c battery 5 Follow the procedures in After Working Inside Your Computer Removing the Keyboard 1 Follow the procedures in Before Working Inside Your Computer 2 Remove a battery b SD card c base cover 3 Disconnect the keyboard backlight cable trackstick cable and keyboard cable 15 ...

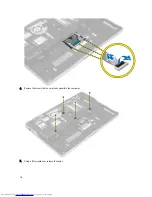
Page 16: ...4 Remove the screws that secure the keyboard to the computer 5 Using a flat screwdriver release the snaps 16 ...

Page 17: ...puter and tighten the screws to secure the keyboard 3 Connect the keyboard cable keyboard backlight cable and trackstick cable 4 Install a base cover b SD card c battery 5 Follow the procedures in After Working Inside Your Computer Removing the Palmrest Assembly 1 Follow the procedures in Before Working Inside Your Computer 2 Remove a battery b SD card c base cover d keyboard 17 ...

Page 18: ...3 Disconnect the media board cable power switch cable touchpad cable fingerprint scanner cable and speaker cable 4 Remove the screws that secure the palmrest assembly to the computer 18 ...

Page 19: ...sembly 1 Align the palmrest assembly to its original position in the computer until it snaps into place 2 Tighten the screws to secure the palmrest assembly to the computer 3 Flip the computer and tighten the screws to secure the palmrest assembly to the computer 4 Tighten the screws to secure the palmrest assembly to the base of the computer 5 Connect the following cable a Speaker cable b fingerp...

Page 20: ...cure the power switch board to the computer and remove it from the computer Installing the Power Switch Board 1 Place the power switch board in its place on the computer 2 Tighten the screws to secure the power switch board to the computer 3 Install a palmrest assembly b keyboard c base cover d SD card e battery Removing the Fingerprint Scanner Board 1 Follow the procedures in Before Working Insid...

Page 21: ... computer 2 Place the fingerprint scanner bracket on it and tighten the screw to secure the fingerprint scanner bracket to the computer 3 Route the fingerprint scanner cable 4 Install a palmrest assembly b keyboard c base cover d SD card e battery 5 Follow the procedures in After Working Inside Your Computer Removing the Display Bezel 1 Follow the procedures in Before Working Inside Your Computer ...

Page 22: ...bezel until it clicks onto the display assembly 3 Install the battery 4 Follow the procedures in After Working Inside Your Computer Removing the Display Panel 1 Follow the procedures in Before Working Inside Your Computer 2 Remove a battery b display bezel 3 Remove the screws that secure the display panel to the display assembly and flip the display panel over 22 ...

Page 23: ...the Display Panel 1 Place the display panel on the display assembly 2 Connect the LVDS cable and affix the LVDS cable connector tape to the display panel and flip the display panel over 3 Tighten the screws to secure the display panel to the display assembly 4 Install a display bezel b battery 5 Follow the procedures in After Working Inside Your Computer 23 ...

Page 24: ...Board 1 Connect the power LED cable to the power LED board 2 Place the power LED board in its place on the computer 3 Tighten the screws to secure the power LED board to the computer 4 Install a display panel b display bezel c battery 5 Follow the procedures in After Working Inside Your Computer Removing the Camera 1 Follow the procedures in Before Working Inside Your Computer 2 Remove a battery b...

Page 25: ...b battery 5 Follow the procedures in After Working Inside Your Computer Removing the Speakers 1 Follow the procedures in Before Working Inside Your Computer 2 Remove a battery b SD card c base cover d keyboard e palmrest assembly 3 Remove the screws that secure the speakers to the computer and remove the speaker cable from their routing tabs and remove the speakers from the computer 25 ...

Page 26: ...nstall a palmrest assembly b keyboard c base cover d SD card e battery 5 Follow the procedures in After Working Inside Your Computer Removing the Coin Cell Battery 1 Follow the procedures in Before Working Inside Your Computer 2 Remove a battery b SD card c base cover d keyboard e palmrest assembly 3 Disconnect the coin cell battery cable Pry the coin cell battery upward and remove it from the com...

Page 27: ...ter Working Inside Your Computer Removing the Smart Card Board 1 Follow the procedures in Before Working Inside Your Computer 2 Remove a battery b SD card c base cover d keyboard e palmrest assembly 3 Disconnect the smart card cables from the computer 4 Remove the screws that secure the smart card board in its place Remove the smart card cable from the routing channel and remove the smart card fro...

Page 28: ...r 3 Connect the smart card cables to the computer 4 Install a palmrest assembly b keyboard c base cover d SD card e battery 5 Follow the procedures in After Working Inside Your Computer Removing the Smart Card Cage 1 Follow the procedures in Before Working Inside Your Computer 2 Remove a battery b SD card c base cover d keyboard e palmrest assembly 3 Disconnect the smart card cable 28 ...

Page 29: ...computer 2 Tighten the screws to secure the smart card cage to the computer 3 Connect the smart card cable 4 Install a palmrest assembly b keyboard c base cover d SD card e battery 5 Follow the procedures in After Working Inside Your Computer Removing the Hall Sensor 1 Follow the procedures in Before Working Inside Your Computer 2 Remove a battery b SD card 29 ...

Page 30: ...secure the hall sensor to the computer 3 Route and connect the hall sensor cable 4 Remove a palmrest assembly b keyboard c base cover d SD card e battery 5 Follow the procedures in After Working Inside Your Computer Removing the Sniffer Board 1 Follow the procedures in Before Working Inside Your Computer 2 Remove a battery b SD card c base cover d keyboard e palmrest assembly 3 Disconnect the snif...

Page 31: ...oard cable 4 Remove a palmrest assembly b keyboard c base cover d SD card e battery 5 Follow the procedures in After Working Inside Your Computer Removing the Display Assembly 1 Follow the procedures in Before Working Inside Your Computer 2 Remove a battery b SD card c base cover d keyboard e palmrest assembly 3 Disconnect the LVDS and camera cable from the system board 31 ...

Page 32: ...e the screws that secure the display assembly to the base of the computer and slide the antenna cables through the holes on the back of the computer 6 Remove the screws that secure the display assembly to the computer and lift the display assembly from the computer 32 ...

Page 33: ...enna and the LVDS cables through the routing channel 5 Connect the LVDS and camera cable to the computer 6 Connect the antenna cables to the wireless solution 7 Install a palmrest assembly b keyboard c base cover d SD card e battery 8 Follow the procedures in After Working Inside Your Computer Removing the Power Connector 1 Follow the procedures in Before Working Inside Your Computer 2 Remove a ba...

Page 34: ...stem board b display assembly c palmrest assembly d keyboard e base cover f SD card g battery 3 Follow the procedures in After Working Inside Your Computer Removing the System Board 1 Follow the procedures in Before Working Inside Your Computer 2 Remove a battery b SD card c base cover d keyboard e palmrest assembly f sniffer board g display assembly 3 Disconnect the system fan cable 34 ...

Page 35: ...cable and coin cell battery cable 5 Remove the screws that secure the power connector bracket to the computer and remove the power connector bracket from the computer 6 Remove the screws that secure the system board to the computer and remove it 35 ...

Page 36: ... connector bracket to the computer 4 Connect the following cables to the system board a coin cell battery b hall sensor cable c smart card cable 5 Install a display assembly b sniffer board c palmrest assembly d keyboard e base cover f SD card g battery 6 Follow the procedures in After Working Inside Your Computer Removing the Thermal Module 1 Follow the procedures in Before Working Inside Your Co...

Page 37: ...oard and lift it from the system board Installing the Thermal Module 1 Place the thermal module on the system board 2 Tighten the screws to secure the thermal module to the system board 3 Install a system board b power connector c display assembly d palmrest e keyboard f base cover g SD card h battery 4 Follow the procedures in After Working Inside Your Computer 37 ...

Page 38: ...38 ...

Page 39: ...etup defined boot device order and boot directly to a specific device for example optical drive or hard drive During the Power on Self Test POST when the Dell logo appears you can Access System Setup by pressing F2 key Bring up the one time boot menu by pressing F12 key The one time boot menu displays the devices that you can boot from including the diagnostic option The boot menu options are Remo...

Page 40: ... Tag or Express Service Code NOTE For desktops the service tag label is available on the front of your computer NOTE For notebooks the service tag label is available on the bottom of your computer NOTE For All In One Desktops the service tag label is available at the back of your computer a Enter the Service Tag or Express Service Code and click Submit b Click Submit and proceed to step 5 4 If you...

Page 41: ...ller Video BIOS Version Video Memory Panel Type Native Resolution Audio Controller Modem Controller Wi Fi Device Cellular Device Bluetooth Device Battery Information Displays the battery status and the type of AC adapter connected to the computer Boot Sequence Allows you to change the order in which the computer attempts to find an operating system Diskette Drive Internal HDD USB Storage Device CD...

Page 42: ... Boot Support Enable External USB Port NOTE USB keyboard and mouse always work in the BIOS setup irrespective of these settings USB PowerShare This option configures the USB PowerShare feature behaviour This feature is intended to allow users to charge external devices such as phones and portable music players using the stored system battery power through the USB PowerShare port even when the syst...

Page 43: ... Successful password changes take effect immediately Default Setting Not set System Password Allows you to set change or delete the system password NOTE Successful password changes take effect immediately Default Setting Not set Internal HDD 0 Password Allows you to set or change the system s internal hard disk drive NOTE Successful password changes take effect immediately Default Setting Not set ...

Page 44: ...r changes will be allowed Default Setting Deactivate CPU XD Support Allows you to enable the Execute Disable mode of the processor Default Setting Enable CPU XD Support OROM Keyboard Access Allows you to set an option to enter the Option ROM Configuration screens using hotkeys during boot The options are Enable One Time Enable Disable Default Setting Enable Admin Setup Lockout Allows you to preven...

Page 45: ...ble or disable the Intel TurboBoost mode of the processor Default Setting Enable Intel TurboBoost Hyper Thread Control Allows you to enable or disable the HyperThreading in the processor Default Setting Enabled Rapid Start Technology The Intel Rapid Start feature might improve the battery life by automatically putting the system into a low power state during sleep after a user specified time The o...

Page 46: ...adio is not selected Wake on LAN WLAN Allows you to enable or disable the feature that powers on the computer from the Off state when triggered by a LAN signal Disabled This option is enabled by default LAN Only WLAN Only LAN or WLAN Block Sleep This option lets you block entering to sleep S3 state in Operating System environment Block Sleep S3 state This option is disabled by default POST Primary...

Page 47: ...t process by bypassing some compatibility steps Minimal Thorough This option is enabled by default Auto Virtualization Support Table 10 Virtualization Support Option Description Virtualization Allows you to enable or disable the Intel Virtualization Technology Default Setting Enable Intel Virtualization Technology VT for Direct I O Enables or disables the Virtual Machine Monitor VMM from utilizing...

Page 48: ...e Option Description Service Tag Displays the Service Tag of your computer Asset Tag Allows you to create a system asset tag if an asset tag is not already set This option is not set by default System Logs Table 13 System Logs Option Description BIOS Events Allows you to view and clear the System Setup BIOS POST events Thermal Events Allows you to view and clear the Thermal events Power Events All...

Page 49: ...quire user interaction Always ensure that you are present at the computer terminal when the diagnostic tests are performed 1 Power on the computer 2 As the computer boots press the F12 key as the Dell logo appears 3 On the boot menu screen select the Diagnostics option The Enhanced Pre boot System Assessment window is displayed listing all devices detected in the computer The diagnostics starts ru...

Page 50: ...uter may emit a series of beeps during start up if the display cannot show errors or problems These series of beeps called beep codes identify various problems The delay between each beep is 300 ms the delay between each set of beeps is 3 seconds and the beep sound lasts 300 ms After each beep and each set of beeps the BIOS should detect if the user presses the power button If so BIOS will jump ou...

Page 51: ... two times pause etc This pattern continues until the system is powered off Code Cause and Troubleshooting Steps 1 System board BIOS ROM failure System board failure covers BIOS corruption or ROM error 2 Memory No memory RAM detected 3 Chipset Error North and South Bridge Chipset DMA IMR Timer Error Time Of Day Clock test failure Gate A20 failure Super I O chip failure Keyboard controller test fai...

Page 52: ...52 ...

Page 53: ...Primary Hard Drive Fixed bay Device System eSATA Device Dock eSATA Device LOM MAC Address Video Controller Video BIOS Version Video Memory Panel Type Native Resolution Audio Controller Modem Controller Wi Fi Device Cellular Device Bluetooth Device Battery Information Displays the battery status and the type of AC adapter connected to the computer Boot Sequence Allows you to change the order in whi...

Page 54: ...y type of USB Mass Storage Devices HDD memory key floppy If USB port is enabled device attached to this port is enabled and available for OS If USB port is disabled the OS cannot see any device attached to this port Enable Boot Support Enable External USB Port NOTE USB keyboard and mouse always work in the BIOS setup irrespective of these settings USB PowerShare This option configures the USB Powe...

Page 55: ... to enable disable Dynamic backlight control Security Table 20 Security Option Description Admin Password Allows you to set change or delete the administrator admin password NOTE You must set the admin password before you set the system or hard drive password Deleting the admin password automatically deletes the system password and the hard drive password NOTE Successful password changes take effe...

Page 56: ...wed when an Administrator Password is set If disabled the setup options are locked by the admin password TPM Security Allows you to enable the Trusted Platform Module TPM during POST Default Setting The option is disabled Computrace Allows you to activate or disable the optional Computrace software The options are Deactivate Disable Activate NOTE The Activate and Disable options will permanently a...

Page 57: ...disable multi core support for the processor The options are All 1 2 Default Setting All Intel SpeedStep Allows you to enable or disable the Intel SpeedStep feature Default Setting Enable Intel SpeedStep C States Control Allows you to enable or disable the additional processor sleep states Default Setting The option C statesis enabled Intel TurboBoost Allows you to enable or disable the Intel Turb...

Page 58: ... Wireless Radio Control Allows you to enable or disable the feature that automatically switches from wired or wireless networks without depending on the physical connection Control WLAN Radio Control WWAN Radio Default Setting Control WLAN radio or Control WWAN radio is not selected Wake on LAN WLAN Allows you to enable or disable the feature that powers on the computer from the Off state when tri...

Page 59: ...eys Allows you enable the sign on screen message display indicating the keystroke sequence to access the System Setup option menu Default Setting Enable F12 Boot Option Menu Fast Boot Allows you to speed the boot process by bypassing some compatibility steps Minimal Thorough This option is enabled by default Auto Virtualization Support Table 25 Virtualization Support Option Description Virtualizat...

Page 60: ...ooth All the options are enabled by default Maintenance Table 27 Maintenance Option Description Service Tag Displays the Service Tag of your computer Asset Tag Allows you to create a system asset tag if an asset tag is not already set This option is not set by default System Logs Table 28 System Logs Option Description BIOS Events Allows you to view and clear the System Setup BIOS POST events Ther...

Page 61: ...e based support and service options Availability varies by country and product and some services may not be available in your area To contact Dell for sales technical support or customer service issues 1 Visit www dell com support 2 Select your support category 3 Verify your country or region in the Choose a Country Region drop down menu at the top of page 4 Select the appropriate service or suppo...

Reviews: