NOTE:
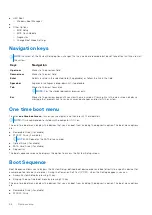
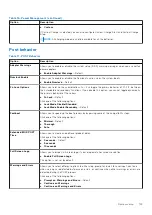
XXX denotes the SATA drive number.
●
Optical Drive (if available)
●
SATA Hard Drive (if available)
●
Diagnostics
NOTE:
Choosing
Diagnostics
, will display the
ePSA diagnostics
screen.
The boot sequence screen also displays the option to access the System Setup screen.
System setup options
NOTE:
Depending on the laptop and its installed devices, the items listed in this section may or may not appear.
General options
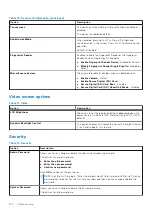
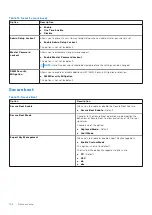
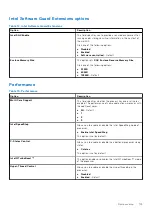
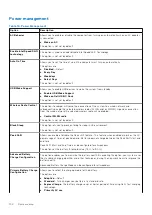
Table 9. General
Option
Description
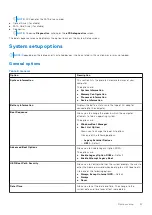
System Information
This section lists the primary hardware features of your
computer.
The options are:
●
System Information
●
Memory Configuration
●
Processor Information
●
Device Information
Battery Information
Displays the battery status and the type of AC adapter
connected to the computer.
Boot Sequence
Allows you to change the order in which the computer
attempts to find an operating system.
The options are:
●
Windows Boot Manager
●
Boot List Option:
Allows you to change the boot list options.
Click one of the following options:
○
Legacy External Devices
○
UEFI
—Default
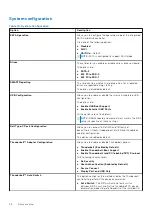
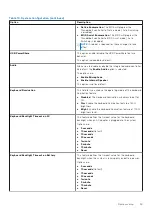
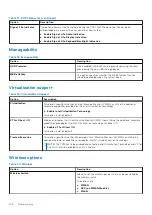
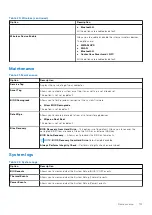
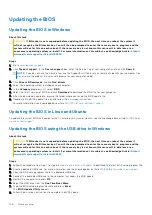
Advanced Boot Options
Allows you to Enable Legacy Option ROMs.
The options are:
●
Enable Legacy Option ROMs
—Default
●
Enable Attempt Legacy Boot
UEFI Boot Path Security
Allows you to control whether the system prompts the user to
enter the Admin password when booting to a UEFI boot path.
Click one of the following options:
●
Always, Except Internal HDD
—Default
●
Always
●
Never
Date/Time
Allows you to set the date and time. The change to the
system date and time takes effect immediately.
System setup
97
Summary of Contents for Latitude 7400 2-in-1
Page 24: ...4 Pry along the left right and bottom edges of the base 24 Removing and installing components ...
Page 43: ...5 Place the metal shield on the WWAN card Removing and installing components 43 ...
Page 51: ...8 Adhere the Mylar sheet on the system board Removing and installing components 51 ...
Page 56: ...4 Remove the metal foil from the heatsink shield 56 Removing and installing components ...
Page 57: ...5 Remove the heatsink shield from the system board Removing and installing components 57 ...
Page 60: ...3 Place the heatsink shield on the heatsink 60 Removing and installing components ...
Page 61: ...4 Adhere the metal foils on the heatsink shield Removing and installing components 61 ...
Page 87: ...8 Lift the keyboard off the palmrest assembly Removing and installing components 87 ...

