52
Remo ving and Replacing Parts
w
w
w
.d
e
ll.c
o
m
|
s
u
p
p
o
rt
.d
e
ll.
c
o
m
Replacing the LED Board
1
Align the two screw holes with the two mounting holes on the bottom
case assembly, and press the board into its connector.
2
Replace the two 4-mm screws.
Fan Assembly
NOTICE:
Disconnect the computer and attached devices from electrical
outlets and remove any installed batteries.
NOTICE:
To avoid ESD, ground yourself by using a wrist grounding strap or
by periodically touching unpainted metal on the computer.
Fa n A s s e m bl y
Removing the Fan Assembly
1
Follow the instructions in
“Preparing to Work Inside the Computer
2
Remove the
3
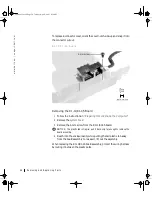
Remove the three 4-mm screws from the fan assembly.
4
Disconnect the two fan cables from the system board.
4-mm screws (3)
fan cables
64mcwc11.book Page 52 Tuesday, April 3, 2001 9:58 AM


