Back to Contents Page
AC Adapter:
Dell™ Latitude™ CS/CS
x
Portable Computers User's Guide
Using the AC Adapter
The AC adapter converts AC power to the DC power required by the computer. The AC adapter kit includes the AC adapter with its attached DC
cable (which inputs power to the computer) as well as an AC power cable that connects to an electrical outlet.
You can connect the AC adapter with your computer either turned on or off.
The AC adapter works with electrical outlets worldwide. However, power connectors vary among countries. Before you use AC power in a foreign
country, you may need to obtain a new power cable designed for use in that country.
If the computer is docked to one of Dell's C/Port Family Advanced Port Replicators (APR) or C/Dock Family Expansion Stations, it obtains power
through the APR or expansion station, which must be connected to an electrical outlet.
Connecting the AC Adapter
1.
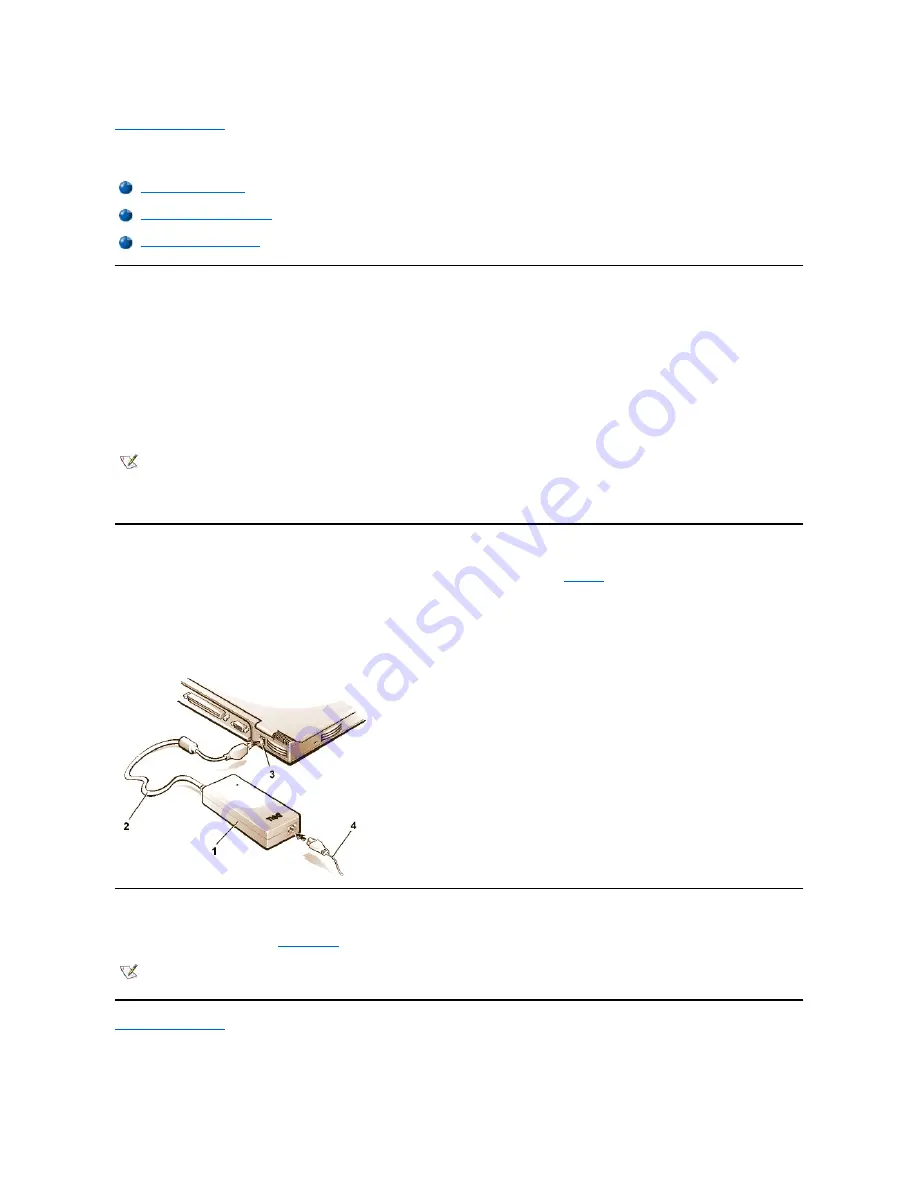
Connect the AC adapter's attached cable into the computer's AC adapter connector (see
Figure 1
).
2. Plug the AC power cable into the other end of the AC adapter.
3. Plug the AC power cable into an electrical outlet.
Figure 1. Connecting the AC Adapter
Turning On the Computer
To turn on the computer, press the
power button
.
Back to Contents Page
Using the AC Adapter
Connecting the AC Adapter
Turning On the Computer
NOTE: If you are running your computer on AC power with a battery installed, the AC adapter charges the battery (if needed) and then
maintains the battery's charge.
NOTICE: The AC adapter should be in a ventilated area, such as on a desktop or on the floor, when used to power the computer or
charge the battery. Do not use the AC adapter in a poorly ventilated environment, such as inside a carrying case.
1
AC adapter
2
AC adapter's attached cable
3
AC adapter connector
4
AC power cable
NOTE: If your computer's operating system is "locked up"
—
that is, it does not respond to commands
—
press and hold down the power
button for at least five seconds to turn off the computer.
Summary of Contents for Latitude CS
Page 38: ......
Page 43: ......
Page 69: ...The S2D partition was successfully created Back to Contents Page ...

