background image

Steps

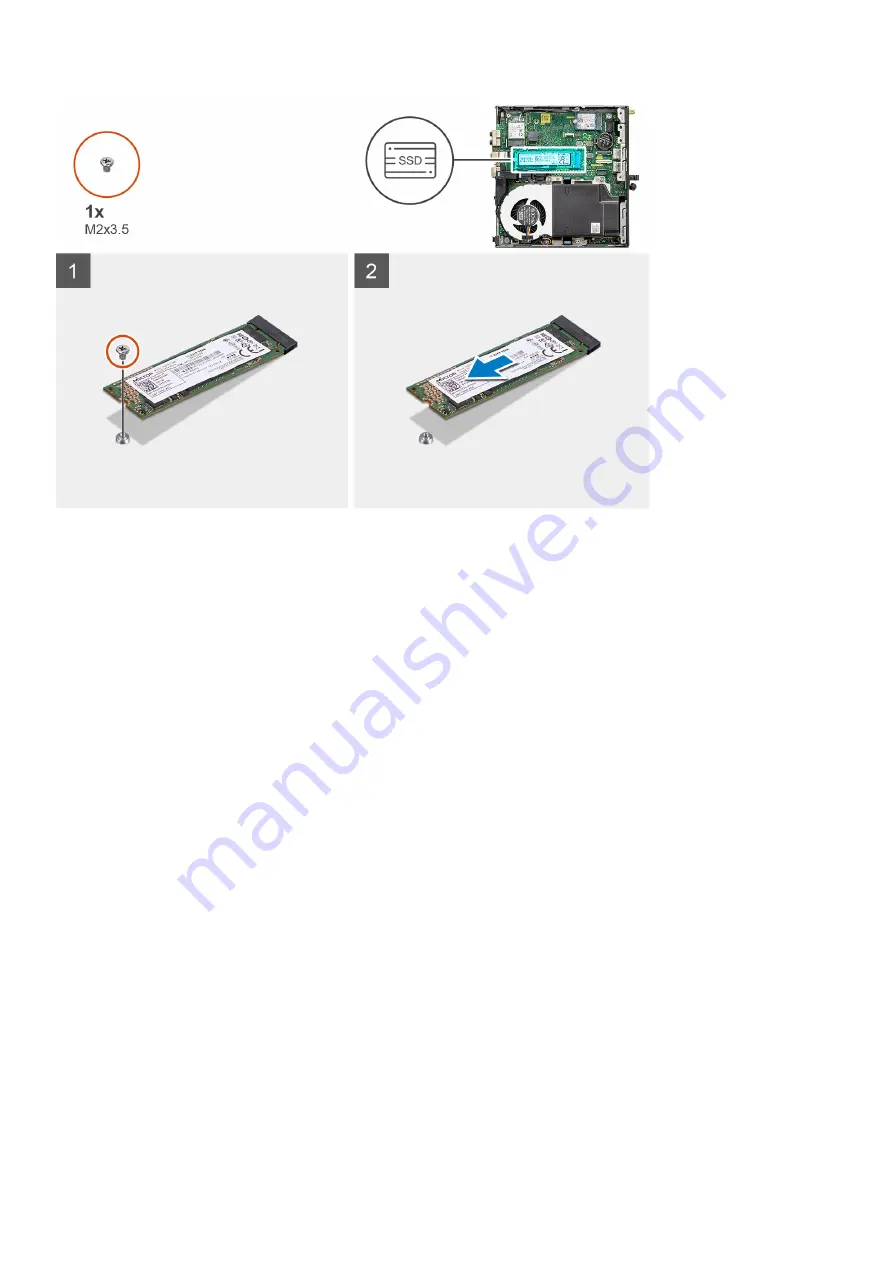
1. Remove the screw (M2x3.5) that secures the solid-state drive to the system board.
2. Slide and lift the solid-state drive off the system board.

Installing the M.2 2280 PCIe solid-state drive

Prerequisites

If you are replacing a component, remove the existing component before performing the installation procedure.

About this task

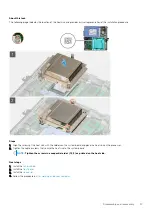
The following image indicates the location of the solid-state drive and provides a visual representation of the installation procedure.

28

Disassembly and reassembly

Summary of Contents for OptiPlex 7080 Micro

Page 1: ...OptiPlex 7080 Micro Service Manual Regulatory Model D14U Regulatory Type D14U001 D14U003 May 2020 Rev A00 ...

Page 2: ...ential damage to hardware or loss of data and tells you how to avoid the problem WARNING A WARNING indicates a potential for property damage personal injury or death 2020 Dell Inc or its subsidiaries All rights reserved Dell EMC and other trademarks are trademarks of Dell Inc or its subsidiaries Other trademarks may be trademarks of their respective owners ...

Page 3: ...ve assembly 22 Removing the hard drive assembly 22 Removing the hard drive bracket 23 Installing the hard drive bracket 23 Installing the 2 5 in hard drive assembly 24 Solid state drive 25 Removing the M 2 2230 PCIe solid state drive 25 Installing the M 2 2230 PCIe solid state drive 26 Removing the M 2 2280 PCIe solid state drive 27 Installing the M 2 2280 PCIe solid state drive 28 WLAN card 29 Re...

Page 4: ... the processor 44 System board 46 Removing the system board 46 Installing the system board 48 5 Troubleshooting 51 Dell SupportAssist Pre boot System Performance Check diagnostics 51 Running the SupportAssist Pre Boot System Performance Check 51 Diagnostic LED behavior 51 Diagnostic error messages 53 System error messages 55 WiFi power cycle 56 6 Getting help 57 Contacting Dell 57 4 Contents ...

Page 5: ...by touching an unpainted metal surface such as the metal at the back of the computer While you work periodically touch an unpainted metal surface to dissipate static electricity which could harm internal components CAUTION When you disconnect a cable pull it by its connector or its pull tab not the cable itself Some cables have connectors with locking tabs or thumb screws that you must disengage b...

Page 6: ...wer requirements and increased density ESD protection is an increasing concern Due to the increased density of semiconductors used in recent Dell products the sensitivity to static damage is now higher than in previous Dell products For this reason some previously approved methods of handling parts are no longer applicable Two recognized types of ESD damage are catastrophic and intermittent failur...

Page 7: ...kit assess the situation at the customer location For example deploying the kit for a server environment is different than for a desktop or portable environment Servers are typically installed in a rack within a data center desktops or portables are typically placed on office desks or cubicles Always look for a large open flat work area that is free of clutter and large enough to deploy the ESD ki...

Page 8: ...5 Turn on your computer 8 Working on your computer ...

Page 9: ...ximum bus power and increased device current draw to better accommodate power hungry devices New power management features Full duplex data transfers and support for new transfer types Backward USB 2 0 compatibility New connectors and cable The topics below cover some of the most commonly asked questions regarding USB 3 0 USB 3 1 Gen 1 Speed Currently there are 3 speed modes defined by the latest ...

Page 10: ...re than promising With its promised 4 8Gbps speed the standard will find its way into some products that previously weren t USB territory like external RAID storage systems Listed below are some of the available SuperSpeed USB 3 0 USB 3 1 Gen 1 products External Desktop USB 3 0 USB 3 1 Gen 1 Hard Drives Portable USB 3 0 USB 3 1 Gen 1 Hard Drives USB 3 0 USB 3 1 Gen 1 Drive Docks Adapters USB 3 0 U...

Page 11: ... the device and the cable have to support USB Power Delivery Just having a USB Type C connection doesn t necessarily mean they do USB Type C and USB 3 1 USB 3 1 is a new USB standard USB 3 s theoretical bandwidth is 5 Gbps while USB 3 1 s is 10 Gbps That s double the bandwidth as fast as a first generation Thunderbolt connector USB Type C isn t the same thing as USB 3 1 USB Type C is just a connec...

Page 12: ...lows an HDMI connected TV with a built in tuner to send audio data upstream to a surround audio system eliminating the need for a separate audio cable 3D Defines input output protocols for major 3D video formats paving the way for true 3D gaming and 3D home theater applications Content Type Real time signaling of content types between display and source devices enabling a TV to optimize picture se...

Page 13: ... HDMI supports communication between the video source such as a DVD player and the DTV enabling new functionality Technology and components 13 ...

Page 14: ...3 14 Major components of your system ...

Page 15: ...Major components of your system Major components of your system 15 ...

Page 16: ... Cable FFC bracket 12 M 2 Solid state drive 13 Hard drive assembly NOTE Dell provides a list of components and their part numbers for the original system configuration purchased These parts are available according to warranty coverages purchased by the customer Contact your Dell sales representative for purchase options 16 Major components of your system ...

Page 17: ... in before working inside your computer NOTE Ensure that you remove the security cable from the security cable slot if applicable About this task The following images indicate the location of the side cover and provide a visual representation of the removal procedure 4 Disassembly and reassembly 17 ...

Page 18: ... lift the cover Installing the side cover Prerequisites If you are replacing a component remove the existing component before performing the installation procedure About this task The following image indicates the location of the side cover and provides a visual representation of the installation procedure 18 Disassembly and reassembly ...

Page 19: ...Steps 1 Align the side cover with the grooves on the chassis Disassembly and reassembly 19 ...

Page 20: ... bezel Removing the front bezel Prerequisites 1 Follow the procedure in before working inside your computer 2 Remove the side cover About this task The following images indicate the location of the front bezel and provide a visual representation of the removal procedure Steps 1 Pry the retention tabs to release the front bezel from the system 2 Remove the front bezel from the system 20 Disassembly...

Page 21: ...ng image indicates the location of the front bezel and provides a visual representation of the installation procedure Steps 1 Position the bezel to align the tabs with the slots on the chassis 2 Press the bezel until the release tabs click into place Next steps 1 Install the side cover 2 Follow the procedure in after working inside your computer Disassembly and reassembly 21 ...

Page 22: ...bout this task The following images indicate the location of the hard drive assembly and provide a visual representation of the removal procedure Steps 1 Press the release tabs on the hard drive assembly and slide it towards the front of the system to disconnect it from the connector on the system board 2 Lift the hard drive assembly from the system 22 Disassembly and reassembly ...

Page 23: ...ut this task The following images indicate the location of the hard drive bracket and provide a visual representation of the removal procedure Steps 1 Pull one side of the hard drive bracket to disengage the pins on the bracket from the slots on the drive 2 Lift the hard drive out of the bracket Installing the hard drive bracket Prerequisites If you are replacing a component remove the existing co...

Page 24: ...an replace it correctly Next steps 1 Install the 2 5 in hard drive assembly 2 Install the front bezel 3 Install the side cover 4 Follow the procedure in after working inside your computer Installing the 2 5 in hard drive assembly Prerequisites If you are replacing a component remove the existing component before performing the installation procedure About this task The following image indicates th...

Page 25: ...abs clicks into place Next steps 1 Install the front bezel 2 Install the side cover 3 Follow the procedure in after working inside your computer Solid state drive Removing the M 2 2230 PCIe solid state drive Prerequisites 1 Follow the procedure in before working inside your computer 2 Remove the side cover 3 Remove the front bezel Disassembly and reassembly 25 ...

Page 26: ...te drive to the system board 2 Slide and lift the solid state drive off the system board Installing the M 2 2230 PCIe solid state drive Prerequisites If you are replacing a component remove the existing component before performing the installation procedure About this task The following image indicates the location of the solid state drive and provides a visual representation of the installation p...

Page 27: ...stall the hard drive assembly 2 Install the front bezel 3 Install the side cover 4 Follow the procedure in after working inside your computer Removing the M 2 2280 PCIe solid state drive Prerequisites 1 Follow the procedure in before working inside your computer 2 Remove the side cover 3 Remove the front bezel 4 Remove the hard drive assembly About this task The following images indicate the locat...

Page 28: ...Installing the M 2 2280 PCIe solid state drive Prerequisites If you are replacing a component remove the existing component before performing the installation procedure About this task The following image indicates the location of the solid state drive and provides a visual representation of the installation procedure 28 Disassembly and reassembly ...

Page 29: ...eps 1 Install the hard drive assembly 2 Install the front bezel 3 Install the side cover 4 Follow the procedure in after working inside your computer WLAN card Removing the WLAN card Prerequisites 1 Follow the procedure in before working inside your computer 2 Remove the side cover 3 Remove the front bezel 4 Remove the hard drive assembly About this task The following images indicate the location ...

Page 30: ...ard 4 Slide and remove the WLAN card from the connector on the system board Installing the WLAN card Prerequisites If you are replacing a component remove the existing component before performing the installation procedure About this task The following image indicates the location of the wireless card and provides a visual representation of the installation procedure 30 Disassembly and reassembly ...

Page 31: ...black triangle Black 2 Place the WLAN card bracket to secure the antenna cables 3 Align the notch on the WLAN card with the tab on the WLAN card slot Insert the WLAN card into the connector on the system board 4 Replace the M2x3 5 screw to secure the WLAN card bracket to the WLAN card Next steps 1 Install the hard drive assembly 2 Install the front bezel 3 Install the side cover 4 Follow the proce...

Page 32: ...procedure in before working inside your computer 2 Remove the side cover 3 Remove the front bezel About this task The following images indicate the location of the fan assembly and provide a visual representation of the removal procedure 32 Disassembly and reassembly ...

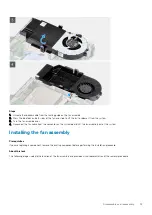
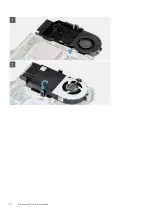
Page 33: ...nnect the fan cable from the connector on the system board Lift the fan assembly out of the system Installing the fan assembly Prerequisites If you are replacing a component remove the existing component before performing the installation procedure About this task The following images indicate the location of the fan assembly and provide a visual representation of the removal procedure Disassembly...

Page 34: ...34 Disassembly and reassembly ...

Page 35: ...tem until it clicks into place 4 Route the speaker cable through the routing guides on the fan assembly Next steps 1 Install the front bezel 2 Install the side cover 3 Follow the procedure in after working inside your computer Heat sink Removing the heat sink Prerequisites 1 Follow the procedure in before working inside your computer Disassembly and reassembly 35 ...

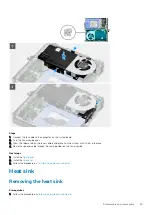
Page 36: ...emoval procedure Steps 1 Loosen the three captive screws that secure the heat sink to the system NOTE Loosen the screw in the sequential order 1 2 3 as printed on the heat sink 2 Lift the heat sink from the system board Installing the heat sink Prerequisites If you are replacing a component remove the existing component before performing the installation procedure 36 Disassembly and reassembly ...

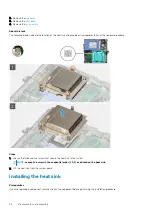
Page 37: ...ers on the system board and place the heat sink on the processor 2 Tighten the captive screws that secure the heat sink to the system board NOTE Tighten the screws in a sequential order 1 2 3 as printed on the heat sink Next steps 1 Install the fan assembly 2 Install the front bezel 3 Install the side cover 4 Follow the procedure in after working inside your computer Disassembly and reassembly 37 ...

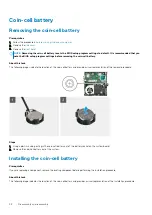
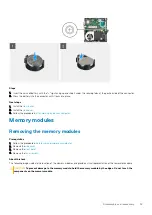
Page 38: ...ndicate the location of the coin cell battery and provide a visual representation of the removal procedure Steps 1 Using a plastic scribe gently pry the coin cell battery out of the battery socket on the system board 2 Remove the coin cell battery out of the system Installing the coin cell battery Prerequisites If you are replacing a component remove the existing component before performing the in...

Page 39: ...your computer Memory modules Removing the memory modules Prerequisites 1 Follow the procedure in before working inside your computer 2 Remove the side cover 3 Remove the front bezel 4 Remove the fan assembly About this task The following images indicate the location of the memory modules and provide a visual representation of the removal procedure CAUTION To prevent damage to the memory module hol...

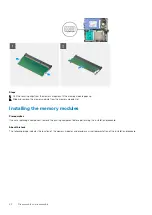
Page 40: ...module slot Installing the memory modules Prerequisites If you are replacing a component remove the existing component before performing the installation procedure About this task The following image indicates the location of the memory modules and provides a visual representation of the installation procedure 40 Disassembly and reassembly ...

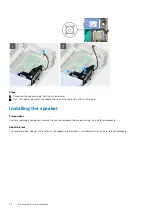
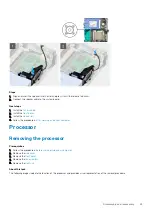
Page 41: ...eps 1 Install the fan assembly 2 Install the front bezel 3 Install the side cover 4 Follow the procedure in after working inside your computer Speaker Removing the speaker Prerequisites 1 Follow the procedure in before working inside your computer 2 Remove the side cover 3 Remove the front bezel 4 Remove the fan assembly About this task The following images indicate the location of the speaker and...

Page 42: ...the system board Installing the speaker Prerequisites If you are replacing a component remove the existing component before performing the installation procedure About this task The following image indicates the location of the speaker and provides a visual representation of the installation procedure 42 Disassembly and reassembly ...

Page 43: ... Follow the procedure in after working inside your computer Processor Removing the processor Prerequisites 1 Follow the procedure in before working inside your computer 2 Remove the side cover 3 Remove the front bezel 4 Remove the fan assembly 5 Remove the heat sink About this task The following images indicate the location of the processor and provide a visual representation of the removal proced...

Page 44: ...socket or allow any objects to fall on the pins in the socket 3 Gently lift the processor from the processor socket Installing the processor Prerequisites If you are replacing a component remove the existing component before performing the installation procedure About this task The following image indicates the location of the processor and provides a visual representation of the installation proc...

Page 45: ...ted all four corners are aligned at the same height If one or more corners of the processor are higher than the others the processor is not seated properly 2 When the processor is fully seated in the socket close the processor cover 3 Press down and push the release lever under the securing tab to lock it Next steps 1 Install the heat sink 2 Install the fan assembly 3 Install the front bezel 4 Ins...

Page 46: ...e the hard drive assembly 5 Remove the solid state drive 6 Remove the WLAN card 7 Remove the fan assembly 8 Remove the heat sink 9 Remove the memory modules 10 Remove the speaker 11 Remove the processor About this task The following images indicate the location of the system board and provide a visual representation of the removal procedure 46 Disassembly and reassembly ...

Page 47: ...Disassembly and reassembly 47 ...

Page 48: ...t secure the system board to the chassis 4 Lift the system board away from the chassis Installing the system board Prerequisites If you are replacing a component remove the existing component before performing the installation procedure About this task The following image indicates the location of the system board and provides a visual representation of the installation procedure 48 Disassembly an...

Page 49: ...Disassembly and reassembly 49 ...

Page 50: ...ard drive caddy support with system board and place the hard drive caddy on the system board 4 Replace the screw 6 32 to secure the hard drive caddy support to the system board Next steps 1 Install the processor 2 Install the speaker 3 Install the memory modules 4 Install the heat sink 5 Install the fan assembly 6 Install the WLAN card 7 Install the solid state drive 8 Install the hard drive assem...

Page 51: ...require user interaction Always ensure that you are present at the computer terminal when the diagnostic tests are performed For more information see https www dell com support article sln115162 Running the SupportAssist Pre Boot System Performance Check Steps 1 Turn on your computer 2 As the computer boots press the F12 key as the Dell logo appears 3 On the boot menu screen select the Diagnostics...

Page 52: ...or Clock failure Gate A20 failure Super I O failure Keyboard controller failure Flash latest BIOS version If problem persists replace the system board 3 1 CMOS battery failure Reset the CMOS battery connection If problem persists replace the RTS battery 3 2 PCI or Video card chip failure Replace the system board 3 3 BIOS Recovery image not found Flash latest BIOS version If problem persists replac...

Page 53: ...ADING PCMCIA CARD The computer cannot identify the ExpressCard Reinsert the card or try another card EXTENDED MEMORY SIZE HAS CHANGED The amount of memory recorded in non volatile memory NVRAM does not match the memory module installed in the computer Restart the computer If the error appears again Contact Dell THE FILE BEING COPIED IS TOO LARGE FOR THE DESTINATION DRIVE The file that you are tryi...

Page 54: ... external keyboards check the cable connection Restart the computer and avoid touching the keyboard or the mouse during the boot routine Run the Keyboard Controller test in Dell Diagnostics KEYBOARD DATA LINE FAILURE For external keyboards check the cable connection Run the Keyboard Controller test in Dell Diagnostics KEYBOARD STUCK KEY FAILURE For external keyboards or keypads check the cable con...

Page 55: ...tem board may be malfunctioning Run the System Set tests in Dell Diagnostics If the message reappears Contact Dell TIME OF DAY CLOCK LOST POWER System configuration settings are corrupted Connect your computer to an electrical outlet to charge the battery If the problem persists try to restore the data by entering the System Setup program then immediately exit the program If the message reappears ...

Page 56: ...stem setup and ensure that the boot sequence information is correct No timer tick interrupt A chip on the system board might be malfunctioning or motherboard failure NOTICE Hard Drive SELF MONITORING SYSTEM has reported that a parameter has exceeded its normal operating range Dell recommends that you back up your data regularly A parameter out of range may or may not indicate a potential hard driv...

Page 57: ... and telephone based support and service options Availability varies by country and product and some services may not be available in your area To contact Dell for sales technical support or customer service issues Steps 1 Go to Dell com support 2 Select your support category 3 Verify your country or region in the Choose a Country Region drop down list at the bottom of the page 4 Select the approp...

Reviews: