6
Dell OptiPlex FX160 Re-Imaging Guide
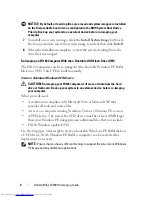
NOTE:
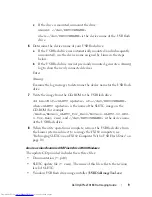
Image preparation, performed in the next step, is not required for the Dell
Image Deployment tool. Skipping this step allows future updates to be added to
your image by simply remounting
boot.wim
and copying the update files to the
correct directories.
6
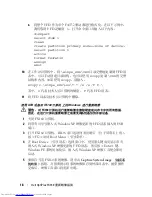
Prepare the image with the
peimg /prep
command. This command
removes non-installed packages from the image to reduce the size of the
final image:
peimg /prep c:\winpe_x86\mount\Windows
7
Commit the changes to the original image file (
Winpe.wim
) using the
ImageX /unmount
option with the
/commit
option:
imagex /unmount c:\winpe_x86\mount /commit
8
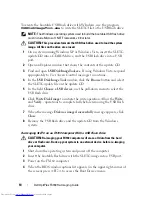
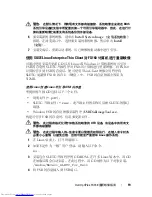
Replace the default
Boot.wim
in the
\winpe_x86\ISO
directory
with your new customized image. The image must be called
Boot.wim
.
CAUTION:
When a UFD device is formatted, all files on the device are erased.
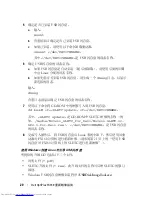
9
Prepare the UFD device. Use Diskpart to format the UFD with a Windows
Vista or Windows PE environment.
a
Within a Windows Vista operating system or Windows PE session,
insert your UFD device.
b
Format the entire UFD as a single FAT32 drive. The following
example assumes the UFD is
disk 1
. Open a command window and
enter the following:
diskpart
select disk 1
clean
create partition primary size=<size of device>
select partition 1
active
format fs=fat32
assign
exit
Summary of Contents for OptiPlex FX160
Page 12: ...12 Dell OptiPlex FX160 Re Imaging Guide ...
Page 13: ...w w w d e l l c o m s u p p o r t d e l l c o m Dell OptiPlex FX160 重新映像指南 型号 DC01T ...
Page 23: ...w w w d e l l c o m s u p p o r t d e l l c o m 年 Dell OptiPlex FX160 影像重新處理指南 型號 DC01T ...
Page 58: ...58 Guide de remplacement d une image système Dell OptiPlex FX160 ...
Page 72: ...72 Dell OptiPlex FX160 Handbuch zur Image Wiederherstellung ...
Page 97: ...w w w d e l l c o m s u p p o r t d e l l c o m Dell OptiPlex FX160 이미지 재설치 가이드 모델 DC01T ...

