background image

8

Dell OptiPlex G1 Managed PC Systems Documentation Update

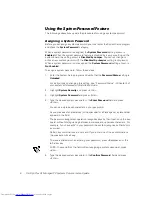
4. Type the desired setup password in the 

Enter Password

 field and press <Enter>.

If a character is illegal for password use, the system emits a beep.

5. Type the desired setup password in the 

Confirm Password

 field and press 

<Enter>.

The setup password is now assigned. The 

Setup Password

 setting changes 

from 

Not Enabled

 to 

Enabled

.  

NOTE: The setup password can be the same as the system password. If the two 

passwords are different, the setup password can be used as an alternate system 

password. However, the system password cannot be used in place of the setup 

password.

After you verify the password, the 

Setup Password

 setting changes to 

Enabled

. The 

next time you enter the System Setup program, the system prompts you for the 

setup password.

A change to the 

Setup Password

 setting becomes effective immediately (rebooting 

the system is not required).

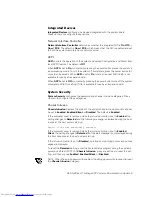
2SHUDWLQJZLWKD6HWXS3DVVZRUG(QDEOHG

If 

Setup Password

 is set to 

Enabled

, you must enter the correct setup password 

before you can modify the majority of the System Setup categories. 

When you start the System Setup program, the 

System Setup

 screen appears with 

Setup Password

 highlighted, prompting you to type the password.

If you do not enter the correct password in three tries, the system lets you view, but 

not modify, the System Setup screen, with one exception: If 

Password Status

 is set 

to 

Unlocked

, you may modify the system password.

'HOHWLQJRU&KDQJLQJDQ([LVWLQJ6HWXS3DVVZRUG

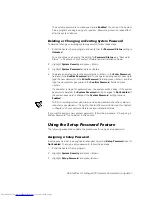
To delete or change an existing setup password, follow these steps: 

1.

Enter the System Setup program.

2. Highlight 

System Security

 and press <Enter>.

3. Highlight 

Setup Password

 and press <Enter>.

4. To delete an existing setup password, press <Enter> in the 

Enter Password

 field 

and the 

Confirm Password

 field. To change an existing setup password, type the 

new password in the 

Enter Password

 field and press <Enter>, and then type the 

new setup password in the 

Confirm Password

 field and press <Enter>.  

If a character is illegal for password use, the system emits a beep. If the setup 

password is deleted, the 

Setup Password

 setting changes to 

Not Enabled

. If 

the setup password is changed, the 

Setup Password

 setting remains 

Enabled

5. If you want to assign a new setup password, follow the procedure in “Assigning a 

Setup Password” found earlier in this section.

Summary of Contents for OptiPlex G1

Page 1: ...ZZZ GHOO FRP HOO 2SWL3OH 0DQDJHG 3 6 VWHPV 2 80 17 7 21 83 7 ...

Page 2: ..._______________ Information in this document is subject to change without notice 1999 Dell Computer Corporation All rights reserved Reproduction in any manner whatsoever without the written permission of Dell Computer Corporation is strictly forbidden Trademarks used in this text Dell OptiPlex and the DELL logo are trademarks of Dell Computer Corporation Microsoft Windows and Windows NT are regist...

Page 3: ...tem Security 5 Chassis Intrusion 5 Using the System Password Feature 6 Assigning a System Password 6 Deleting or Changing an Existing System Password 7 Using the Setup Password Feature 7 Assigning a Setup Password 7 Operating with a Setup Password Enabled 8 Deleting or Changing an Existing Setup Password 8 Disabling a Forgotten Password 9 Expansion Slots Midsize Systems Only 10 Microsoft Updated A...

Page 4: ...herDisk XL Version 3 01 Diskettes 14 System Board and Connectors 15 LJXUHV Figure 1 System Setup Screen 3 Figure 2 Passive Riser Board With Three PCI Slots 11 Figure 3 Active Riser Board With Five PCI Slots 11 Figure 4 System Board Features 15 7DEOHV Table 1 System Setup Navigation Keys 2 ...

Page 5: ...ting system Reinstallation of DirectX and video drivers Configuration of network drivers for the 3Com Peripheral Component Intercon nect PCI 3C905b Ethernet network interface controller NIC System board layout for new OptiPlex systems FFHVVLQJ 2QOLQH RFXPHQWDWLRQ In addition to the online System User s Guide your system also includes online versions of the Reference and Installation Guide and the ...

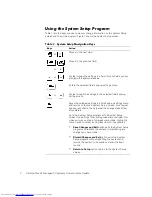
Page 6: ...aves the selected settings in a field s pop up settings menu and returns to the main System Setup screen For a few cat egories as noted in the help area the changes take effect immediately Exits the System Setup program at the System Setup screen if no settings for any categories were changed Pro vides exit menu options if changes were made Highlight a menu option to select it and press Enter to a...

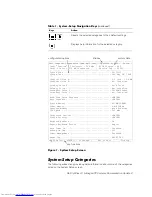
Page 7: ...QFK 0 LVNHWWH ULYH 1RW QVWDOOHG 3ULPDU ULYH DUG ULYH 3ULPDU ULYH 1RW QVWDOOHG 6HFRQGDU ULYH 520 5HDGHU 6HFRQGDU ULYH 1RW QVWDOOHG DUG LVN ULYH 6HTXHQFH 17 5 RRW 6HTXHQFH 17 5 6 VWHP 0HPRU 0 6 5 0 9LGHR 0HPRU 0 6 5 0 5HVHUYHG 0HPRU 1RQH 5HVHUYHG 38 6SHHG 0 QWHJUDWHG HYLFHV 17 5 6 VWHP 6HFXULW 17 5 H ERDUG 1XP RFN 2Q 5HSRUW H ERDUG UURUV 5HSRUW XWR 3RZHU 2Q LVDEOHG DNHXS 2Q 1 2II 3RZHU 0DQDJHPHQW LV...

Page 8: ...evices LVNHWWH ULYH Selecting Diskette Drive A as the first device causes the system to try booting from drive A first If the system finds a diskette that is not bootable in the drive or finds a problem with the drive itself it displays an error message If it does not find a diskette in the drive the system tries to boot from the next device in the boot sequence list DUG LVN ULYH Selecting Hard Di...

Page 9: ... card 6 VWHP 6HFXULW System Security configures the password and chassis intrusion categories Press Enter to configure these categories KDVVLV QWUXVLRQ Chassis Intrusion displays the status of the system chassis intrusion monitor and can be set to Enabled Enabled Silent or Disabled The default is Enabled If the computer cover is removed while the intrusion monitor is set toEnabled the setting chan...

Page 10: ...ked For instructions on changing this setting see Password Status in Chapter 2 of your system s Reference and Installation Guide 2 Highlight System Security and press Enter 3 Highlight System Password and press Enter 4 Type the desired system password in the Enter Password field and press Enter You can use up to seven characters in your password As you press each character key or the spacebar for ...

Page 11: ...d field and press Enter and then type the new system password in the Confirm Password field and press Enter If a character is illegal for password use the system emits a beep If the system password is deleted the System Password setting changes to Not Enabled If the system password is changed the System Password setting remains Enabled NOTE An existing system password can also be disabled when the...

Page 12: ...e System Setup categories When you start the System Setup program the System Setup screen appears with Setup Password highlighted prompting you to type the password If you do not enter the correct password in three tries the system lets you view but not modify the System Setup screen with one exception If Password Status is set to Unlocked you may modify the system password HOHWLQJ RU KDQJLQJ DQ L...

Page 13: ...ed System Board Jumpers in your Reference and Installation Guide for jumper information and for the location of the password jumper labeled PSWD on the system board 3 Replace the computer cover 4 Reconnect your computer and peripherals to their electrical outlets and then turn them on Booting your system with the PSWD jumper plug removed erases the existing password s NOTE After you remove and rep...

Page 14: ...57 RYHU ZDV SUHYLRXVO UHPRYHG 10 To reset the chassis intrusion detector enter the System Setup program and reset Chassis Intrusion See Chassis Intrusion in Chapter 2 of your Reference and Installation Guide for instructions NOTE If a setup password has been assigned by someone else contact your network administrator for information on resetting the chassis intrusion detector 11 Assign a new syste...

Page 15: ...or configuration is needed NOTE If Windows NT 4 0 is reinstalled the Microsoft updated ATAPI driver must also be reinstalled The driver for Windows NT 4 0 has also been copied to your hard disk drive in diskette image form If you need to reinstall this driver you can do so as described in the following subsection ISA3 ISA1 shared with PCI3 HDLED connector PCI3 shared with ISA1 PCI2 ISA2 PCI1 LED P...

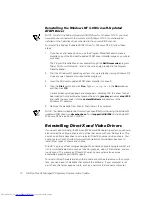
Page 16: ... automatically saves the existingatapi sys driver as atapi 000 and loads the new driver into the system32 drivers subdirectory in the Windows NT directory 5 Remove the diskette from drive A Then restart the computer NOTE To enable or disable direct memory access DMA while using the Microsoft updated ATAPI driver run dmacheck exe from support utils i386 on the Microsoft Windows NT Service Pack 3 CD...

Page 17: ...rogram diskette set of drivers as described in the introduction to this procedure Or if you received the Network Administrator s Kit locate the diskettes containing drivers and utilities 2 If you reinstalled Windows 95 make sure Universal Serial Bus USB support was reinstalled along with the operating system USB support is enabled when Windows 95 is installed by Dell However if you need to reinsta...

Page 18: ...ck the Network Neighborhood icon on the Windows desktop and then select Properties from the pop up menu 2 Under the Configuration tab in the Network window click IPX SPX compatible Protocol if it is not already highlighted 3 Click Properties to open the IPX SPX compatible Protocol Properties window 4 Click the Advanced tab and then click Frame Type in the Property list 5 Select the appropriate fra...

Page 19: ...L1 mouse keyboard connectors stacked MOUSE KYBD video memory upgrade socket VIDEO_UPGRADE control panel connector PANEL battery socket BATTERY optional integrated NIC connector ENET riser board connector RISER system board jumpers primary EIDE interface connector IDE1 pin 1 corner secondary EIDE interface connector IDE2 pin 1 corner front of computer diskette tape drive interface connector DSKT pi...

Page 20: ...16 Dell OptiPlex G1 Managed PC Systems Documentation Update ...

Page 21: ......

Page 22: ... ZZZ GHOO FRP 3ULQWHG LQ WKH 8 6 3 1 5HY ...

Reviews: