


Removing and Replacing Parts on the Low-Profile Chassis
4-13
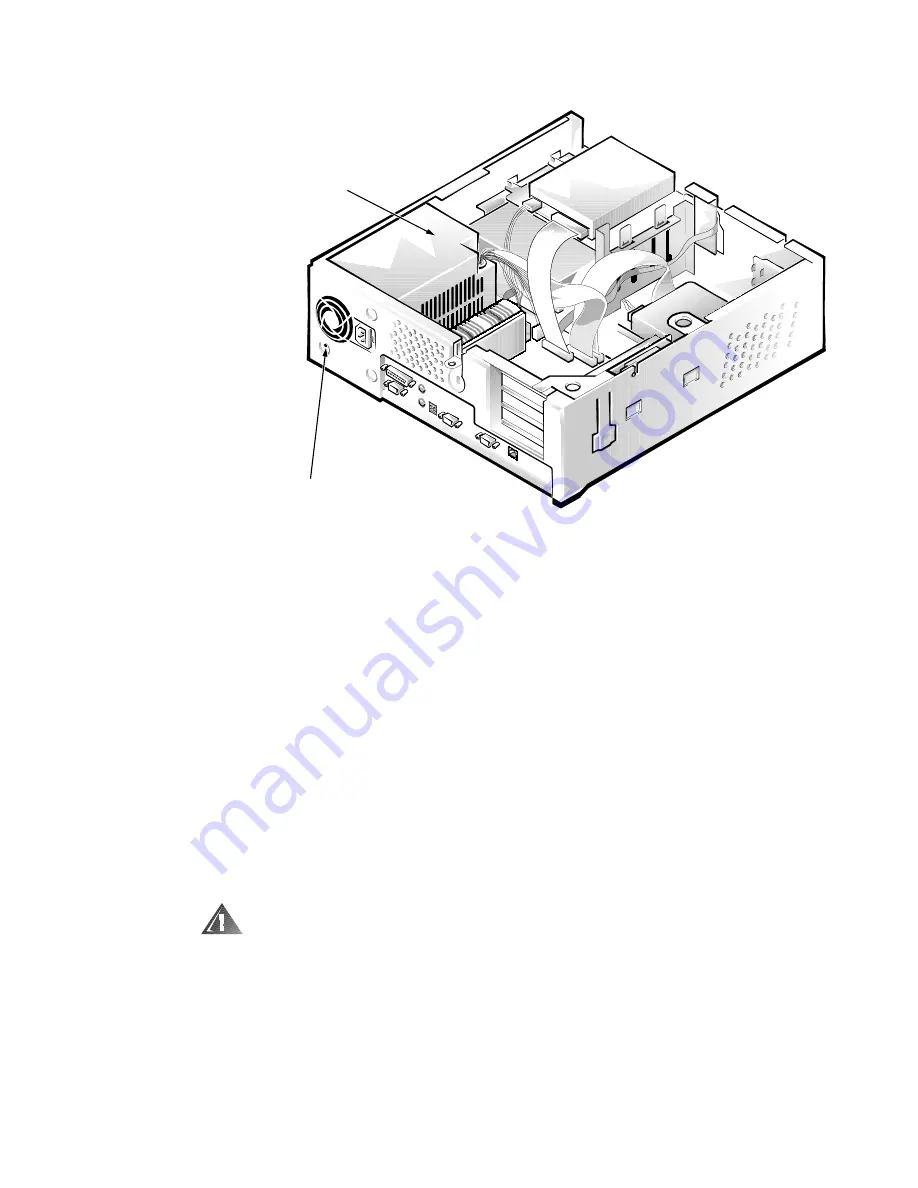
6\VWHP3RZHU6XSSO\
)LJXUH6\VWHP3RZHU6XSSO\5HPRYDO
To remove the system power supply, follow these steps:
'LVFRQQHFWWKH$&SRZHUFDEOHIURPWKHEDFNRIWKHSRZHUVXSSO\
'LVFRQQHFWWKH'&SRZHUFDEOHVIURPWKHV\VWHPERDUGDQGWKH
GULYHV
5HPRYHWKHSRZHUVXSSO\PRXQWLQJVFUHZDWWKHEDFNRIWKH
FKDVVLV
6OLGHWKHV\VWHPSRZHUVXSSO\IRUZDUGXQWLOLWVWRSVWKHQOLIWLW
IURPWKHFKDVVLV
When you replace the system power supply, place it down inside the chassis
and against the right side of the chassis. Then slide the system power supply
toward the back of the chassis, and hook the tabs into the right side of the
power supply.
:$51,1*7KHYROWDJHVHOHFWLRQVZLWFKORFDWHGRQWKHEDFNRIWKH
SRZHUVXSSO\DVVHPEO\PXVWEHVHWWRWKHFRUUHFWRSHUDWLQJYROWDJH
RU9EHIRUHWKHSRZHUFDEOHLVSOXJJHGLQWRDQ$&RXWOHW
power supply
power-supply
mounting screw
Summary of Contents for OptiPlex G1
Page 1: ...ZZZ GHOO FRP HOO 2SWL3OH 0DQDJHG 3 6 VWHPV 6 59 0 18 ...
Page 44: ...1 34 Dell OptiPlex G1 Managed PC Systems Service Manual ...
Page 58: ...3 8 Dell OptiPlex G1 Managed PC Systems Service Manual ...
Page 82: ...4 24 Dell OptiPlex G1 Managed PC Systems Service Manual ...
Page 132: ...6 26 Dell OptiPlex G1 Managed PC Systems Service Manual ...
Page 143: ......


