


Removing and Replacing Parts on the Midsize Chassis
5-11
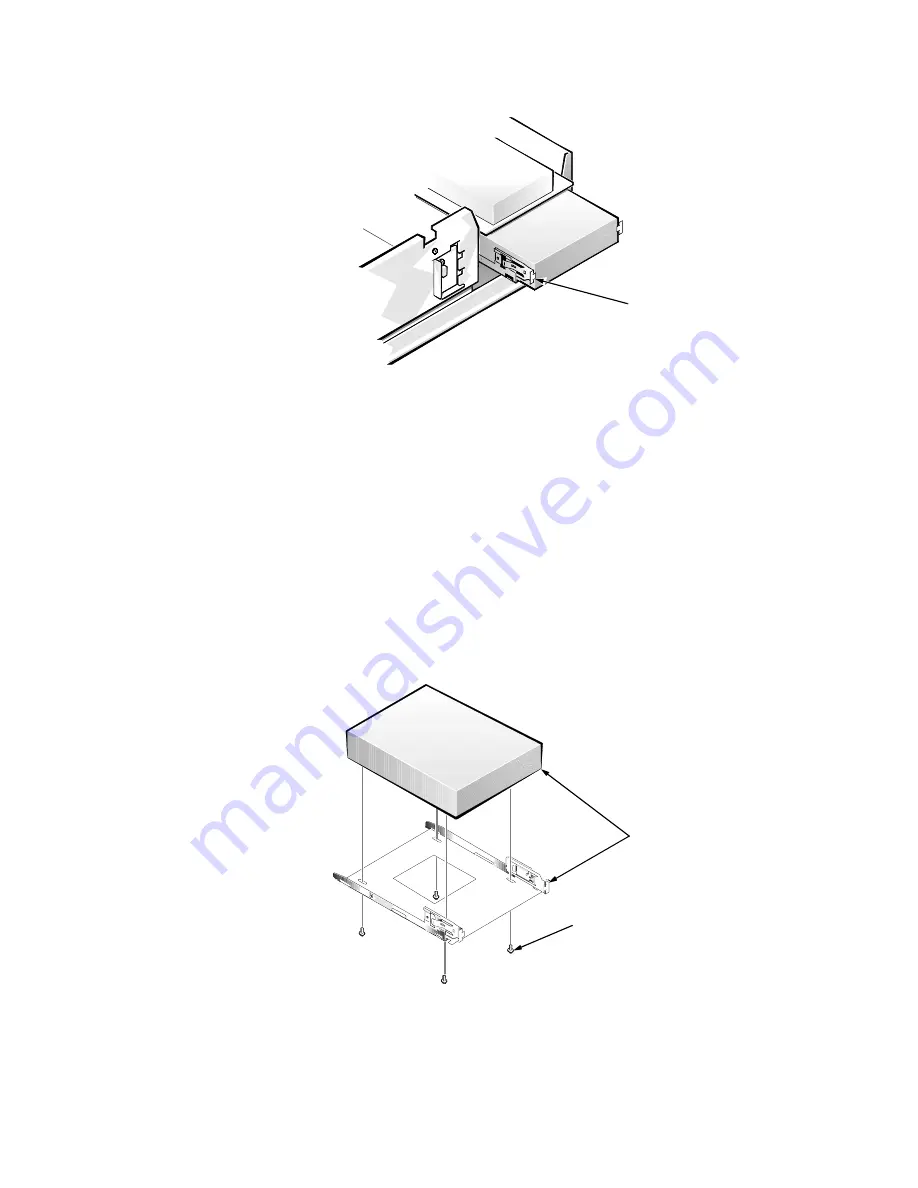
,QFK'ULYH$VVHPEO\
)LJXUH,QFK'ULYH$VVHPEO\5HPRYDO
To remove a 5.25-inch drive assembly from the middle or lower drive bay, fol-
low these steps:
'LVFRQQHFWWKH'&SRZHUFDEOHDQGWKHLQWHUIDFHFDEOHIURPWKH
EDFNRIWKHGULYH
3UHVVLQRQWKHWZRUHWDLQLQJWDEVRQHRQHDFKVLGHRIWKHGULYH
DQGVOLGHWKHGULYHDVVHPEO\IRUZDUGWRUHPRYHLW
5HPRYHWKHIRXUVFUHZVDWWDFKLQJWKHLQFKGULYHWRWKH
PRXQWLQJSODWHDQGOLIWWKHGULYHRXWRIWKHPRXQWLQJSODWHVHH
)LJXUH
)LJXUH,QFK'ULYH5HPRYDO
retaining tabs (2)
Align the front of the drive
flush with the tab at the
front of the 5.25-inch
drive-mounting plate.
drive-mounting screws (4)
Summary of Contents for OptiPlex G1
Page 1: ...ZZZ GHOO FRP HOO 2SWL3OH 0DQDJHG 3 6 VWHPV 6 59 0 18 ...
Page 44: ...1 34 Dell OptiPlex G1 Managed PC Systems Service Manual ...
Page 58: ...3 8 Dell OptiPlex G1 Managed PC Systems Service Manual ...
Page 82: ...4 24 Dell OptiPlex G1 Managed PC Systems Service Manual ...
Page 132: ...6 26 Dell OptiPlex G1 Managed PC Systems Service Manual ...
Page 143: ......


