


118
Installing Upgrades
w
w
w
.d
e
ll
.co
m
|
s
u
p
p
o
rt
.d
e
ll.c
o
m
9
Verify that your computer works correctly by running the
Dell
Diagnostics
.
Small Desktop and Small Mini-Tower Computers
1
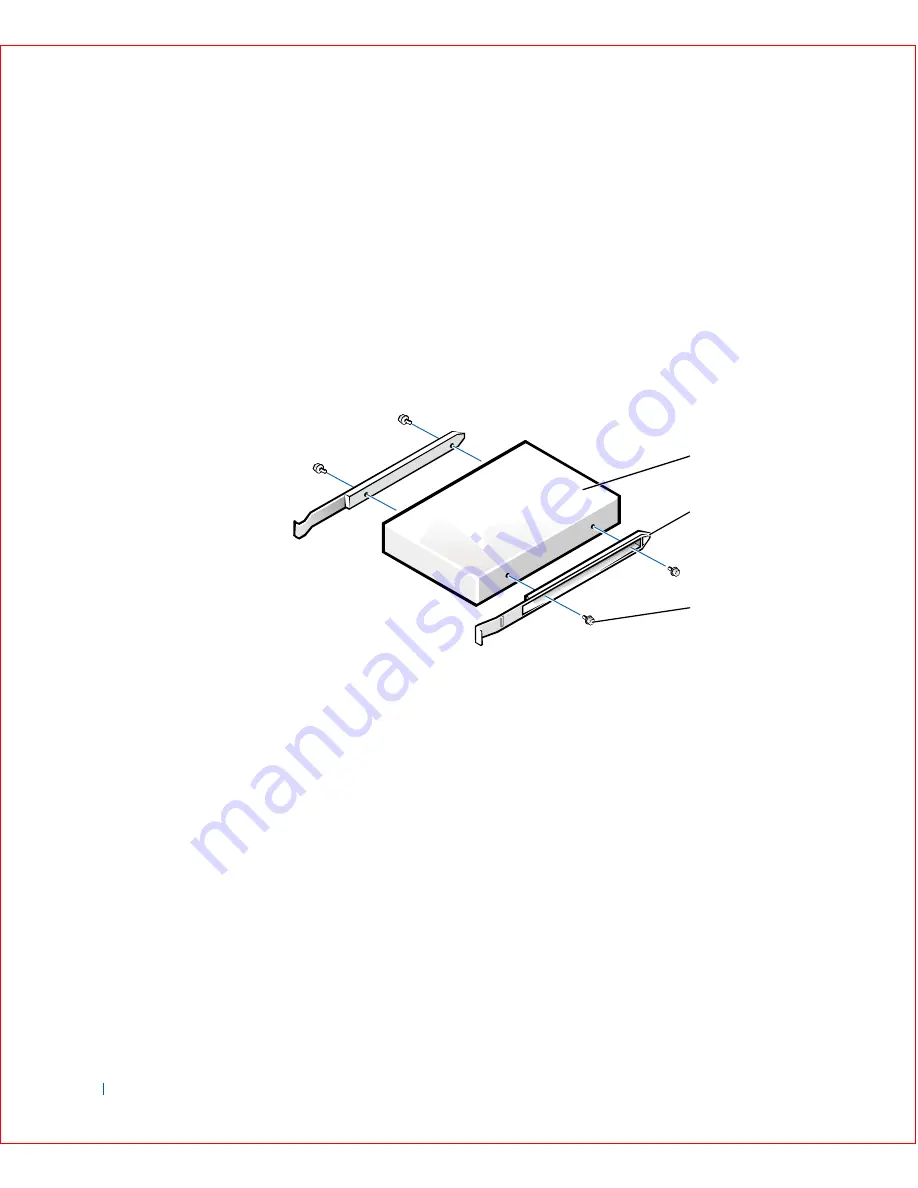
If the replacement drive does not have the bracket rails attached,
remove the rails from the old drive by removing the two screws that
secure each rail to the drive. Attach the bracket to the new drive by
aligning the screw holes on the drive with the screw holes on the
bracket rails and tightening all four screws (two screws on each rail).
F l o p p y D r i v e B r a c k e t Ra i l s
2
Gently slide the drive into place until the tabs securely click into
position.
3
Attach the power and data cables to the floppy drive, and connect the
other end of the data cable to the connector labeled “DSKT” on the
system board
.
1
Drive
2
Bracket rails (2)
3
Screws (4)
1
3
2
Summary of Contents for OptiPlex GX50
Page 1: ...w w w d e l l c o m s u p p o r t d e l l c o m Dell OptiPlex GX50 Systems User s Guide ...
Page 10: ...x Contents ...
Page 40: ...38 Abo u t You r C o mp u t er w w w d e l l c o m s u p p o r t d e l l c o m ...
Page 113: ...Installing Upgrades 111 1 Floppy drive cable 2 Lever 1 2 ...
Page 117: ...Installing Upgrades 115 S ma l l D es k t op C om p u te r Small Mini Tow er Comput er ...
Page 136: ...134 Ins ta l l i n g Up g r a d es w w w d e l l c o m s u p p o r t d e l l c o m ...
Page 154: ...152 Microsoft Windows XP Features w w w d e l l c o m s u p p o r t d e l l c o m ...
Page 162: ...160 Te c h n ic a l Sp e c if ic a tio n s w w w d e l l c o m s u p p o r t d e l l c o m ...
Page 210: ...208 So lv ing Pr o ble m s w w w d e l l c o m s u p p o r t d e l l c o m ...
Page 232: ...230 Ge tt ing Help w w w d e l l c o m s u p p o r t d e l l c o m ...


