background image

Printing Photos From a PictBridge-Enabled Camera

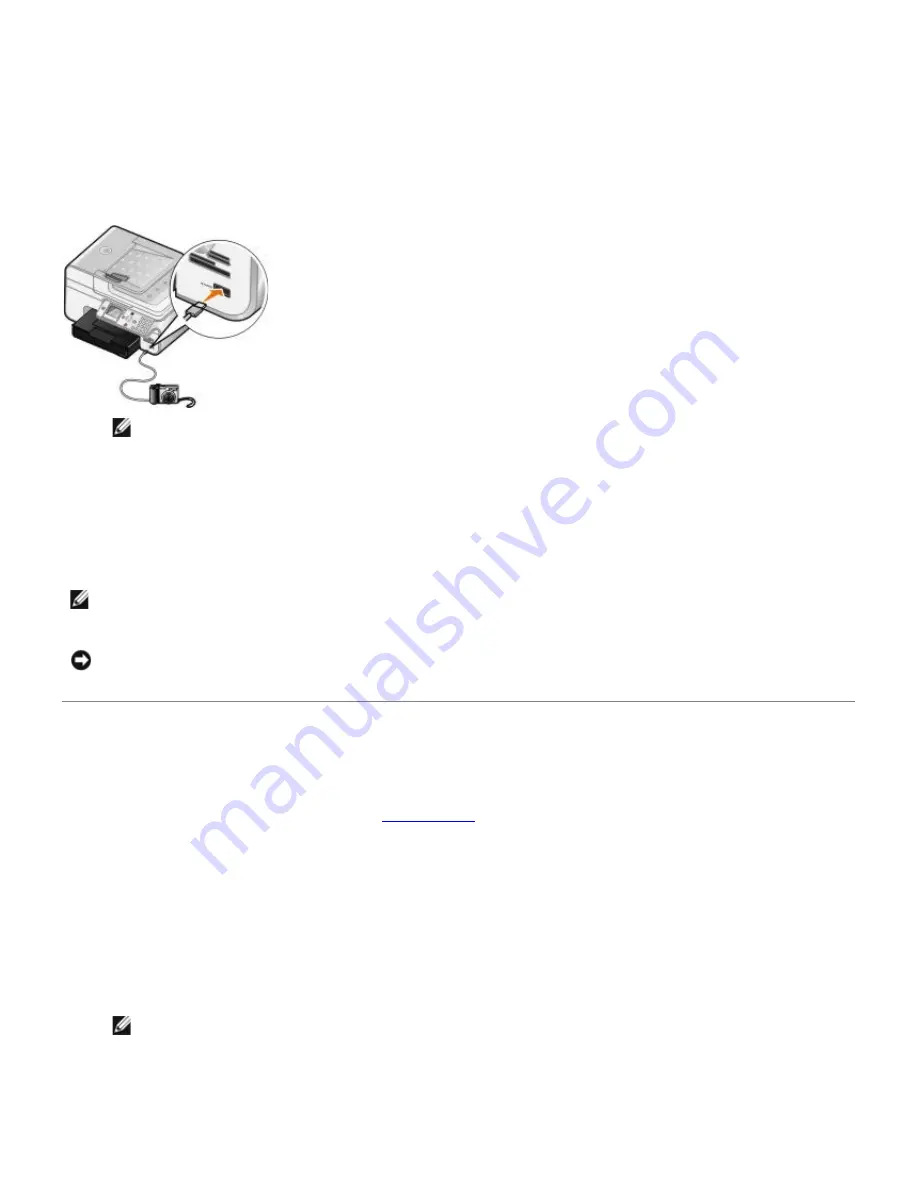
Your printer supports PictBridge-enabled cameras.

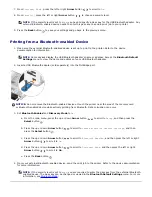
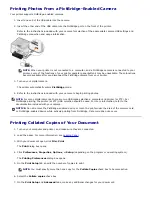
1.  Insert one end of the USB cable into the camera.

2.  Insert the other end of the USB cable into the PictBridge port on the front of the printer.

Refer to the instructions included with your camera for selection of the appropriate camera USB settings and

PictBridge connection and usage information.

NOTE: 

When your printer is not connected to a computer, and a PictBridge camera is connected to your

printer, some of the functions of your printer operator panel buttons may be unavailable. These functions

become available after you disconnect the PictBridge camera from your printer.

3.  Turn on your digital camera.

The printer automatically enters 

PictBridge

 mode.

4.  Refer to the instructions included with your camera to begin printing photos.

Printing Collated Copies of Your Document

1.  Turn on your computer and printer, and make sure they are connected.

2.  Load the paper. For more information, see 

Loading Paper

.

3.  With your document open, click 

File

®

 Print

.

The 

Print

 dialog box opens.

4.  Click 

Preferences

Properties

Options

, or 

Setup

 (depending on the program or operating system).

The 

Printing Preferences

 dialog box opens.

5.  On the 

Print Setup

 tab, specify the number of copies to print.

NOTE: 

You must specify more than one copy for the 

Collate Copies

 check box to become active.

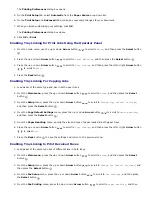
6.  Select the 

Collate copies

 check box.

7.  On the 

Print Setup

 and 

Advanced

 tabs, make any additional changes for your document.

NOTE: 

For many digital cameras, there are two USB mode selections: computer and printer (or PTP). For

PictBridge printing, the printer (or PTP) USB selection should be used. For more information, refer to the

documentation included with your camera.

NOTICE: 

Do not remove the PictBridge-enabled device or touch the printer near the area of the memory card

or PictBridge-enabled device while actively printing from PictBridge. Data corruption can occur.

Summary of Contents for Photo All-in-One 966

Page 1: ...ies Windows Server and Windows NT are registered trademarks of Microsoft Corporation Windows Vista is either a trademark or a registered trademark of Microsoft Corporation in the United States and or other countries Bluetooth is a registered trademark owned by Bluetooth SIG Inc and is used by Dell Inc under license EMC is a registered trademark of EMC Corporation Other trademarks and trade names m...

Page 2: ...July 2007 SRV FT715 Rev A01 ...

Page 3: ...all drivers or access your documentation Readme files may be included on your CD to provide last minute updates about technical changes to your printer or advanced technical reference material for experienced users or technicians How to set up my printer Setting Up Your Printer poster Safety information How to set up and use my printer Warranty information Owner s Manual Express Service Code and S...

Page 4: ...rs Reference Printer documentation and product specifications How to use Windows XP Documentation for my printer Windows XP Help and Support Center 1 Click Start Help and Support 2 Type a word or phrase that best describes your problem and then click the arrow icon 3 Click the topic that describes your problem 4 Follow the instructions shown on the screen How to use Windows Vista Documentation for...

Page 5: ...this section printer phone cord provided Make copies and send and receive faxes without the use of a computer Connecting Directly to a Telephone Wall Jack printer telephone sold separately two phone cords one provided Use the fax line as a normal telephone line Set up your printer wherever your telephone is Make copies and send and receive faxes without the use of a computer Connecting to a Teleph...

Page 6: ...ch as Germany Sweden Denmark Austria Belgium Italy France and Switzerland remove the blue plug from the PHONE jack connector bottom connector and insert the supplied yellow terminator for your fax to work correctly You will not be able to use this port for additional devices in these countries What if I have a Digital Subscriber Line DSL DSL delivers digital data to a computer through a telephone ...

Page 7: ...ector 3 Connect a phone cord from the answering machine to a telephone 4 Connect a phone cord from the answering machine to the PHONE jack connector bottom connector NOTE If phone communication is serial in your country such as Germany Sweden Denmark Austria Belgium Italy France and Switzerland you must remove the blue plug from the PHONE jack connector bottom connector and insert the supplied yel...

Page 8: ...to scroll to Phone Book and then press the Select button c Press the up or down Arrow button to scroll to Name Search Phone Number Search or Group Search and then press the Select button d Press the up or down Arrow button to scroll to the name or number you want to send the fax to Sending a fax to an extension number Press the asterisk and pound signs and then use the keypad to enter the extensio...

Page 9: ... Start button Sending a Fax Using the Dell All In One Center 1 Turn on your printer and computer and make sure they are connected Make sure your computer modem is connected to an active analog telephone line If you have DSL broadband service on the same phone line that you are using to fax you must also have a DSL filter installed Contact your Internet Service Provider for information 2 Load your ...

Page 10: ...Fax 3 Click OK and then follow the instructions on the screen Sending a Broadcast Fax A broadcast fax allows you to send the same fax to multiple recipients at once You can enter up to 30 different numbers 1 Make sure your printer is on and connected to an active telephone line 2 Load your original document 3 From the main menu press the up or down Arrow button to scroll to Fax and then press the ...

Page 11: ...istening to a Telephone Line On Hook Dial 1 Make sure your printer is on and connected to an active telephone line 2 Load an original document 3 From the main menu press the up or down Arrow button to scroll to Fax and then press the Select button 4 Press the up or down Arrow button to scroll to On Hook Dial 5 Press the Select button to make the printer go off hook 6 Enter the number to which you ...

Page 12: ...and then press the Select button 2 Press the up or down Arrow button to scroll to Edit Fax Settings and then press the Select button 3 From the Cover Page menu item press the left or right Arrow button to scroll to Yes and then press the Menu button 4 Use the keypad to enter or change information on the Cover Page screen Using the Computer 1 With the Dell Fax Solutions open select Select Settings ...

Page 13: ...button to scroll to Color 8 Press the Back button twice to go back to the main menu 9 Use the keypad to enter a fax number For more information see Entering a Fax Number 10 Press the Start button Using Auto Fax Convert If you are faxing a high resolution document to a fax machine that prints at a lower resolution the printer can automatically adjust the fax you send Auto Fax Convert is on by defau...

Page 14: ...e you want Auto Answer to be turned on and turned off e Press the Back button 3 Set the number of rings the printer should allow before answering the incoming fax a From the main menu press the up or down Arrow button to scroll to Fax and then press the Select button b Press the up or down Arrow button to scroll to Fax Setup and then press the Select button c Press the up or down Arrow button to s...

Page 15: ... Select button 4 Press the up or down Arrow button to scroll to Manual Pickup Keycode and then press the Select button 5 Use the keypad to specify a new one to seven digit keycode NOTE Valid characters for the pickup code are 0 9 pound and star Any other characters entered are ignored 6 Press the Select button Receiving a Fax Using Dell Fax Solutions 1 Click Start Programs or All Programs Dell PC ...

Page 16: ...ton 2 Press the up or down Arrow button to scroll to Fax Setup and then press the Select button 3 Press the up or down Arrow button to scroll to Fax Printing and then press the Select button 4 From the 2 Sided Print menu item press the right or left Arrow button to scroll to 2 Sided Print 5 Press the Back button Changing the Fax Setup Using the Operator Panel If you are using your printer as a sta...

Page 17: ...n your country have a detection pattern using DTMF The Caller ID detection pattern is determined by the country or region you selected during initial setup If phones in your country use two detection patterns call your telecommunications company to know which pattern it subscribes to Specify a manual answer code The default code is DELL 3355 Choose whether you want to answer incoming faxes automat...

Page 18: ...NOTE The lowest possible group dial number is automatically assigned to this contact You cannot change the speed dial number 5 Press the Back button Using a Speed or Group Dial List 1 From the main menu press the up or down Arrow button to scroll to Fax and then press the Select button 2 Use the keypad to enter the two digit speed dial number 3 Press the Start button Blocking Faxes Create a Blocke...

Page 19: ...and press the Select button 2 Press the up or down Arrow button to scroll to Fax Setup and press the Select button 3 Press the up or down Arrow button to scroll to Fax Blocking and press the Select button 4 Press the left or right Arrow button to choose On from Block No ID 5 Press the Select button If the printer detects a fax from a machine without Caller ID the transmission is disconnected Creat...

Page 20: ...ge for your report 4 Click the print button in the upper left corner of the dialog to print the fax report Creating a Report for Received and Incoming Faxes 1 Click Start Programs or All Programs Dell PC Fax Dell PC Fax For Windows Vista a Click Programs b Click Dell PC Fax c Click Dell PC Fax 2 From Receiving Faxes click Create Report 3 Select a date range for your report 4 Click the print button...

Page 21: ... is connected to a computer or not must be connected to a telephone line before you can send a fax NOTE If you use a DSL modem for your computer you must install a DSL filter on the telephone line attached to your computer Number Part Description 1 Automatic Document Feeder ADF Part that feeds original documents into the printer 2 Printer unit Unit you lift to gain access to the ink cartridges 3 O...

Page 22: ...ur call when contacting technical support NOTE The Express Service Code is not available in all countries 12 Supplies Reorder Label To order ink cartridges or paper visit www dell com supplies 13 FAX connector upper connector Slot into which you plug an active telephone line to send and receive faxes NOTE Do not connect additional devices to the FAX connector upper connector and do not connect a D...

Page 23: ...emains plugged into a power outlet an LED is illuminated to notify you that power is present NOTE If the power is off when you unplug your printer the power will be off when you plug it back in 21 Back cover Cover that you have to remove to install the Dell 966 Internal Wireless Ethernet Adapter Number Use the To 1 LCD display Display scanning copying faxing and printing options as well as status ...

Page 24: ...tate Your printer consumes minimal power at this state 7 Cancel button Cancel a scan print or copy job in progress Cancel a copy job using only the printer and eject the page Exit a menu and return to the default settings 8 Back button Return to the previous menu or screen Save the changes made on a sub menu temporarily 9 Keypad Enter numerical data or text ...

Page 25: ...e Allows you to fax electronic or scanned documents Printing Preferences Allows you to adjust printer settings Memory Card Manager Allows you to display manage edit print and scan photos from your memory card or USB memory key to your computer Dell Ink Management System Warns you when your printer is running low on ink Using the Dell All In One Center The Dell All In One Center allows you to Scan ...

Page 26: ...nd Fax Select the program where you want to send the scanned image Select the type of image being scanned Select a quality setting for your scan Select Scan Now Select Fax Now NOTE Click See More Scan Settings to view all settings Copy Select the quality and color of your copies Select a quality setting for your copies Specify the blank paper size Specify the size of the original document being co...

Page 27: ...tions When you save the settings they apply to every fax you send or receive In this section You can Sending Faxes Send a new fax Manage your phonebook Set a template for your cover page Specify information for the cover page View a list of sent and outgoing faxes Create a report on sent and outgoing faxes Specify if you want to use a fax header Specify the number of times the printer attempts to ...

Page 28: ...ing Preferences when a document is not open 1 In Windows XP click Start Settings Control Panel Printers and Other Hardware Printers and Faxes In Windows 2000 click Start Settings Printers In Windows Vista a Click Control Panel b Click Hardware and Sound c Click Printers 2 Right click the printer icon and then select Printing Preferences NOTE Changes made to the printer settings from the Printers f...

Page 29: ...pe orientation Envelope Select the check box if you want to print an envelope The Paper Size area lists the envelope sizes available for printing Copies Customize how the printer prints several copies of a single print job Collated Normal or Print Last Page First Advanced 2 sided printing Select this to print on both sides of the paper Select from Automatic Manual or Print Duplex Layout Select Nor...

Page 30: ...t as you expect If your black ink cartridge is out of ink you can choose to print black from the color ink cartridge Process Black by selecting Complete A Print before clicking the Continue Printing button If you select Complete A Print and click Continue Printing Process Black is used for all black printing until the black cartridge is replaced or the option is cleared from More Options located o...

Page 31: ...oto AIO Printer 966 3 Follow the instructions on the screen 4 Restart your computer 5 Insert the Drivers and Utilities CD and then follow the instructions on the screen If the installation screen does not appear a In Windows XP click Start My Computer In Windows 2000 double click My Computer from your desktop In Windows Vista click Computer b Double click the CD ROM drive icon and then double clic...

Page 32: ...arge 50 100 200 Custom Fit to Page 2 x 2 Poster 3 x 3 Poster 4 x 4 Poster Quality Draft Normal Photo Auto Lighter Darker Press the left or right Arrow button to adjust the brightness Paper Handling Press the Select button to enter the Paper Handling menu and then select the size and type of the blank paper loaded in the input tray If you have an optional input tray you can also specify the paper s...

Page 33: ... 2 Sided Original 2 Sided Copy N up 1 up 2 up 4 up Layout 1 Per Page 4 Per Page 9 Per Page 16 Per Page Content Type Text Graphics Photo Text Only Line Drawing Change Default Settings Press the Select button to enter the Copy Default Settings menu For more information see Copy Default Settings Menu NOTICE Do not remove the memory card or touch the printer in the area of the memory card while the li...

Page 34: ...o Print Settings Menu or Photo Default Settings Menu Print Camera Selection Press the Select button twice to display the selections that you made using your camera For more information see Camera Selection Preview NOTE This item is displayed only if there is a DPOF Digital Print Order Format selection in your memory card Menu item Settings Edit Photo Press the Select button to enter the Photo Edit...

Page 35: ...e Photo Card Mode menu scroll to Change Photo Print Settings and press the Select button Factory default setting Menu item Settings Factory default setting Photo Size Automatic NOTE The setting changes to Automatic if the selected photo size cannot fit onto the layout specified Hagaki L 2L 60x80 mm A6 10x15 cm A5 B5 A4 13x18 cm 3 5x 5 4x6 5x7 8x10 8 5x11 Layout Automatic Borderless 1 per page One ...

Page 36: ...egrated signature digital network unless you purchase a digital line filter Contact your Internet Service Provider for more details If you are using the Dell Fax to send a fax from within an application the printer must be connected to a computer with a USB cable NOTICE Do not remove the memory card or USB key or touch the printer near the area of the memory card or USB key while actively reading ...

Page 37: ... enter the Auto Answer Schedule menu For more information see Auto Answer Schedule Menu Off Edit Fax Settings Press the Select button to enter the Edit Fax Settings menu For more information see Edit Fax Settings Menu Fax Setup Press the Select button to enter the Fax Setup menu For more information see Fax Setup Menu Menu item Action Name Search Press the Select button to enter the Name Search me...

Page 38: ...e name for the contact Fax Number Use the keypad to edit the fax number for the contact Speed Dial Number The speed dial number assigned to this contact is displayed NOTE The speed dial number is automatically assigned You cannot modify the speed dial number Delete Entry Press the Select button to delete the entry from the phone book Menu item Action Name Use the keypad to enter the name for the c...

Page 39: ...he keypad to enter the fax numbers for the group Name Search Press the Select button to enter the Name Search menu For more information see Name Search Menu Phone Number Search Press the Select button to enter the Phone Book Search menu For more information see Phone Number Search Menu Redial History Press the Select button to display the redial history The last five numbers dialed are displayed o...

Page 40: ... Use the keypad to enter information about the sender Your Name Displays the name of the sender Your Phone Displays the phone number of the sender Your Fax Use the keypad to enter your fax number Priority None FYI Please Reply Urgent Message Use the keypad to enter your message for the recipient Menu item Action Speed Dial Phone Book Press the Select button to enter the Phone Book menu For more in...

Page 41: ...ry Press the Select button to print a history of your fax activity Confirmation Off On Error For All Menu item Action Redial This Number Press the Select button to enter the Fax Mode menu with the selected number displayed in the Fax Number Window Add Number to Phone Book Press the Select button to enter the Phone Book Add Entry menu with the fax number field automatically populated with the curre...

Page 42: ... If phones in your country use two detection patterns call your telecommunications company to know which pattern it subscribes to Menu item Action Factory default settings If Too Big Fit to Page Use Two Pages Fax Footer On Off 2 Sided Print 1 Sided Print 2 Sided Print Paper Handling Press the Select button to enter the Paper Handling menu and then select the size and type of the blank paper loaded...

Page 43: ... Dial the fax is scanned to memory before dialing the fax number After Dial the fax number is dialed communication with receiving fax is established and then the fax is scanned Max Send Speed 33 600 bps 31 200 bps 28 800 bps 26 400 bps 24 000 bps 21 600 bps 19 200 bps 16 800 bps 14 400 bps 12 000 bps 9 600 bps 7 200 bps 4 800 bps 2 400 bps Auto Fax Conversion On the fax is automatically converted ...

Page 44: ... Name Search menu For more information see Blocked Fax Name Search Menu Blocked Fax Entry Number Search Press the Select button to enter the Blocked Fax Number Search menu For more information see Blocked Fax Entry Number Search Menu Blocked Fax Add Entry Press the Select button to enter the Blocked Fax Add Entry menu For more information see Blocked Fax Add Entry Menu Print Blocked Fax List Press...

Page 45: ...the keypad to edit the fax number for the contact Blocked Fax A number is assigned to this blocked fax number NOTE The number is automatically assigned You cannot modify the assigned number Delete Entry Press the Select button to delete this entry from the blocked fax list Menu item Action Name Use the keypad to edit the name for the contact Fax Number Use the keypad to edit the fax number for the...

Page 46: ... the Copy Default Settings menu For more information see Copy Default Settings Menu Change Photo Default Settings Press the Select button to enter the Photo Default Settings menu For more information see Photo Default Settings Menu Change Print File Default Settings Press the Select button to enter the Print Files Default Settings menu For more information see Print File Default Settings Menu Chan...

Page 47: ...lected in all other menus Type Auto Detect Plain Matte Photo Transparency Paper Handling menu for printer with two input trays Menu item Settings Size Tray 1 Hagaki L 2L A6 A5 B5 A4 3x5 4x6 8 5x11 8 5x14 NOTE Size is determined by the country code you selected during initial setup Changing size from any menu changes the option selected in all other menus Type Tray 1 Auto Detect Plain Matte Photo T...

Page 48: ...elect Auto if you want the printer to pick from the tray containing the paper that matches the size of the incoming fax You also need to specify the correct paper size for both trays Menu item Settings Set Date and Time Press the Select button to enter the Set Date and Time menu For more information see Set Date and Time Menu Paper Handling Press the Select button to enter the Paper Handling menu ...

Page 49: ...other users from changing the settings of your printer Menu item Action Current Time Use the keypad to enter the current time Press the left or right Arrow button to move to the next entry field Current Date Use the keypad to enter the current date Press the left or right Arrow button to move to the next entry field Menu item Settings Factory default setting Color Color Black White Quality Auto Dr...

Page 50: ... Fax Setup Menu You can access the Fax Setup menu by selecting Change Fax Default Settings from the Setup menu or by selecting Menu item Settings Factory default setting Photo Size Hagaki L 2L 60x80 mm A6 10x15 cm A5 B5 A4 13x18 cm 3 5x 5 4x6 5x7 8x10 8 5x11 Layout Automatic Borderless 1 per page One Photo Centered 1 per page 2 per page 3 per page 4 per page 6 per page 8 per page 16 per page Quali...

Page 51: ...ange Bluetooth Default Settings from the Setup menu For more information see Bluetooth Mode PictBridge Default Settings Menu You can view or change the PictBridge Default Settings by selecting Change PictBridge Default Settings from the Setup menu Menu item Settings Factory default setting Color Color Black White Quality Automatic 150 dpi 300 dpi 600 dpi Original Size Auto Detect L 2L A6 A5 B5 A4 ...

Page 52: ...ireless Setup Menu For more information see Wireless Menu TCP IP Press the Select button to enter the TCP IP Menu For more information see TCP IP Menu Network Time Menu Press the Select button to enter Network Time Menu From the Network Time Menu press the left or right Arrow button to enable or disable the Time Server and then press the Back button to save the settings NOTE When Time Server is en...

Page 53: ...ress Press the right Arrow button to enter a set of numbers in the next field or press the left Arrow button to erase an entry Press the Back button to save the settings NOTE The IP address cannot be changed if DHCP is enabled Set IP Gateway Press the Select button to enter the Set IP Gateway menu From the Set IP Gateway menu use the keypad to enter an IP address Press the right Arrow button to en...

Page 54: ...ll settings to factory default settings PictBridge Default Print Settings Menu Menu item Settings Factory default setting Photo Size Hagaki L 2L 60x80mm A6 10x15cm A5 B5 A4 13x18cm 3 5x5 4x6 5x7 8x10 8 5x11 Layout Automatic Borderless 1 per page One Photo Centered 1 per page 2 per page 3 per page 4 per page 6 per page 8 per page 16 per page Quality Auto Draft Normal Photo Paper Handling Press the ...

Page 55: ... the printer detects more than eight devices the least recently used device is removed from the list Device Name The name assigned to the USB Bluetooth adapter When printing from an external Bluetooth enabled device the Device Name or Device Address should be selected Device Address The address of your USB Bluetooth adapter When printing from an external Bluetooth enabled device the Device Name or...

Page 56: ... systems Windows Vista Windows XP Windows 2000 Wireless Network Settings Some wireless network settings may be needed to configure the adapter that has been installed in the printer Here are some of the settings that you may need Network Name also known as SSID Service Set ID BSS Basic Service Set Type the type of wireless network you use Ad Hoc or Infrastructure Wireless Channel Number Network Au...

Page 57: ...ing and Setting Up the Adapter Installing the Adapter 1 Turn off your printer and then unplug the power cable from the wall 2 Remove the back cover by pushing the tab to the left and then pulling the cover away from the printer 3 Remove the screws and the cover plate 4 Unpack the adapter Save the packaging materials 5 Align the edges of the adapter into the guides on the left and right and then sl...

Page 58: ...l computer Connect the USB cable between the port on the back of the printer and the port on the back of the computer and then go to step 8 If you are using your printer with an existing computer Go to the next step 4 Make sure your computer is on and then insert the Drivers and Utilities CD The CD launches automatically NOTE If you do not have your Drivers and Utilities CD you can download the ap...

Page 59: ...riate software from support dell com 4 Select Using an Ethernet cable and then click Next 5 Click I Agree to the terms of this license agreement to accept the license agreement 6 Read the Firewall Exception information and then click Next 7 Your printer should appear in the printer list and it should already be selected Click Next to begin the installation process If your printer is not shown you ...

Page 60: ...r The ink cartridges are installed correctly Paper has been loaded into the printer The USB cable is attached to the printer and the computer The printer is turned on and ready to be installed Using an Available Wireless Network Configuration 1 From the Wireless Networks Found In Your Area screen select the appropriate Network Name SSID from the list and then click Next 2 On the Apply and Verify W...

Page 61: ...structure Mode To set up the adapter in Infrastructure Mode the setup steps vary based on the security settings you select If you don t want any security 1 From the Wireless Security Settings screen select No Security and then click Next 2 On the Apply and Verify Wireless Settings screen check each network attribute to make sure the settings are correct and then click Next to apply the settings 3 ...

Page 62: ...t up the adapter in Ad Hoc Mode the setup steps vary based on the security settings you select The security options are more limited in Ad Hoc Mode than they are in Infrastructure Mode If you don t want any security 1 From the Wireless Security Settings screen select No Security and then click Next 2 On the Apply and Verify Wireless Settings screen check each network attribute to make sure the set...

Page 63: ...with printer software installation If the adapter was not able to join the wireless network try one of the following suggestions Click View Settings to verify the settings are correct Select I want to change the settings I entered and then click Next Follow the instructions on your screen to update the wireless settings Select I have moved my wireless printer closer to the wireless router I would ...

Page 64: ... Into Trays Loading Paper 1 Fan the paper 2 Remove the paper tray Push the lever in and then extend the tray until it is long enough to accommodate the length of the paper 3 Load paper in the paper tray and adjust the paper guides NOTE You can only load letter size legal size or A4 paper in the optional paper tray 4 Replace the paper tray ...

Page 65: ...amp in the lower right corner or in Landscape orientation with the stamp in the lower left corner If you are mailing internationally print Landscape orientation with the stamp in the upper left corner You select the correct envelope size Select the next biggest size if the exact envelope size is not listed and set the left and right margins so your envelope text is correctly positioned 20 sheets o...

Page 66: ... or Photo print quality 50 sheets of transparencies The rough side of the transparencies faces down The paper guides rest against the edges of the transparencies You select Automatic Draft Normal or Photo print quality 25 sheets of labels The print side of the labels faces down The top of the labels feeds into the printer first The paper guides rest against the edges of the paper 150 sheets of let...

Page 67: ...t media from Tray 1 until it becomes empty and then the printer automatically feeds print paper from Tray 2 In addition you can load a different size of paper for each tray so that the printer picks the paper that matches the size of the fax you received For example if letter size is loaded in Tray 1 and legal size is loaded in Tray 2 if you receive a legal size fax the printer picks from Tray 2 Y...

Page 68: ... button 3 From the Setup menu press the up or down Arrow button to scroll to Change Copy Default Settings and then press the Select button 4 From the Copy Default Settings menu press the up or down Arrow button to scroll to Paper Handling and then press the Select button 5 From the Paper Handling menu specify the size and type of paper loaded in both paper trays 6 Press the up or down Arrow button...

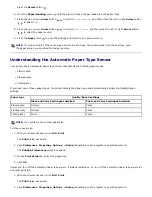
Page 69: ...per size 1 With your document open click File Print The Print dialog box opens 2 Click Preferences Properties Options or Setup depending on the program or operating system The Printing Preferences dialog box opens 3 On the Print Setup tab select the paper size 4 Click OK Unless you turn off the automatic paper type sensor it always remains on To turn off the automatic paper type sensor for a speci...

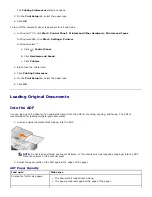
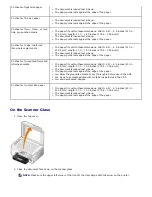
Page 70: ...Setup tab select the paper type 5 Click OK Loading Original Documents Into the ADF You can load up to 50 sheets of an original document into the ADF for scanning copying and faxing The ADF is recommended for loading multiple page documents 1 Load an original document text side up into the ADF NOTE Do not load postcards photos small items or thin media such as magazine clippings into the ADF Place ...

Page 71: ... edge reinforced three hole copier media The paper fits within these dimensions Width 8 27 8 5 inches 210 0 215 9 mm Length 11 0 14 0 inches 279 4 355 6 mm The document is loaded text side up The paper guide rests against the edge of the paper 50 sheets of preprinted forms and letterhead media The paper fits within these dimensions Width 8 27 8 5 inches 210 0 215 9 mm Length 11 0 14 0 inches 279 4...

Page 72: ...3 Close the top cover ...

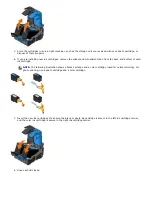
Page 73: ... not provide warranty coverage for problems caused by using accessories parts or components not supplied by Dell Replacing Ink Cartridges 1 Turn on your printer 2 Lift the printer unit The ink cartridge carrier moves and stops at the loading position unless the printer is busy 3 Press down on the ink cartridge lever to raise each ink cartridge lid 4 Remove the old ink cartridges CAUTION Before per...

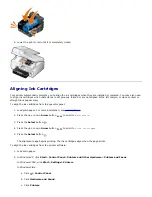
Page 74: ...rom the back and bottom of each ink cartridge NOTE The following illustration shows a black cartridge and a color cartridge used for normal printing For photo printing use a photo cartridge and a color cartridge 7 Insert the new ink cartridges Make sure the black or photo ink cartridge is secure in the left ink cartridge carrier and the color ink cartridge is secure in the right ink cartridge carr...

Page 75: ...oad plain paper For more information see Loading Paper 2 Press the up or down Arrow button to scroll to Maintenance 3 Press the Select button 4 Press the up or down Arrow button to scroll to Align Cartridges 5 Press the Select button The alignment page begins printing The ink cartridges align when the page prints To align the ink cartridges from the printer software 1 Load plain paper 2 In Windows...

Page 76: ...the nozzles from the operator panel 1 Load plain paper For more information see Loading Paper 2 Press the up or down Arrow button to scroll to Maintenance 3 Press the Select button 4 Press the up or down Arrow button to scroll to Clean Cartridges 5 Press the Select button The cleaning page begins printing To clean the nozzles from the printer software 1 Load plain paper 2 In Windows XP click Start...

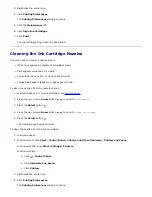
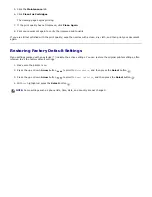
Page 77: ... Restoring Factory Default Settings Menu settings marked with an asterisk indicate the active settings You can restore the original printer settings often referred to as the factory default settings 1 Make sure the printer is on 2 Press the up or down Arrow button to scroll to Maintenance and then press the Select button 3 Press the up or down Arrow button to scroll to Reset Defaults and then pres...

Page 78: ...ting system The Printing Preferences dialog box opens 5 On the Print Setup and Advanced tabs make any necessary changes for your document 6 When you finish customizing your settings click OK The Printing Preferences dialog box closes 7 Click OK or Print Printing Photos 1 Turn on your computer and printer and make sure they are connected 2 Load photo glossy paper with the print side facing up NOTE ...

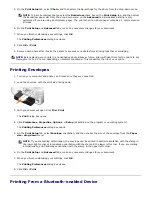
Page 79: ...our document open click File Print The Print dialog box opens 4 Click Preferences Properties Options or Setup depending on the program or operating system The Printing Preferences dialog box opens 5 On the Print Setup tab select Envelope orientation and then choose the size of the envelope from the Paper size drop down menu NOTE If you are mailing within Japan the envelope can be printed in portra...

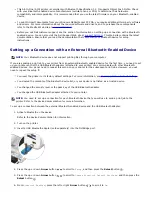
Page 80: ...r attached to your printer can communicate with other Bluetooth enabled devices You do not need to repeat this setup on your printer for the subsequent print jobs However you will need to repeat the setup if You reset the printer to its factory default settings For more information see Restoring Factory Default Settings You cleared the contents of the Bluetooth device list or your device is not li...

Page 81: ...scovery Mode to On a From the main menu press the up or down Arrow button to scroll to Setup and then press the Select button b Press the up or down Arrow button to scroll to Change Bluetooth Default Settings and then press the Select button c Press the up or down Arrow button to scroll to Bluetooth Enabled and then press the left or right Arrow button to scroll to On d Press the up or down Arrow ...

Page 82: ...f Your Document 1 Turn on your computer and printer and make sure they are connected 2 Load the paper For more information see Loading Paper 3 With your document open click File Print The Print dialog box opens 4 Click Preferences Properties Options or Setup depending on the program or operating system The Printing Preferences dialog box opens 5 On the Print Setup tab specify the number of copies ...

Page 83: ...dvanced tab make any additional changes for your document 9 Select the number of pages to print on each page 10 When you are finished customizing your settings click OK The Printing Preferences dialog box closes 11 Click OK or Print Duplexing a Print Job Two Sided Printing Automatic Duplex Automatic duplex allows you to print your document on both sides of the paper without having to manually re o...

Page 84: ... the 2 sided printing check box 6 From the drop down list select Manual 7 Select how you want to bind your pages 8 When you are finished customizing your settings click OK The Printing Preferences dialog box closes 9 Click OK or Print 10 When all the odd numbered pages have exited the printer follow the instructions on your computer screen Printing an Image as a Multi page Poster 1 Turn on your co...

Page 85: ...nced tab select Banner from the Layout drop down list and then select Letter Banner or A4 Banner from the Banner Paper Size drop down list 6 On the Print Setup tab and Advanced tab make any additional changes for your document 7 When you are finished customizing your settings click OK The Printing Preferences dialog box closes 8 Click OK or Print NOTE Once the printer begins printing wait until yo...

Page 86: ...onnected to your printer and your computer Shut down the computer reconnect the USB cable as shown on the Setting Up Your Printer poster and then restart the computer If the software installation screen does not appear automatically install the software manually 1 Insert the Drivers and Utilities CD 2 In Windows XP click Start My Computer In Windows 2000 double click My Computer from your desktop ...

Page 87: ...ick Printers 2 Right click the printer icon and select Set as Default Printer Printer won t print and print jobs are stuck in the print queue Check for multiple instances of the printer installed on your computer 1 In Windows XP click Start Control Panel Printers and Other Hardware Printers and Faxes In Windows 2000 click Start Settings Printers In Windows Vista a Click Control Panel b Click Hardw...

Page 88: ...he printer For more information see Error Messages Ensure you installed the ink cartridges correctly and removed the sticker and tape from each cartridge Make sure you loaded the paper correctly For more information see Loading Paper Ensure the printer is not connected to a PictBridge enabled camera For more information see Printing Photos From a PictBridge Enabled Camera General Problems Printing...

Page 89: ...nces Make sure you loaded the paper correctly For more information see Loading Paper Copying Problems Check for blinking lights or error messages on the printer For more information see Error Messages Make sure the scanner glass is clean If the scanner glass is dirty gently wipe it with a clean lint free cloth dampened with water Use the Remove Patterns option to remove image patterns from magazin...

Page 90: ... Printer poster and then restart the computer Determine if the printer software is installed Click Start Programs or All Programs Dell Printers For Windows Vista 1 Click Programs 2 Click Dell Printers If the printer does not appear in the list of printers the printer software is not installed Install the printer software For more information see Removing and Reinstalling Software Correct communica...

Page 91: ...ter 966 2 Select Dell All In One Center The Dell All In One Center opens 3 Click See More Scan Settings 4 Select a higher scan resolution from the Select Scan Quality menu 5 Click Scan Now Use the Remove Patterns option to remove image patterns from magazines or newspapers 1 Click Start Programs or All Programs Dell Printers Dell Photo AIO Printer 966 For Windows Vista a Click Programs b Click Del...

Page 92: ... another application NOTE If the program you want to use is not listed select Search for more in the drop down menu On the next screen click Add to locate and add your program to the list Make sure the document or photo is loaded correctly on the scanner glass or into the ADF For more information see how to load originals On the Scanner Glass Into the ADF Make sure the scanner glass is clean If th...

Page 93: ...e country or region you selected during initial setup If phones in your country use two detection patterns call your telecommunications company to determine which pattern it subscribes to 1 From the main menu press the up or down Arrow button to scroll to Fax and then press the Select button 2 Press the up or down Arrow button to scroll to Fax Setup and then press the Select button 3 Press the up ...

Page 94: ...er Check your network connection Make sure the printer is connected to a working network connection Check the network adapter documentation for setup and usage information Memory Card Problems Make sure that the type of memory card you are using can be used in the printer For more information see Printing From a Memory Card or USB Key Insert only one memory card at a time Insert the memory card un...

Page 95: ...ple pages For more information see Print Media Guidelines Make sure the paper is not wrinkled torn or damaged Check for a paper jam If the paper jam is near the paper input tray 1 Remove the paper tray 2 Pull firmly on the paper to remove it 3 Replace the paper tray 4 Press the Select button 5 Resend your print job to print any missing pages If the paper jam is not visible 1 Turn off the printer 2...

Page 96: ... door 1 If you have a duplex unit remove it 2 Open the rear access door 3 Firmly grasp the paper and gently pull it from the printer 4 Close the rear access door 5 Re install the duplex unit 6 Press the Select button to continue printing If the paper jam occurs near the ADF 1 Lift the ADF cover located to the left of the ADF input tray 2 Firmly grasp the paper and then gently pull it from the prin...

Page 97: ...e sure that the memory card or USB key is not damaged Failed to find an MS Office application to print The computer fails to find an application to print Make sure that the memory card or USB key contains files that have DOC XLS or PPT as filename extensions The attached device is not a PictBridge or a supported Mass Storage Class Device Please disconnect and refer to user manual Attach a PictBrid...

Page 98: ...ut paper tray and you loaded paper into both trays Tray Linking is not enabled Enable Tray Linking For more information see Understanding Tray Linking Media Mismatch You have enabled Tray Linking and set the paper type to Automatic or Auto Detect but the paper loaded is not plain paper Press the Select button to continue printing Otherwise press the Cancel button and then load plain paper Out of M...

Page 99: ...ormation see Aligning Ink Cartridges and Cleaning the Ink Cartridge Nozzles For additional solutions go to support dell com General Guidelines for Selecting or Loading Print Media Attempting to print on damp curled wrinkled or torn paper can cause paper jams and poor print quality Use only high quality copier grade paper for the best print quality Avoid paper with embossed lettering perforations o...

Page 100: ...ia is properly loaded in the input tray Do not overload the input tray Do not remove media from the input tray while printing Flex fan and straighten the paper before loading Do not use creased damp or curled paper Orient the media according to the instructions for the printer ...

Page 101: ...When you insert a memory card or USB key the printer automatically switches to Photo mode Printing Photos Viewing or Printing Photos 1 Insert a memory card or USB key The printer automatically switches to Photo mode 2 Press the Select button to access the Photo Card Mode menu 3 Press the up or down Arrow button to scroll to Browse and Print Photos and then press the Select button NOTE Do not inser...

Page 102: ... or down Arrow button to scroll to View Slideshow and then press the Select button 4 Press the up or down Arrow button to select the speed of the slide show and then press the Select button Printing All Photos 1 Insert the memory card or USB key The printer automatically switches to Photo mode 2 Press the Select button to access the Photo Card Mode menu 3 Press the up or down Arrow button to scrol...

Page 103: ...the Select button 4 Press the left or right Arrow button to scroll to the photo you want to edit and then press the Select button 5 Press the Menu button 6 From the Photo Menu press the up or down Arrow button to scroll to Edit Photo and then press the Select button The menu items appear beside the photo you want to edit 7 Press the up or down Arrow button to scroll through the menu items 8 Press ...

Page 104: ...3 Press the button to access the Print Files Mode menu 4 Press the up or down Arrow button to scroll to the file that you want to print 5 Press the Start button ...

Page 105: ...MB SDRAM 4 MB FLASH 4 MB Fax Connectivity USB 2 0 high speed Duty cycle average 5 000 pages per month Printer life Printer 18 000 pages Scanner 18 000 scans ADF 18 000 scans Temperature Relative Humidity Condition Temperature Relative humidity non condensing Operation 61 to 90 F 8 to 80 Storage 34 to 140 F 5 to 80 Shipping 40 to 140 F 5 to 100 Rated AC input 90 255 V Rated frequency 47 Hz to 63 Hz...

Page 106: ...al mode 32 W NOTE If you are faxing over a telephone line connected to a DSL modem install a DSL filter to avoid interference with the analog fax modem signal NOTE ISDN integrated service digital network and cable modems are not fax modems and are not supported for faxing Print and scan resolution Scan resolution Print resolution Photo Glossy paper All other media Draft 150 x 150 dpi 600 x 600 dpi...

Page 107: ... Envelopes 120 x 235 mm Chokei 4 Envelopes 90 x 205 mm Chokei 40 Envelopes 90 x 225 mm Kakugata 3 Envelopes 216 x 277 mm Kakugata 4 Envelopes 197 x 267 mm Kakugata 5 Envelopes 190 x 240 mm Kakugata 6 Envelopes 162 x 229 mm 10 envelopes Greeting cards index cards postcards or photo cards Photo Post card 4 x 6 inches Index card 3 x 5 inches 25 cards Photo glossy or matte paper 8 5 x 11 inches 216 x ...

Page 108: ......

Page 109: ...ad your original document 4 Press the Menu button to change copy settings 5 Press the Start button The copy is made in the currently specified copy selection Color or Black NOTE If you press the Start button without specifying a copy selection the copy is printed in color by default Using the Computer 1 Turn on your computer and printer and make sure they are connected 2 Load the paper For more in...

Page 110: ...from the Copy drop down menu NOTE You must make more than one copy before you can collate documents 7 Click See More Copy Settings to customize your copy 8 Click the Advanced button The Advanced Copy Settings dialog box opens 9 On the Print tab select the Collate Copies check box 10 Click OK 11 When you are finished customizing your settings click Copy Now Collating Copies Using the Operator Panel...

Page 111: ...puter and printer and make sure they are connected 2 Load the paper For more information see Loading Paper 3 Load your original document 4 Click Start Programs or All Programs Dell Printers Dell Photo AIO Printer 966 For Windows Vista a Click Programs b Click Dell Printers c Click Dell Photo AIO Printer 966 5 Select Dell All In One Center The Dell All In One Center opens 6 Select the number of cop...

Page 112: ... Press the up or down Arrow button to scroll to Copy and then press the Select button 5 From the Copy Mode menu press the up or down Arrow button to scroll to Content Type 6 Press the left or right Arrow button to scroll to Photo 7 Press the Start button Using the Computer 1 Turn on your computer and printer and make sure they are connected 2 Load photo glossy paper with the print side facing down...

Page 113: ...f copies 1 99 and then specify the color settings from the Copy drop down menu 9 Click See More Copy Settings to customize your copy 10 When you finish customizing your settings click Copy Now Copying a Two sided Document 1 Load the original document into the ADF 2 From the main menu press the up or down Arrow button to scroll to Copy and then press the Select button 3 From the Copy Mode menu pres...

Page 114: ...ton 3 From the Copy Mode menu press the up or down Arrow button to scroll to 2 Sided Copies 4 Press the left or right Arrow button to scroll to 1 Sided Original 2 Sided Copy if you are copying a one sided document or 2 Sided Original 2 Sided Copy if you are copying a two sided document and then press the Select button 5 Press the Start button Changing Copy Settings Using the Operator Panel If you ...

Page 115: ...tomizing your settings click Copy Now Click this tab To Print Select the paper size and type Select borderless printing options Select the print quality Collate copies Print the last page first Scan Select the color depth and scan resolution Auto crop the scanned image Adjust the sensitivity of the auto crop tool Set the size of the area to be scanned Image Enhancements Straighten images after sca...

Page 116: ...provided by the original manufacturer including those purchased and or installed through Software Peripherals DellWare ReadyWare and Custom Factory Integration CFI DellPlus Contacting Dell You can access Dell Support at support dell com Select your region on the WELCOME TO DELL SUPPORT page and fill in the requested details to access help tools and information You can contact Dell electronically u...

Page 117: ...ada only Warranty and Return Policy Dell Inc Dell manufactures its hardware products from parts and components that are new or equivalent to new in accordance with industry standard practices For information about the Dell warranty for your printer refer to the Owner s Manual ...

Page 118: ...n your computer and printer and make sure they are connected 2 Load your original document or photo 3 Click Start Programs or All Programs Dell Printers Dell Photo AIO Printer 966 For Windows Vista a Click Programs b Click Dell Printers c Click Dell Photo AIO Printer 966 4 Select Dell All In One Center The Dell All In One Center opens 5 From the Send scanned image to drop down menu select the prog...

Page 119: ...e Center The Dell All In One Center opens 5 From the Send scanned image to drop down menu select the program you want to use NOTE If the program you want to use is not listed select Search for more in the drop down menu On the next screen click Add to locate and add your program to the list 6 Click See More Scan Settings to customize your scan 7 Click the Advanced button The Advanced Scan Settings...

Page 120: ...Dell Photo AIO Printer 966 4 Select Dell All In One Center The Dell All In One Center opens 5 From the Send scanned image to drop down menu select the program you want to use NOTE If the program you want to use is not listed select Search for more in the drop down menu On the next screen click Add to locate and add your program to the list 6 Click See More Scan Settings to customize your scan 7 Wh...

Page 121: ...see Setting the Computer Name and PIN The PIN is not required by default it is only requested if the PIN has been set 7 Press the Select button 8 Make any necessary changes to your scan settings and then press the Start button The scan opens on the computer you selected Setting the Computer Name and PIN Set a scan to network PIN to restrict users from sending a scanned document to your computer Yo...

Page 122: ...uter 1 Turn on your computer and printer and make sure they are connected 2 Load your original document 3 Click Start Programs or All Programs Dell Printers Dell Photo AIO Printer 966 For Windows Vista a Click Programs b Click Dell Printers c Click Dell Photo AIO Printer 966 4 Select Dell All In One Center The Dell All In One Center opens 5 From the Send scanned images to drop down menu select the...

Page 123: ...u select the program you want to use NOTE If the program you want to use is not listed select Search for more in the drop down menu On the next screen click Add to locate and add your program to the list 6 Click See More Scan Settings to customize your scan 7 When you finish customizing your settings click Scan Now When the image has finished processing it opens in the program you selected 8 Edit ...

Page 124: ...sta a Click Programs b Click Dell Printers c Click Dell Photo AIO Printer 966 4 Select Dell All In One Center The Dell All In One Center opens 5 From the Productivity Tools section click Save an image on my computer 6 Follow the instructions on your screen to save an image on your computer E Mailing a Scanned Image or Document 1 Turn on your computer and printer and make sure they are connected 2 ...

Page 125: ... section click E mail an image or document 6 Follow the instructions on the screen to prepare the document for e mail 7 Click Next 8 Open your e mail program write a note to accompany the attached document and then send it NOTE If you have questions about attaching documents to e mail consult the Help for your e mail program Enlarging or Reducing Images or Documents 1 Turn on your computer and pri...

Page 126: ...olution or size you have selected To correct this problem reduce either your resolution or the size of your scan area 6 From the Productivity Tools section select Enlarge or reduce an image 7 Follow the instructions on the screen to select the size of your new image 8 When you finish customizing your image click Scan Now Changing Scan Settings Using the Operator Panel You can change the copy setti...

Page 127: ...he following tabs 7 Click OK 8 When you are finished customizing your settings click Scan Now Click this tab To Scan Choose a color depth Select a scan resolution Adjust the sensitivity of the auto drop tool Set the area to be scanned Use the OCR program to convert scanned items to text Indicate that you are scanning multiple items Update the list of applications to send scans to Update the defaul...

Page 128: ... met 1 Redistributions of source code must retain the above copyright notice this list of conditions and the following disclaimer 2 Redistributions in binary form must reproduce the above copyright notice this list of conditions and the following disclaimer in the documentation and or other materials provided with the distribution 3 The name of the author may not be used to endorse or promote prod...

Page 129: ...istributed under the terms of this General Public License The Program below refers to any such program or work and a work based on the Program means either the Program or any derivative work under copyright law that is to say a work containing the Program or a portion of it either verbatim or with modifications and or translated into another language Hereinafter translation is included without lim...

Page 130: ...r this License However parties who have received copies or rights from you under this License will not have their licenses terminated so long as such parties remain in full compliance 5 You are not required to accept this License since you have not signed it However nothing else grants you permission to modify or distribute the Program or its derivative works These actions are prohibited by law if...

Page 131: ...RED INACCURATE OR LOSSES SUSTAINED BY YOU OR THIRD PARTIES OR A FAILURE OF THE PROGRAM TO OPERATE WITH ANY OTHER PROGRAMS EVEN IF SUCH HOLDER OR OTHER PARTY HAS BEEN ADVISED OF THE POSSIBILITY OF SUCH DAMAGES END OF TERMS AND CONDITIONS How to Apply These Terms to Your New Programs If you develop a new program and you want it to be of the greatest possible use to the public the best way to achieve...

Page 132: ... It also provides other free software developers Less of an advantage over competing non free programs These disadvantages are the reason we use the ordinary General Public License for many libraries However the Lesser license provides advantages in certain special circumstances For example on rare occasions there may be a special need to encourage the widest possible use of a certain library so t...

Page 133: ...te it Thus it is not the intent of this section to claim rights or contest your rights to work written entirely by you rather the intent is to exercise the right to control the distribution of derivative or collective works based on the Library In addition mere aggregation of another work not based on the Library with the Library or with a work based on the Library on a volume of a storage or dist...

Page 134: ...y the above specified materials from the same place e Verify that the user has already received a copy of these materials or that you have already sent this user a copy For an executable the required form of the work that uses the Library must include any data and utility programs needed for reproducing the executable from it However as a special exception the materials to be distributed need not ...

Page 135: ...this License which applies to it and any later version you have the option of following the terms and conditions either of that version or of any later version published by the Free Software Foundation If the Library does not specify a license version number you may choose any version ever published by the Free Software Foundation 14 If you wish to incorporate parts of the Library into other free ...

Reviews: