Dell PowerConnect J-Series J-SRX100S/SU Services Gateway Getting Started Guide
9
2.2.1 Connecting the Power Cable to the Device
To connect the power cable to the device:
1 .
Plug the DC connector end of the power cable in to the
power connector on the back of the device.
2 .
Plug the AC adapter end of the power cable in to an AC
power outlet. We recommend using a surge protector.
Note the following indications (see
J-Series J-SRX100S/SU Services Gateway Front Panel”
):
- POWER LED (green): The device is receiving power.
- STATUS LED (green): The device is operating normally.
- ALARM LED (amber): The device is operating normally, but a
rescue configuration has not yet been set. This is not a panic
condition, however.
NOTE:
Initially, if the rescue configuration has not been
set, a steadily amber ALARM LED indicates a minor alarm
condition, and a steadily red ALARM LED indicates that a
major alarm condition on the services gateway.
NOTE:
You must allow the device between 5 and 7
minutes to boot fully after you have powered it on. Wait
until the STATUS LED is steadily green before proceeding
to
“2 .2 .2 Connecting the Management Device .”
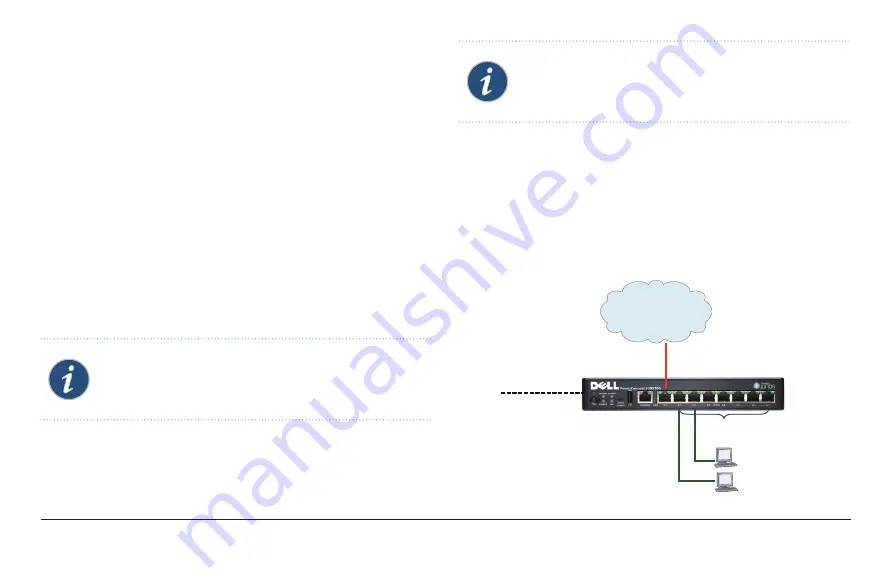
2.2.2 Connecting the Management Device
Connect the management device to the services gateway using
an RJ-45 cable (Ethernet cable) from any one of the fe-0/0/1
through fe-0/0/7 ports on the front panel to the Ethernet port
on the management device.
Figure 1: Connecting the Management Device to the Services
Gateway
Internet
Trust Zone
Untrust Zone
DHCP Client
Vlan0
Management
Devices
fe-0/0/0
fe-0/0/1 to fe-0/0/7
DHCP Server


