310
| Access Point Notes
Dell PowerConnect W AirWave 7.1
| User Guide
Determining the Boot-Block Version
The subsequent steps that you must follow to reset the Cisco AP depend on the version of the AP's boot-block.
Follow the steps below to determine which boot-block version is currently on your AP, then use the
corresponding instructions detailed below.
When you connect to the AP, the Summary Status screen appears. Reboot the AP by pressing CTRL-X or by
unplugging and then re-plugging the power connector. As the AP reboots, introductory system information will
appear onscreen.
The boot-block version appears in the third line of this text and is labeled Bootstrap Ver.
System ID: 00409625854D
Motherboard: MPC860 50MHz, 2048KB FLASH, 16384KB DRAM, Revision 20
Bootstrap Ver. 1.01: FLASH, CRC 4143E410 (OK)
Initialization: OK
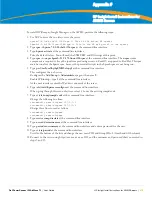
Resetting the AP (for Boot-Block Versions from 1.02 to 11.06)
Follow these steps to reset your AP if the boot-block version on your AP is greater than or equal to version 1.02
but less than 11.07:
1. If you have not done so already, connect to the AP (see above), click OK, and press Enter.
2. When the Summary Status screen appears, reboot the AP by pressing CTRL-X or by unplugging and then
re-plugging the power connector.
3. When the memory files are listed under the heading Memory: File, press CTRL-W within five seconds to
reach the boot-block menu.
4. Copy the AP's installation key to the AP's DRAM by performing the following steps:
Press C to select Copy File.
Press 1 to select DRAM.
Press the selection letter for AP Installation Key.
5. Perform the following steps to reformat the AP's configuration memory bank:
Press CTRL-Z to reach the Reformat menu.
Press ! (SHIFT-1) to select FORMAT Memory Bank.
Press 2 to select Config.
Press upper-case Y (SHIFT-Y) to confirm the FORMAT command.
Press CTRL-Z to reach the reformat menu and to reformat the AP's configuration memory bank.
6. Copy the installation key back to the configuration memory bank as follows:
Press C to select Copy file
Press 2 to select Config.
Press the selection letter for AP Installation Key.
7. Perform the following steps to run the AP firmware:
Press R to select Run
Select the letter for the firmware file that is displayed.
The following message appears while the AP starts the firmware:
Inflating <firmware file name>
.
8. When the Express Setup screen appears, begin reconfiguring the AP using the terminal emulator or an
Internet browser.
Resetting the AP (for Boot-Block Versions 11.07 and Higher)
Follow these steps to reset your AP if the boot-block version on your AP is greater than 11.07:
Summary of Contents for PowerConnect W Airwave 7.1
Page 1: ...Dell PowerConnect W AirWave Version 7 1 User Guide ...
Page 10: ...10 Dell PowerConnect W AirWave 7 1 User Guide ...
Page 30: ...30 Installing AWMS Dell PowerConnect W AirWave 7 1 User Guide ...
Page 194: ...194 Creating and Using Templates Dell PowerConnect W AirWave 7 1 User Guide ...
Page 260: ...260 Performing Daily Administration in AWMS Dell PowerConnect W AirWave 7 1 User Guide ...
Page 294: ...294 Creating Running and Emailing Reports Dell PowerConnect W AirWave 7 1 User Guide ...
Page 302: ...302 Using the AWMS Helpdesk Dell PowerConnect W AirWave 7 1 User Guide ...
Page 304: ...304 Package Management for AWMS Dell PowerConnect W AirWave 7 1 User Guide ...
Page 308: ...308 Third Party Security Integration for AWMS Dell PowerConnect W AirWave 7 1 User Guide ...
Page 314: ...314 Access Point Notes Dell PowerConnect W AirWave 7 1 User Guide ...
Page 316: ...316 Initiating a Support Connection Dell PowerConnect W AirWave 7 1 User Guide ...
Page 318: ...318 Cisco Clean Access Integration Perfigo Dell PowerConnect W AirWave 7 1 User Guide ...
Page 330: ...330 Third Party Copyright Information Dell PowerConnect W AirWave 7 1 User Guide ...
Page 334: ...334 Index Dell PowerConnect W AirWave 7 1 User Guide ...


