21. Log in to the CMC web interface and enter the correct time and date. For more information, see the
Dell Chassis
Management Controller for Dell PowerEdge VRTX User’s Guide
at dell.com/esmmanuals.
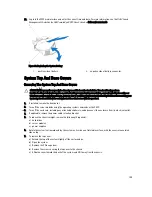
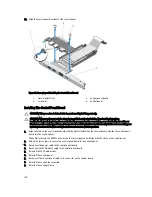
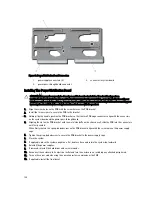
Figure 72. Replacing the System Battery
1.
positive side of battery
2.
negative side of battery connector
System Top And Base Covers
Removing The System Top And Base Covers
CAUTION: Many repairs may only be done by a certified service technician. You should only perform
troubleshooting and simple repairs as authorized in your product documentation, or as directed by the online or
telephone service and support team. Damage due to servicing that is not authorized by Dell is not covered by your
warranty. Read and follow the safety instructions that came with the product.
1.
If installed, remove the front bezel.
2.
Turn off the server modules using the operating system commands or the CMC.
3.
Turn off the enclosure, including any attached peripherals, and disconnect the enclosure from its electrical outlet.
4.
If applicable, remove the power cable retention bracket.
5.
To reduce the chassis weight, remove the following (if required):
a) hard drives
b) server modules
c) power supplies
6.
Rotate the system feet inward and lay the system on its side on a flat stable surface, with the cover release latch
side on top.
7.
To remove the top cover:
a) Extend the top of the system slightly off the surface edge.
b) Open the system.
c) Remove the PCIe cage door.
d) Remove the screw securing the top cover to the chassis.
e) Slide the cover toward the back of the system and lift it away from the chassis.
109
Summary of Contents for PowerEdge M520
Page 1: ...Dell PowerEdge VRTX Enclosure Owner s Manual Regulatory Model E22S Regulatory Type E22S001 ...
Page 8: ...8 ...
Page 34: ...34 ...
Page 66: ...Figure 45 Securing the Power Cable Without Wheel Assembly 1 power cable 2 strap 66 ...
Page 148: ...148 ...
Page 151: ...Figure 94 System Board Connectors Back 1 midplane planar connectors 3 151 ...
Page 152: ...152 ...
Page 158: ...158 ...


