2.
Follow the procedure listed in
Before working inside your system
.
3.
Keep the #2 Phillips screwdriver ready.
CAUTION: To prevent damage to the hard drives/SSDs and the hard drive/SSD backplane,
you must remove the hard drives/SSDs from the blade before removing the hard drive/SSD
backplane.
CAUTION: You must note the number of each hard drive/SSD and temporarily label them
before removal so that you can replace them in the same locations.
4.
Remove the hard drive(s)/SSD(s).
Steps
1.
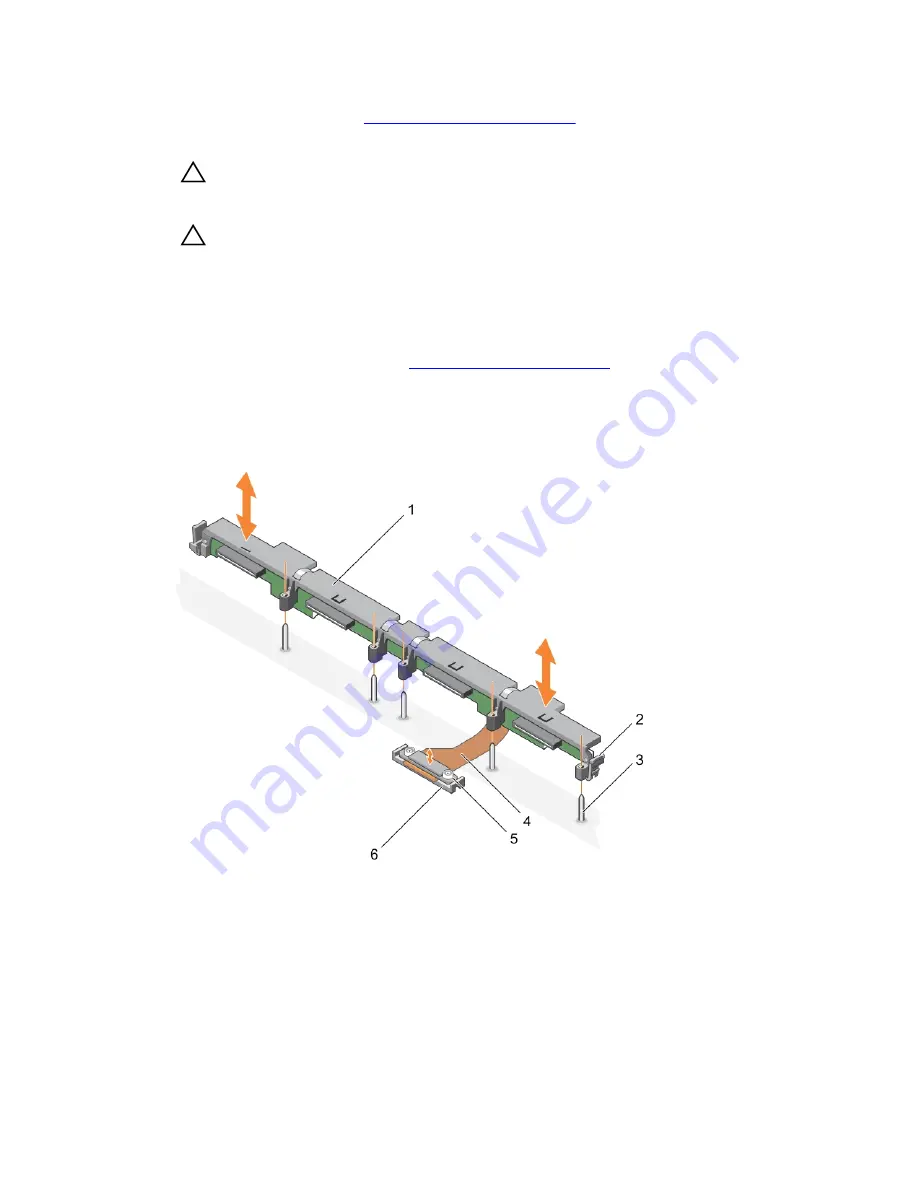
Press the release latches, lift the backplane until the guide pins on the hard drive/SSD cage disengage
from the guides on the hard drive/SSD backplane.
2.
Remove the hard drive/SSD cage. See
Removing a hard drive/SSD cage
.
3.
Loosen the two retention screws securing the hard-drive/SSD backplane cable connector to the
system board connector.
4.
Lift the backplane away from the system.
Figure 34. Removing a 2.5 inch (x4) SATA hard drive/SSD backplane
1.
hard drive/SSD backplane
2. release latch (2)
3. guide pin (5)
4. hard-drive/SSD backplane cable
5. retention screw on the hard-drive/SSD
backplane cable connector (2)
6. connector
93


