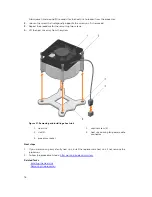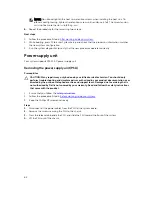
NOTE: Do not overtighten the heat sink retention screws when installing the heat sink. To
prevent overtightening, tighten the retention screw until resistance is felt. The screw tension
must not be more than 6 in-lb (6.9 kg-cm).
6.
Repeat the procedure for the remaining two screws.
Next steps
1.
Follow the procedure listed in
After working inside your system
.
2.
While booting, press F2 to enter System Setup and check that the processor information matches
the new system configuration.
3.
Run the system diagnostics to verify that the new processor operates correctly.
Power supply unit
Your system supports 290 W AC power supply unit.
Removing the power supply unit (PSU)
Prerequisites
CAUTION: Many repairs may only be done by a certified service technician. You should only
perform troubleshooting and simple repairs as authorized in your product documentation, or as
directed by the online or telephone service and support team. Damage due to servicing that is
not authorized by Dell is not covered by your warranty. Read and follow the safety instructions
that came with the product.
1.
Ensure that you follow the
Safety instructions
.
2.
Follow the procedure listed in
Before working inside your system
.
3.
Keep the Phillips #2 screwdriver ready.
Steps
1.
Disconnect all the power cables from the PSU to the system board.
2.
Remove the screws securing the PSU to the chassis.
3.
Press the release tab beside the PSU, and slide the PSU toward the front of the system.
4.
Lift the PSU out of the chassis.
84

