background image

5

Troubleshooting your system

Safety first—for you and your system

CAUTION: Many repairs may only be done by a certified service technician. You should only 
perform troubleshooting and simple repairs as authorized in your product documentation, or as 
directed by the online or telephone service and support team. Damage due to servicing that is 
not authorized by Dell is not covered by your warranty. Read and follow the safety instructions 
that came with the product.


Troubleshooting system startup failure

If you boot the system to the BIOS boot mode after installing an operating system from the UEFI Boot 
Manager, the system stops responding. To avoid this issue, you must boot to the same boot mode in 
which you installed the operating system.

For all other startup issues, note the system messages that appear on the screen.

Troubleshooting external connections

Before troubleshooting any external devices, ensure that all external cables are securely attached to the 
external connectors on your system before troubleshooting any external devices.

Troubleshooting the video subsystem

Steps
1.

Check the power connections to the monitor.

2.

Check the video interface cabling from the system to the monitor.

3.

Run the appropriate diagnostic test.

If the tests run successfully, the problem is not related to video hardware.

Next steps

If the tests fail, see 

Getting Help

.

Troubleshooting a USB device

Prerequisites

NOTE: Follow steps 1 to 6 to troubleshoot a USB keyboard or mouse. For other USB devices, go to 
step 7.

95

Summary of Contents for PowerEdge T130

Page 1: ...Dell PowerEdge T130 Owner s Manual Regulatory Model E36S Series Regulatory Type E36S001 ...

Page 2: ...problem WARNING A WARNING indicates a potential for property damage personal injury or death Copyright 2015 Dell Inc All rights reserved This product is protected by U S and international copyright and intellectual property laws Dell and the Dell logo are trademarks of Dell Inc in the United States and or other jurisdictions All other marks and names mentioned herein may be trademarks of their res...

Page 3: ...ding drivers and firmware 18 3 Pre operating system management applications 20 Navigation keys 20 About system setup 21 Entering System Setup 21 System Setup Main Menu 21 System BIOS screen details 21 System Information screen details 22 Memory Settings screen details 23 Processor Settings screen details 23 SATA Settings screen details 24 Boot Settings screen details 26 Network Settings screen det...

Page 4: ...9 Installing the system cover 40 Bezel 41 Removing the bezel 41 Installing the bezel 42 Inside the system 43 Intrusion switch 44 Removing the intrusion switch 44 Installing the intrusion switch 45 Control panel assembly 45 Removing the control panel assembly 45 Installing the control panel assembly 47 Hard drives 47 Removing the hard drive cage 48 Installing the hard drive cage 49 Removing a hard ...

Page 5: ... 74 Replacing an optional SD vFlash card 74 Removing the optional iDRAC port card 75 Installing the optional iDRAC port card 76 Processors and heat sinks 77 Removing the heat sink 77 Removing the processor 79 Installing the processor 81 Installing the heat sink 82 Power supply unit 84 Removing the power supply unit PSU 84 Installing the power supply unit PSU 86 System battery 86 Replacing the syst...

Page 6: ...g an SD card 103 Troubleshooting an optical drive 103 Troubleshooting a hard drive 104 Troubleshooting a storage controller 104 Troubleshooting expansion cards 105 Troubleshooting processors 106 System messages 106 Warning messages 106 Diagnostic messages 107 Alert messages 107 6 Using system diagnostics 108 Dell Embedded System Diagnostics 108 When to use the Embedded System Diagnostics 108 Runni...

Page 7: ...114 Power specifications 115 Storage controller specifications 115 Drive specifications 115 Connectors specifications 116 Video specifications 116 Environmental specifications 116 9 Getting help 119 Contacting Dell 119 Locating your system Service Tag 119 7 ...

Page 8: ...PowerEdge T130 tower server supports one processor based on the Intel E3 1200 V5 series up to four DIMMs and storage capacity of up to four 3 5 inch cabled hard drives Front panel features and indicators Figure 1 Front panel features and indicators 8 ...

Page 9: ...stem This port is USB 3 0 compliant 5 USB connector Enables you to connect USB devices to the system This port is USB 2 0 compliant Diagnostic indicators The diagnostic indicators on the system front panel display error status during system startup NOTE No diagnostic indicators are lit when the system is switched off To start the system plug it into a working power source and press the power butto...

Page 10: ...riences an electrical error for example voltage out of range or a failed power supply unit PSU or voltage regulator Check the System Event Log or system messages for the specific issue If it is due to a problem with the PSU check the LED on the PSU Reseat the PSU If the problem persists see Getting help Temperature indicator The indicator flashes amber if the system experiences a thermal error for...

Page 11: ...bles you to connect USB devices to the system There are four USB 2 0 compliant ports and two USB 3 0 compliant ports 2 Ethernet connectors 2 Enable you to connect to the Integrated 10 100 1000 Mbps NIC connectors 3 System identification button Enables you to locate a particular system When this button is pressed the system status indicator on the back flashes until the button is pressed again 11 ...

Page 12: ...ly through the optional cable management arm 5 Video connector Enables you to connect a VGA display to the system 6 Power supply Enables you to install one 290 W non redundant AC PSU 7 Self diagnostic button Enables you to check the health status of the PSU 8 AC power supply status indicator Enables you to check the power supply to the PSU 9 Serial connector Enables you to connect a serial device ...

Page 13: ...nk indicator is green The NIC is connected to a valid network at its maximum port speed 1 Gbps C Link indicator is yellow The NIC is connected to a valid network at less than its maximum port speed D Activity indicator is flashing green Network data is being sent or received Power indicator codes for power supply unit Press the self diagnostic button to perform a quick health check on the power su...

Page 14: ...rack Rack documentation included with your rack solution Set up your system and know the system technical specifications Getting Started With Your System that shipped with your system or see Dell com poweredgemanuals Install the operating system Operating system documentation at Dell com operatingsystemmanuals Get an overview of the Dell Systems Management offerings Dell OpenManage Systems Managem...

Page 15: ... Storage controller documentation at Dell com storagecontrollermanuals Check the event and error messages generated by the system firmware and agents that monitor system components Dell Event and Error Messages Reference Guide at Dell com openmanagemanuals OpenManage software Accessing system information by using QRL You can use the Quick Resource Locator QRL to get immediate access to the informa...

Page 16: ...16 ...

Page 17: ... panel You can use the default iDRAC IP address 192 168 0 120 to configure the initial network settings including setting up DHCP or a static IP for iDRAC NOTE To access iDRAC ensure that you install the iDRAC port card or connect the network cable to the Ethernet connector 1 on the system board You can configure iDRAC IP address by using the following interfaces NOTE Make sure that you change the...

Page 18: ...tation at Dell com operatingsystemmanuals Dell Lifecycle Controller see the Dell Lifecycle Controller documentation at Dell com idracmanuals Dell OpenManage Deployment Toolkit see the Dell OpenManage documentation at Dell com openmanagemanuals OpenManage software For information on the list of operating systems supported on your system see the operating system s support matrix at Dell com ossuppor...

Page 19: ... If you do not have the Service Tag select Automatically detect my Service Tag for me to enable the system to automatically detect your service tag or select your product from the Product Selection page 3 Click Get drivers and downloads The drivers that are applicable to your selection are displayed 4 Download the drivers that you need to a USB drive CD or DVD 19 ...

Page 20: ...Controller F11 Enables you to enter Boot Manager F12 Enables you to enter PXE Boot Page Up Enables you to move to the previous screen Page Down Enables you to move to the next screen Up arrow Enables you to move to the previous field Down arrow Enables you to move to the next field Enter Enables you to type a value in the selected field if applicable Spacebar Enables you to expand or collapse a dr...

Page 21: ...iption System BIOS Enables you to configure BIOS settings iDRAC Settings Enables you to configure iDRAC settings The iDRAC settings utility is an interface to set up and configure the iDRAC parameters by using UEFI You can enable or disable various iDRAC parameters by using the iDRAC settings utility For more information about this utility see Integrated Dell Remote Access Controller User s Guide ...

Page 22: ...rd Trusted Platform Module TPM security It also manages the power and NMI buttons on the system Miscellaneous Settings Displays options to change the system date time and so on System Information screen details You can use the System Information screen to view system properties such as Service Tag system model name and the BIOS version To view the System Information screen click System Setup Main ...

Page 23: ...essor Settings screen details You can use the Processor Settings screen to view the processor settings and perform specific functions such as enabling virtualization technology hardware prefetcher and logical processor idling To view the Processor Settings screen click System Setup Main Menu System BIOS Processor Settings The Processor Settings screen details are explained as follows Option Descri...

Page 24: ...per Processor Controls the number of enabled cores in each processor This option is set to All by default Processor 64 bit Support Specifies if the processor s support 64 bit extensions Processor Core Speed Displays the maximum core frequency of the processor Processor 1 The following settings are displayed for each processor installed in the system Option Description Brand Displays the brand name...

Page 25: ...d drive This field is undefined for removable media devices such as optical drives Port C For AHCI or RAID mode BIOS support is always enabled Option Description Model Displays the drive model of the selected device Drive Type Displays the type of drive attached to the SATA port Capacity Displays the total capacity of the hard drive This field is undefined for removable media devices such as optic...

Page 26: ...sables the BIOS Boot Settings menu Setting this field to BIOS disables the UEFI Boot Settings menu CAUTION Switching the boot mode may prevent the system from booting if the operating system is not installed in the same boot mode If the operating system supports UEFI you can set this option to UEFI Setting this field to BIOS allows compatibility with non UEFI operating systems This option is set t...

Page 27: ... handles the network settings To view the UEFI ISCSI Settings screen click System Setup Main Menu System BIOS Network Settings UEFI ISCSI Settings The UEFI ISCSI Settings screen details are explained as follows Option Description ISCSI Initiator Name Specifies the name of the iSCSI initiator iqn format ISCSI Device n n 1 to 4 Enables or disables the iSCSI device When disabled a UEFI boot option is...

Page 28: ...ven if the Embedded Video Controller setting is set to Disabled OS Watchdog Timer If your system stops responding this watchdog timer aids in the recovery of your operating system When this option is set to Enabled the operating system initializes the timer When this option is set to Disabled the default the timer does not have any effect on the system Memory Mapped I O above 4 GB Enables or disab...

Page 29: ...failsafe baud rate for console redirection The BIOS attempts to determine the baud rate automatically This failsafe baud rate is used only if the attempt fails and the value must not be changed This option is set to 115200 by default Remote Terminal Type Sets the remote console terminal type This option is set to VT 100 VT 220 by default Redirection After Boot Enables or disables the BIOS console ...

Page 30: ...g to manipulate the internal behavior of the processor and determines whether to target higher performance or better power savings Number of Turbo Boot Enabled Cores for Processor 1 Controls the number of turbo boost enabled cores for processor 1 The maximum number of cores is enabled by default Monitor Mwait Enables the Monitor Mwait instructions in the processor This option is set to Enabled for...

Page 31: ... This option is set to Off by default Power Button Enables or disables the power button on the front of the system This option is set to Enabled by default NMI Button Enables or disables the NMI button on the front of the system This option is set to Disabled by default AC Power Recovery Sets how the system behaves after AC power is restored to the system This option is set to Last by default AC P...

Page 32: ...ous Settings screen to perform specific functions such as updating the asset tag and changing the system date and time To view the Miscellaneous Settings screen click System Setup Main Menu System BIOS Miscellaneous Settings The Miscellaneous Settings screen details are explained as follows Option Description System Time Enables you to set the time on the system System Date Enables you to set the ...

Page 33: ...e to boot from Launch System Setup Enables you to access System Setup Launch Lifecycle Controller Exits the Boot Manager and invokes the Dell Lifecycle Controller program System Utilities Launches System Utilities menu such as System Diagnostics and UEFI shell About Dell Lifecycle Controller Dell Lifecycle Controller enables you to perform tasks such as configuring BIOS and hardware settings deplo...

Page 34: ...is enabled The password jumper enables or disables the system password and setup password features For more information about the password jumper settings see System board jumpers and connectors Ensure that password status is unlocked in the System Security Settings screen For more information see System Security Settings screen details NOTE If the password jumper setting is disabled the existing ...

Page 35: ... the correct password is entered Deleting or changing system password and setup password Prerequisites Ensure that the password jumper is Enabled and the Password Status is set to Unlocked before attempting to delete or change the existing system or setup password NOTE You cannot delete or change an existing system or setup password if the Password Status is set to Locked Steps 1 To enter System S...

Page 36: ...bedded systems management throughout the server s lifecycle The Dell Lifecycle Controller can be started during the boot sequence and can function independently of the operating system NOTE Certain platform configurations may not support the full set of features provided by the Dell Lifecycle Controller For more information about setting up the Dell Lifecycle Controller configuring hardware and fi...

Page 37: ...AC Settings Thermal 2 Under SYSTEM THERMAL PROFILE Thermal Profile select one of the following options Default Thermal Profile Settings Maximum Performance Performance Optimized Minimum Power Performance per Watt Optimized 3 Under USER COOLING OPTIONS set the Fan Speed Offset Minimum Fan Speed and Custom Minimum Fan Speed 4 Click Back Finish Yes 37 ...

Page 38: ...d by Dell is not covered by your warranty Read and follow the safety instructions that came with the product NOTE Dell recommends that you always use a static mat and static strap while working on components inside the system NOTE To ensure proper operation and cooling all bays in the system must be populated always with either a component or with a blank Before working inside your system Prerequi...

Page 39: ...rewdriver Plastic scribe Wrist grounding strap connected to ground System cover Removing the system cover Prerequisites 1 Ensure that you follow the Safety instructions 2 Turn off the system and any attached peripherals 3 Disconnect the system from the electrical outlet and disconnect the peripherals 4 Lay the system on its side Steps Lift the cover release latch and remove the cover away from the...

Page 40: ...attached peripherals Related Tasks Installing the system cover Installing the system cover Prerequisites 1 Ensure that you follow the Safety instructions 2 Follow the procedure listed in Before working inside your system 3 Ensure that all internal cables are connected and placed out of the way and that no tools or extra parts are left inside the system Steps 1 Align the tabs on the system cover wi...

Page 41: ...ving the bezel Prerequisites 1 Ensure that you follow the Safety instructions 2 Follow the procedure listed in Before working inside your system Steps 1 Lift the retention clips at the edge of the bezel 2 Lift the bezel and pull it away from the system Figure 6 Removing and installing the bezel 1 retention clips 4 2 bezel Next steps 1 Install the bezel 2 Follow the procedure listed in After workin...

Page 42: ... instructions 2 Follow the procedure listed in Before working inside your system Steps 1 Insert the bezel tabs into the bezel tab slots on the chassis 2 Press the bezel into the chassis until the retention clips lock into place Next steps 1 Follow the procedure listed in After working inside your system 42 ...

Page 43: ...e the system Figure 7 Inside the system 1 hard drive 2 processor 3 expansion card retention latch 4 PCIe slots 4 5 system fan 6 power supply unit 7 memory slots 4 8 hard drive cage 9 hard drive cage latch 43 ...

Page 44: ...ervicing that is not authorized by Dell is not covered by your warranty Read and follow the safety instructions that came with the product 1 Ensure that you follow the Safety instructions 2 Follow the procedure listed in Before working inside your system Steps 1 Disconnect the intrusion switch cable from the system board 2 Slide the intrusion switch and push it out of the slot on the chassis Figur...

Page 45: ...tch cable to the system board Next steps Follow the procedure listed in After working inside your system Control panel assembly The control panel assembly contains the power button the diagnostic indicators and the front USB ports Removing the control panel assembly Prerequisites CAUTION Many repairs may only be done by a certified service technician You should only perform troubleshooting and sim...

Page 46: ...g the control panel assembly 1 screw 3 2 control panel assembly 3 control panel assembly guide 2 4 control panel assembly guide slot 2 Next steps 1 Install the control panel assembly 2 Install the bezel 3 Follow the procedure listed in After working inside your system Related Tasks Removing the bezel Installing the control panel assembly Installing the bezel 46 ...

Page 47: ...ol panel assembly 3 Follow the procedure listed in After working inside your system Related Tasks Removing the bezel Installing the bezel Hard drives CAUTION Do not turn off or restart your system while the hard drive is being formatted Doing so can cause a hard drive failure NOTE Do not mix enterprise class hard drives with entry class hard drives Your system supports four 3 5 inch entry hard dri...

Page 48: ...le repairs as authorized in your product documentation or as directed by the online or telephone service and support team Damage due to servicing that is not authorized by Dell is not covered by your warranty Read and follow the safety instructions that came with the product 1 Ensure that you follow the Safety instructions 2 Follow the procedure listed in Before working inside your system 3 Discon...

Page 49: ...cage 3 Install the bezel 4 Reconnect the peripherals disconnected from the control panel assembly 5 Follow the procedure listed in After working inside your system Related Tasks Removing the bezel Installing the hard drive cage Installing the bezel Installing the hard drive cage Prerequisites 1 Ensure that you follow the Safety instructions 2 Follow the procedure listed in Before working inside yo...

Page 50: ...nside your system Related Tasks Removing the bezel Installing the bezel Removing a hard drive carrier from the hard drive cage Prerequisites CAUTION Many repairs may only be done by a certified service technician You should only perform troubleshooting and simple repairs as authorized in your product documentation or as directed by the online or telephone service and support team Damage due to ser...

Page 51: ...rive cage 3 Reconnect the power and data cables to the hard drives and optical drive in the hard drive cage 4 Install the bezel 5 Reconnect the peripherals disconnected from the control panel assembly 6 Follow the procedure listed in After working inside your system Related Tasks Removing the bezel Removing the hard drive cage Installing a hard drive carrier into the hard drive cage Installing the...

Page 52: ...nect the power and data cables to the hard drives and optical drive in the hard drive cage 3 Install the bezel 4 Reconnect the peripherals disconnected from the control panel assembly 5 Follow the procedure listed in After working inside your system Related Tasks Removing the bezel Removing the hard drive cage Installing the hard drive cage Installing the bezel Removing a hard drive carrier from t...

Page 53: ...ard drive carrier into the hard drive bay Installing a hard drive carrier into the hard drive bay Prerequisites CAUTION Many repairs may only be done by a certified service technician You should only perform troubleshooting and simple repairs as authorized in your product documentation or as directed by the online or telephone service and support team Damage due to servicing that is not authorized...

Page 54: ... not authorized by Dell is not covered by your warranty Read and follow the safety instructions that came with the product 1 Ensure that you follow the Safety instructions 2 Follow the procedure listed in Before working inside your system 3 Depending on your requirement remove the hard drive carrier from the hard drive cage or the hard drive bay Steps To release the hard drive flex the sides of th...

Page 55: ...tions that came with the product 1 Ensure that you follow the Safety instructions 2 Follow the procedure listed in Before working inside your system 3 Depending on your requirement remove the hard drive carrier from the hard drive cage or the hard drive bay Steps 1 Orient the hard drive so that the screw holes on one side of the hard drive align with the pins on the carrier 2 Flex the other side o...

Page 56: ...e optical drive and the four 3 5 inch SATA hard drives from the PERC card 1 system board 2 SATA connector on system board 3 SATA connector on optical drive 4 optical drive 5 hard drive 6 SATA connector on hard drive 7 SAS A connector on PERC card 8 PERC card 56 ...

Page 57: ...cal drive 5 optical drive 6 hard drive 7 SATA connector on hard drive Setting the cooling fan speed for 4 TB hard drives Prerequisites NOTE Dell recommends that 4 TB hard drives be used only in systems configured with a PERC controller CAUTION Using 4 TB hard drives in the system without a PERC controller might cause hard drive 1 to overheat under excessive work load leading to a potential failure...

Page 58: ...optical drive blank and filler The optical drive blank is on the bezel and the optical drive filler is located in the optical drive slot on the hard drive cage Prerequisites 1 Ensure that you follow the Safety instructions 2 Follow the procedure listed in Before working inside your system 3 Disconnect all peripherals connected to the control panel assembly 4 Remove the bezel 5 If connected disconn...

Page 59: ...cal drive blank from the bezel 1 bezel 2 retention clip 3 optical drive blank 4 optical drive blank locking tab 2 2 On the hard drive cage hold the tabs on the optical drive filler and remove the optical drive filler from the hard drive cage 59 ...

Page 60: ... Related Tasks Removing the bezel Removing the hard drive cage Installing the hard drive cage Installing the bezel Removing the optical drive Prerequisites CAUTION Many repairs may only be done by a certified service technician You should only perform troubleshooting and simple repairs as authorized in your product documentation or as directed by the online or telephone service and support team Da...

Page 61: ... Removing and installing the optical drive 1 SATA and power cable 2 release tab 3 optical drive 4 hard drive cage Next steps 1 Install the optical drive 2 Install the hard drive cage 3 Reconnect the disconnected data and power cables to the hard drives and optical drive 4 Install the bezel 5 Reconnect the peripherals disconnected from the control panel assembly 6 Follow the procedure listed in Aft...

Page 62: ...he hard drive cage 7 If installed remove the optical drive blank from the bezel and the optical drive filler from the hard drive cage Steps 1 Align the optical drive with the optical drive slot on the front of the chassis 2 Slide the optical drive into the slot until the release tab locks into place 3 Connect the power and data cables to the optical drive 4 Route the power and data cables through ...

Page 63: ...and the second socket release lever is marked black Figure 19 Memory socket locations on the system board Memory channels are organized as follows Processor 1 channel 0 memory sockets A1 and A3 channel 1 memory sockets A2 and A4 The following table shows the memory populations and operating frequencies for the supported configurations Table 6 Memory populations and operating frequencies for the su...

Page 64: ...vers and 4 GB DIMMs in the sockets with black release levers Memory modules of different capacities can be mixed provided other memory population rules are followed for example 4 GB and 8 GB memory modules can be mixed Mixing of more than two DIMM capacities in a system is not supported Populate two DIMMs per processor one DIMM per channel at a time to maximize performance Sample memory configurat...

Page 65: ...anty Read and follow the safety instructions that came with the product 1 Ensure that you follow the Safety instructions 2 Follow the procedure listed in Before working inside your system WARNING The memory modules are hot to touch for some time after the system has been powered down Allow the memory modules to cool before handling them Handle the memory modules by the card edges and avoid touchin...

Page 66: ...am Damage due to servicing that is not authorized by Dell is not covered by your warranty Read and follow the safety instructions that came with the product 1 Ensure that you follow the Safety instructions 2 Follow the procedure listed in Before working inside your system WARNING The memory modules are hot to touch for some time after the system has been powered down Allow the memory modules to co...

Page 67: ... the memory module evenly 3 Press the memory module with your thumbs until the socket levers firmly click into place Figure 21 Installing the memory module 1 memory module 2 alignment key 3 memory module socket ejector 2 Next steps 1 Follow the procedure listed in After working inside your system 2 Press F2 to enter System Setup and check the System Memory setting The System Memory Size should ref...

Page 68: ...l the cooling fan by holding the blades CAUTION Never operate your system with the system fan removed System can overheat and result in shutdown of the system and loss of data 1 Ensure that you follow the Safety instructions 2 Follow the procedure listed in Before working inside your system Steps 1 Disconnect the cooling fan power cable from the system board 2 To ease removal of the cooling fan st...

Page 69: ...first Steps 1 Hold the cooling fan by the sides with the cable end facing the bottom of the chassis 2 Align the four grommets on the chassis with the four holes on the sides of the cooling fan 3 Pass the grommets through the corresponding holes on the cooling fan 4 Stretch the grommets and slide the cooling fan toward the chassis until it locks into place 5 Connect the cooling fan power cable to t...

Page 70: ...follow the Safety instructions 2 Follow the procedure listed in Before working inside your system Steps 1 Locate the USB connector or USB memory key on the system board NOTE To locate the internal USB connector on the system board see System board jumpers and connectors 2 If installed remove the USB memory key from the USB connector 3 Insert the replacement USB memory key into the USB connector Fi...

Page 71: ...ler Hub Full Height Half Length x4 x8 NOTE All slots support Generation 3 PCIe expansion cards NOTE The expansion cards are not hot swappable The following table provides a guide for installing expansion cards to ensure proper cooling and mechanical fit Install the expansion card by following the card priority and slot priority order as shown in the table Table 9 Expansion card installation order ...

Page 72: ... Steps 1 Disconnect all the cables from the expansion card 2 Press and push out the expansion card release latch 3 Holding the card by its edge pull the card to disengage it from the connector and lift the card out of the chassis 4 If you are removing the card permanently install an expansion card blank in the empty card slot The steps for installing or removing an expansion card blank are similar...

Page 73: ...e by a certified service technician You should only perform troubleshooting and simple repairs as authorized in your product documentation or as directed by the online or telephone service and support team Damage due to servicing that is not authorized by Dell is not covered by your warranty Read and follow the safety instructions that came with the product 1 Ensure that you follow the Safety inst...

Page 74: ...toward the system until it clicks into place Next steps Follow the procedure listed in After working inside your system iDRAC port card optional The iDRAC port card consists of the SD vFlash card slot and an iDRAC port The iDRAC port card features a dedicated NIC port and is used for remote advanced management of the system through the network An SD vFlash card is a Secure Digital SD card that plu...

Page 75: ...d in your product documentation or as directed by the online or telephone service and support team Damage due to servicing that is not authorized by Dell is not covered by your warranty Read and follow the safety instructions that came with the product 1 Ensure that you follow the Safety instructions 2 Follow the procedure listed in Before working inside your system 3 Keep the Phillips 2 screwdriv...

Page 76: ...ystem Related Tasks Installing the optional iDRAC port card Installing the optional iDRAC port card Prerequisites CAUTION Many repairs may only be done by a certified service technician You should only perform troubleshooting and simple repairs as authorized in your product documentation or as directed by the online or telephone service and support team Damage due to servicing that is not authoriz...

Page 77: ...bleshooting and simple repairs as authorized in your product documentation or as directed by the online or telephone service and support team Damage due to servicing that is not authorized by Dell is not covered by your warranty Read and follow the safety instructions that came with the product CAUTION Never remove the heat sink from a processor unless you intend to remove the processor The heat s...

Page 78: ...sink away from the system Figure 27 Removing and installing a heat sink 1 heat sink 2 captive screw 4 3 slot 4 4 heat sink cooling fan power cable connector 5 processor socket Next steps 1 If you are removing only a faulty heat sink install the replacement heat sink if not remove the processor 2 Follow the procedure listed in After working inside your system Related Tasks Installing the heat sink ...

Page 79: ...OTE You can update the system BIOS by using the Dell Lifecycle Controller 4 Follow the procedure listed in Before working inside your system 5 Remove the heat sink WARNING The processor will be hot to touch for some time after the system has been powered down Allow the processor to cool before removing it CAUTION The processor is held in its socket under strong pressure Be aware that the release l...

Page 80: ...Figure 28 Opening and closing the processor shield 1 processor shield 2 tab on the processor shield 3 socket lever 80 ...

Page 81: ...epairs may only be done by a certified service technician You should only perform troubleshooting and simple repairs as authorized in your product documentation or as directed by the online or telephone service and support team Damage due to servicing that is not authorized by Dell is not covered by your warranty Read and follow the safety instructions that came with the product NOTE This is a Fie...

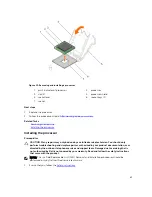
Page 82: ...the triangle on the socket 5 Place the processor on the socket such that the slots on the processor align with the socket keys 6 Close the processor shield by sliding it under the retention screw 7 Lower the socket lever and push it under the tab to lock it Next steps NOTE Ensure that you install the heat sink after you install the processor The heat sink is necessary to maintain proper thermal co...

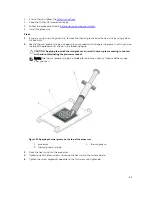
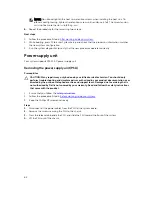
Page 83: ... on the top of the processor as shown in the following figure CAUTION Applying too much thermal grease can result in excess grease coming in contact with and contaminating the processor socket NOTE The thermal grease syringe is intended for one time use only Dispose of the syringe after you use it Figure 30 Applying thermal grease on the top of the processor 1 processor 2 thermal grease 3 thermal ...

Page 84: ...power supply unit PSU Prerequisites CAUTION Many repairs may only be done by a certified service technician You should only perform troubleshooting and simple repairs as authorized in your product documentation or as directed by the online or telephone service and support team Damage due to servicing that is not authorized by Dell is not covered by your warranty Read and follow the safety instruct...

Page 85: ... PSU 1 screws 4 2 PSU 3 release tab 4 P1 power cable 5 P2 power cable 6 PSU support guide Next steps 1 Install the PSU 2 Follow the procedure listed in After working inside your system Related Tasks Installing the power supply unit PSU 85 ...

Page 86: ...uctions 2 Follow the procedure listed in Before working inside your system 3 Keep the plastic scribe ready WARNING There is a danger of a new battery exploding if it is incorrectly installed Replace the battery only with the same or equivalent type recommended by the manufacturer For more information see the safety information that shipped with your system CAUTION Many repairs may only be done by ...

Page 87: ...ess the battery into the connector until it snaps into place Figure 33 Installing the system battery 1 positive side of the battery connector 2 battery connector Next steps 1 Follow the procedure listed in After working inside your system 2 While booting press F2 to enter System Setup and ensure that the battery is operating properly 3 Enter the correct time and date in the System Setup Time and D...

Page 88: ...your hard drives CAUTION Do not attempt to remove the TPM plug in module from the system board After the TPM plug in module is installed it is cryptographically bound to that specific system board Any attempt to remove an installed TPM plug in module breaks the cryptographic binding and it cannot be re installed or installed on another system board 1 Ensure that you follow the Safety instructions ...

Page 89: ...Figure 34 Removing and installing the system board 1 touch point 2 2 system board 3 system board t handle post 89 ...

Page 90: ...C port card Installing the system board Prerequisites CAUTION Many repairs may only be done by a certified service technician You should only perform troubleshooting and simple repairs as authorized in your product documentation or as directed by the online or telephone service and support team Damage due to servicing that is not authorized by Dell is not covered by your warranty Read and follow t...

Page 91: ...2 Reinstall the following components a memory modules b heat sink and processor c iDRAC port card if removed 3 Reconnect all cables to the system board NOTE Ensure that the cables inside the system are routed through the cable routing latch 4 Follow the procedure listed in After working inside your system 5 Import your new or existing iDRAC Enterprise license For more information see the Integrate...

Page 92: ... installation procedures must be performed only by Dell certified service technicians Installing the Trusted Platform Module Prerequisites CAUTION Many repairs may only be done by a certified service technician You should only perform troubleshooting and simple repairs as authorized in your product documentation or as directed by the online or telephone service and support team Damage due to servi...

Page 93: ...e information about initializing the TPM see http technet microsoft com en us library cc753140 aspx The TPM Status changes to Enabled Activated Re enabling the TPM for TXT users 1 While booting your system press F2 to enter System Setup 2 In the System Setup Main Menu click System BIOS System Security Settings 3 In the TPM Security option select On with Pre boot Measurements 4 In the TPM Command o...

Page 94: ...8 In the System Setup Main Menu click System BIOS System Security Settings 9 In the Intel TXT option select On 94 ...

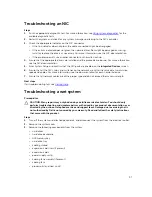
Page 95: ...this issue you must boot to the same boot mode in which you installed the operating system For all other startup issues note the system messages that appear on the screen Troubleshooting external connections Before troubleshooting any external devices ensure that all external cables are securely attached to the external connectors on your system before troubleshooting any external devices Troubles...

Page 96: ...ces screen If your keyboard is not functioning use remote access to enable or disable the USB options 10 Check if USB 3 0 is enabled in System Setup If it is enabled disable it and restart your system 11 If the system is not accessible reset the NVRAM_CLR jumper inside your system and restore the BIOS to the default settings 12 In the IDRAC Settings Utility ensure that USB Management Port Mode is ...

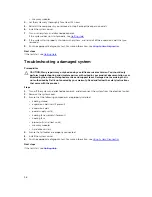
Page 97: ...set to the same data transmission speed and duplex For more information see the documentation for each network device 7 Ensure that all network cables are of the proper type and do not exceed the maximum length Next steps If all troubleshooting fails see Getting Help Troubleshooting a wet system Prerequisites CAUTION Many repairs may only be done by a certified service technician You should only p...

Page 98: ...d simple repairs as authorized in your product documentation or as directed by the online or telephone service and support team Damage due to servicing that is not authorized by Dell is not covered by your warranty Read and follow the safety instructions that came with the product Steps 1 Turn off the system and attached peripherals and disconnect the system from the electrical outlet 2 Remove the...

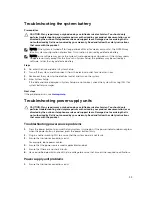
Page 99: ...stem 4 Enter System Setup If the date and time displayed in System Setup are not correct check the System Error Log SEL for system battery messages Next steps If the problem persists see Getting Help Troubleshooting power supply units CAUTION Many repairs may only be done by a certified service technician You should only perform troubleshooting and simple repairs as authorized in your product docu...

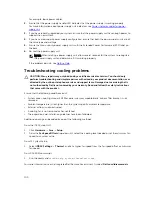
Page 100: ...as authorized in your product documentation or as directed by the online or telephone service and support team Damage due to servicing that is not authorized by Dell is not covered by your warranty Read and follow the safety instructions that came with the product Ensure that the following conditions exist System cover cooling shroud EMI filler panel memory module blank or back filler bracket is n...

Page 101: ...am Damage due to servicing that is not authorized by Dell is not covered by your warranty Read and follow the safety instructions that came with the product Steps 1 If the system is operational run the appropriate system diagnostic test See Using system diagnostics for the available diagnostic tests If the diagnostic tests indicate a fault follow the corrective actions provided by the diagnostic t...

Page 102: ...or each memory module installed Next steps If the problem persists after all memory modules have been checked see Getting Help Troubleshooting an internal USB key Prerequisites CAUTION Many repairs may only be done by a certified service technician You should only perform troubleshooting and simple repairs as authorized in your product documentation or as directed by the online or telephone servic...

Page 103: ...he failed SD card with a new SD card 5 Install the system cover 6 Reconnect the system to its electrical outlet and turn on the system including any attached peripherals 7 Enter System Setup and ensure that the Internal SD Card Port and Internal SD Card Redundancy modes are set to the required modes Verify that the correct SD slot is set as Primary SD Card 8 Check if the SD card is functioning pro...

Page 104: ...er and your hard drives are configured in a RAID array perform the following steps a Restart the system and press F10 during system startup to run the Dell Lifecycle Controller and then run the Hardware Configuration wizard to check the RAID configuration See the Dell Lifecycle Controller documentation or online help for information on RAID configuration b Ensure that the hard drives are configure...

Page 105: ...n card you removed in step 10 perform the following steps a Turn off the system and attached peripherals and disconnect the system from the electrical outlet b Remove the system cover c Reinstall one of the expansion cards d Install the system cover e Run the appropriate diagnostic test For more information see Using system diagnostics If the tests fail see Getting Help Troubleshooting expansion c...

Page 106: ...s not covered by your warranty Read and follow the safety instructions that came with the product Steps 1 Run the appropriate diagnostics test See Using system diagnostics for available diagnostic tests 2 Turn off the system and attached peripherals and disconnect the system from the electrical outlet 3 Remove the system cover 4 Ensure that the processor and heat sink are properly installed 5 Inst...

Page 107: ... about system diagnostics see Using system diagnostics Alert messages The systems management software generates alert messages for your system Alert messages include information status warning and failure messages for drive temperature fan and power conditions For more information see the systems management software documentation 107 ...

Page 108: ...l test options to provide extra information about the failed device s View status messages that inform you if tests are completed successfully View error messages that inform you of problems encountered during testing When to use the Embedded System Diagnostics Run the Embedded System Diagnostics ePSA if your system does not boot Running the Embedded System Diagnostics from Boot Manager 1 When the...

Page 109: ...all detected devices Results Displays the results of all tests that are executed System health Provides the current overview of the system performance Event log Displays a time stamped log of the results of all tests run on the system This is displayed if at least one event description is recorded 109 ...

Page 110: ...ors System board jumpers and connectors Figure 37 System board jumpers and connectors Table 10 System board jumpers and connectors Ite m Connector Description 1 FP_USB Front panel USB connector 2 CTRL_PNL Control panel 110 ...

Page 111: ...ard connector 12 A1 A2 A3 A4 Memory module sockets 13 CPU_PWR CPU power connector P2 14 CPU Processor socket 15 SATA 0 3 SATAe Mini SAS connector 16 SATA_ODD SSD Optical disk drive connector 17 SYS_PWR System power connector P1 18 PWRD_EN Password jumper 19 J_SATA_2 SATA connector 2 20 CTRL_PNL Control panel connector 21 NVRAM_CLR NVRAM password jumper 22 CPU_FAN CPU fan connector 23 TPM Trusted p...

Page 112: ...e password features or disables them and clears any password s currently in use Prerequisites CAUTION Many repairs may only be done by a certified service technician You should only perform troubleshooting and simple repairs as authorized in your product documentation or as directed by the online or telephone service and support team Damage due to servicing that is not authorized by Dell is not co...

Page 113: ...trical outlet 7 Remove the system cover 8 Move the jumper on the system board jumper from pins 1 and 2 to pins 2 and 3 9 Install the system cover 10 Reconnect the system to its electrical outlet and turn on the system including any attached peripherals 11 Assign a new system or setup password 113 ...

Page 114: ...ot 1 One full height half length x4 PCIe Gen3 card slot connected to processor Slot 2 One full height half length x8 PCIe Gen3 card slot connected to processor Slot 3 One full height full length x1 PCIe Gen3 card slot connected to Platform Controller Hub PCH Slot 4 One full height full length x4 PCIe Gen3 card slot connected to PCH Memory specifications Memory Specification Architecture 1600 MT s ...

Page 115: ... designed to be connected to IT power systems with a phase to phase voltage not exceeding 230 V Storage controller specifications Storage controller Specification Storage controller type PERC H730 PERC H330 PERC H830 PERC S130 NOTE Your system supports software RAID S130 and a PERC card For more information on software RAID see the Dell PowerEdge RAID Controller PERC documentation at Dell com stor...

Page 116: ...wo Hi Speed USB Host connectors One USB 2 0 and one USB 3 0 Internal connectors Specification USB One 9 pin USB 3 0 compliant Video specifications Video Specification Video type Integrated Matrox G200 Video memory 16 MB shared Environmental specifications NOTE For additional information about environmental measurements for specific system configurations see Dell com environmental_datasheets Temper...

Page 117: ...ecifications Operating 3048 m 10 000 ft Storage 12 000 m 39 370 ft Operating temperature de rating Specifications Up to 35 C 95 F Maximum temperature is reduced by 1 C 300 m 1 F 547 ft above 950 m 3 117 ft The following section defines the limits to help avoid IT equipment damage and or failure from particulates and gaseous contamination If the levels of particulates or gaseous pollution are beyon...

Page 118: ...rrosive dust Air must be free of corrosive dust Residual dust present in the air must have a deliquescent point less than 60 relative humidity NOTE Applies to data center and non data center environments Gaseous contamination Specifications Copper coupon corrosion rate 300 Å month per Class G1 as defined by ANSI ISA71 04 1985 Silver coupon corrosion rate 200 Å month as defined by AHSRAE TC9 9 NOTE...

Page 119: ... Submit The support page that lists the various support categories is displayed 4 For general support a Select your product category b Select your product segment c Select your product The support page that lists the various support categories is displayed Locating your system Service Tag Your system is identified by a unique Express Service Code and Service Tag number The Express Service Code and...

Reviews: