background image

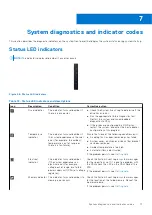
Table 79. NIC indicator codes (continued)

NIC indicator codes

Condition

Link indicator is green, and activity indicator is off.

Indicates that the NIC is connected to a valid network at its maximum
port speed, and data is not being sent or received.

Link indicator is amber, and activity indicator is off.

Indicates that the NIC is connected to a valid network at less than its
maximum port speed, and data is not being sent or received.

Link indicator is blinking green, and activity is off.

Indicates that the NIC identity is enabled through the NIC
configuration utility.

Power supply unit indicator codes

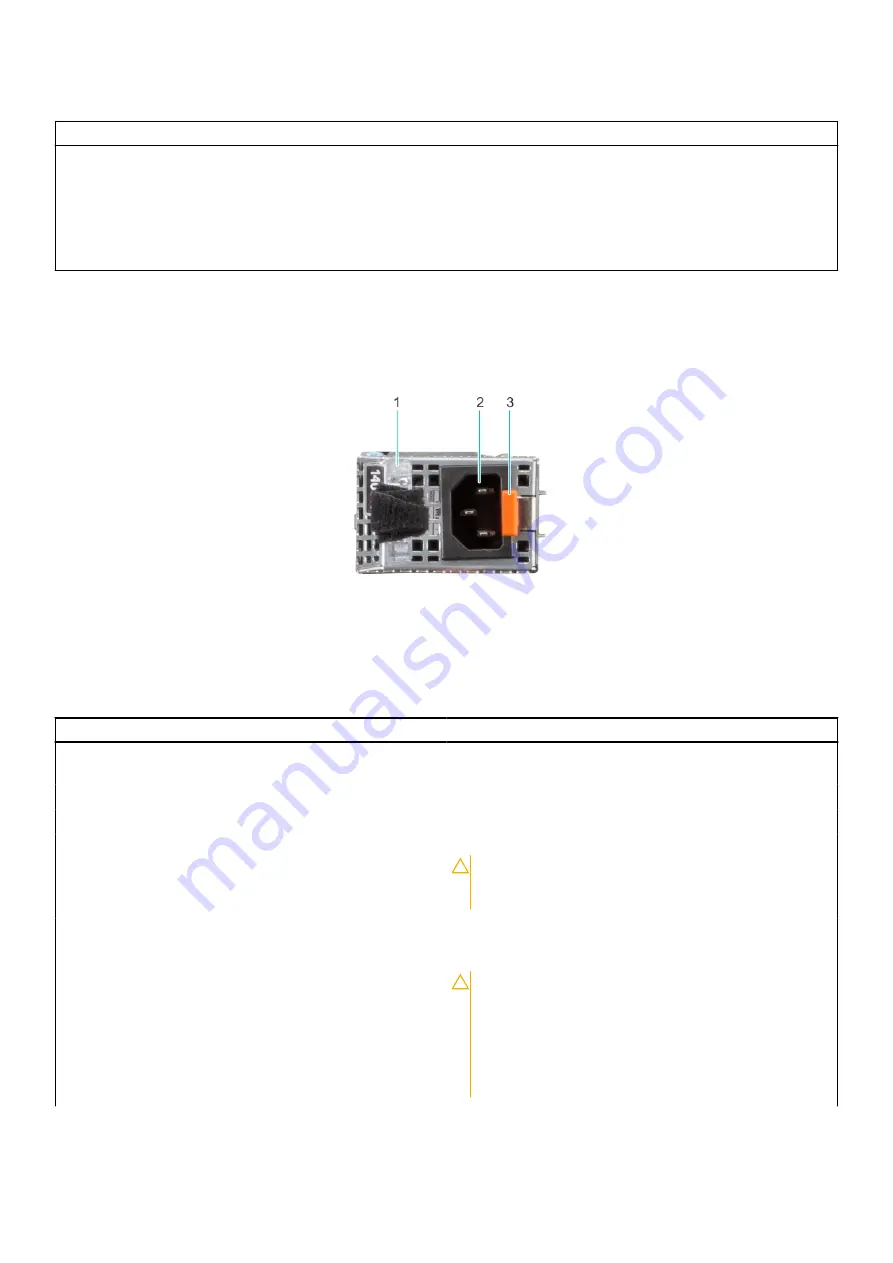
AC and DC power supply units (PSUs) have an illuminated translucent handle that serves as an indicator. The indicator shows if
power is present or if a power fault has occurred.

Figure 70. AC PSU status indicator

1. AC PSU handle
2. Socket
3. Release latch

Table 80. AC PSU status indicator codes 

Power indicator codes

Condition

Green

Indicates that a valid power source is connected to the PSU
and the PSU is operational.

Blinking amber

Indicates an issue with the PSU.

Not powered on

Indicates that the power is not connected to the PSU.

Blinking green

Indicates that the firmware of the PSU is being updated.

CAUTION:

 Do not disconnect the power cord or

unplug the PSU when updating firmware. If firmware
update is interrupted, the PSUs will not function.

Blinking green and powers off

When hot-plugging a PSU, it blinks green five times at a rate
of 4 Hz and powers off. This indicates a PSU mismatch due to
efficiency, feature set, health status, or supported voltage.

CAUTION:

 If two PSUs are installed, both the PSUs

must have the same type of label; for example,
Extended Power Performance (EPP) label. Mixing
PSUs from previous generations of PowerEdge
servers is not supported, even if the PSUs have the
same power rating. This results in a PSU mismatch
condition or failure to power on the system.

82

System diagnostics and indicator codes

Summary of Contents for PowerFlex R750

Page 1: ...Dell Technologies PowerFlex Custom Node R750 Owner s Guide October 2021 Rev 01 ...

Page 2: ...ential damage to hardware or loss of data and tells you how to avoid the problem WARNING A WARNING indicates a potential for property damage personal injury or death 2021 Dell Inc or its subsidiaries All rights reserved Dell EMC and other trademarks are trademarks of Dell Inc or its subsidiaries Other trademarks may be trademarks of their respective owners ...

Page 3: ...0 Cable routing 38 Drive backplane 42 Expansion cards and expansion card risers 44 Expansion card installation guidelines 44 Supported GPU cards 60 System memory 60 System memory guidelines 60 General memory module installation guidelines 62 Intel Persistent Memory 200 series BPS installation guidelines 62 NVDIMM N memory module installation guidelines 67 Chapter 5 Upgrade kits 69 BOSS S2 module k...

Page 4: ...s 82 Drive indicator codes 84 Using system diagnostics 84 Dell Embedded System Diagnostics 85 Chapter 8 Getting help 86 Recycling or End of Life service information 86 Contacting Dell Technologies 86 Accessing system information by using QRL 86 Quick Resource Locator for PowerEdge R750 system 87 Receiving automated support with SupportAssist 87 Chapter 9 Documentation resources 88 4 Contents ...

Page 5: ...bout this guide This guide provides an overview of the R750 system diagnostic tools and additional component installation guidelines Use this guide for information about your system 1 About this guide 5 ...

Page 6: ...are not validated and tested by Dell Damage caused by unauthorized and invalidated hardware installation will null and void the system warranty NOTE For more information see the Dell EMC PowerEdge R750 Technical Specifications on the product documentation page Front view of the system Figure 1 Front view of the 24 x 2 5 inch drive system Table 1 Features available on the front of the system Item P...

Page 7: ...rmation tag is a slide out label panel that contains system information such as Service Tag NIC MAC address and so on If you have opted for the secure default access to iDRAC then the Information tag will also contain the iDRAC secure default password NOTE For more information see the Dell EMC PowerEdge R750 Technical Specifications on the product documentation page Left control panel view Figure ...

Page 8: ...rnel based Virtual Machine KVM on a supported mobile device For more information see the Integrated Dell Remote Access Controller User s Guide at www dell com poweredgemanuals NOTE For more information about the indicator codes see System diagnostics and indicator codes Right control panel view Figure 4 Right control panel view Table 4 Right control panel Ite m Indicator or button Icon Description...

Page 9: ...xpress expansion cards For more information about the expansion cards supported on your system see expansion card guidelines 5 PCIe expansion card riser 3 slot 4 and slot 5 N A The expansion card riser enables you to connect PCI Express expansion cards For more information about the expansion cards supported on your system see expansion card guidelines 6 USB 2 0 port 1 This port is USB 2 0 complia...

Page 10: ... press and hold the system ID button for more than 5 s to enter the BIOS progress mode 13 OCP NIC port optional N A This port supports OCP 3 0 The NIC ports are integrated on the OCP card which is connected to the system board 14 NIC port 1 2 The NIC ports are embedded on the LOM card that is connected to the system board 15 Power supply unit PSU 1 For more information about the PSU configurations...

Page 11: ...module bay 3 Riser 1 4 Power supply unit PSU 1 5 Riser 2 cage 6 System board 7 Air shroud 8 Cooling fan 9 Drive backplane cover 10 Service tag 11 Cooling fan cage assembly 12 Power supply unit PSU 2 13 Riser 3 14 Riser 4 15 Intrusion switch module System overview 11 ...

Page 12: ...rvice Tag are used to identify the system The information tag is located on the front of the system that includes system information such as the Service Tag Express Service Code Manufacture date NIC MAC address QRL label and so on If you have opted for the secure default access to iDRAC the Information tag also contains the iDRAC secure default password If you have opted for iDRAC Quick Sync 2 the...

Page 13: ... Service Tag MEST label is located on the rear of the system that includes the Service Tag ST Express Service Code Exp Svc Code and Manufacture Date Mfg Date The Exp Svc Code is used by Dell EMC to route support calls to the appropriate personnel Alternatively the Service Tag information is located on a label on the left wall of the chassis System information label The system information label is ...

Page 14: ...Figure 9 Service information Figure 10 Memory information and system board connectors 14 System overview ...

Page 15: ...Figure 11 LED behavior Figure 12 Icon legend Figure 13 Configuration and layout for 2 5 inch drive system Figure 14 Configuration and layout for 3 5 inch drive system System overview 15 ...

Page 16: ...Figure 15 System tasks Figure 16 Heat sink Figure 17 BOSS S2 Figure 18 Express service tag 16 System overview ...

Page 17: ...l com sites csdocuments Business_solutions_engineering Docs_Documents en rail rack matrix pdf The document provides the information that is listed below Specific details about rail types and their functionalities Rail adjustability range for various types of rack mounting flanges Rail depth with and without cable management accessories Types of racks supported for various types of rack mounting fl...

Page 18: ...ements During POST any configuration validation error is logged in the System Event Log SEL LifeCycle LC log The reported events are categorized in the configuration validation error table Table 6 Configuration validation error Error Description Possible cause and recommendations Example Config Error A configuration element within the closest match contains something that is unexpected and does no...

Page 19: ...stem Configuration Check operation Recommended Response Action Do the following and retry the operation 1 Disconnect the input power 2 Check for proper cable connection and component placement If the issue persists contact the service provider Category System Health HWC Hardware Config Severity Critical Trap EventID 2329 Table 8 Error message HWC8011 Error code HWC8011 Message The System Configura...

Page 20: ...e 9 8 x 2 5 inch SAS with NVMe and fPERC From To SIG_PWR_1 system board power connector BP_PWR_1 backplane power connector SL1_CPU2_PB1 signal connector on system board BP_DST_PA1 backplane signal connector SL2_CPU2_PA1 signal connector on system board BP_DST_PB1 backplane signal connector SL3_CPU1_PB2 signal connector on system board and SL4_CPU1_PA2 signal connector on system board BP_DST_PA2 ba...

Page 21: ...kplane signal connector and BP_DST_PB1 backplane signal connector CTRL_SRC_PB1 fPERC controller connector BP_DST_PA2 backplane signal connector and BP_DST_PB2 backplane signal connector SL1_CPU2_PB1 signal connector on system board CTRL_DST_PA1 fPERC input connector SL3_CPU1_PB2 signal connector on system board and SL4_CPU1_PA2 signal connector on system board Riser 1C signal connector from Riser ...

Page 22: ...B1 signal connector on system board CTRL_DST_PA1 fPERC input connector SIG_PWR_2 system board power connector BP_PWR_1 backplane power connector CTRL_SRC_PA1 fPERC controller connector BP_DST_PA1 backplane signal connector and BP_DST_PB1 backplane signal connector CTRL_SRC_PB1 fPERC controller connector BP_DST_PA2 backplane signal connector and BP_DST_PB2 backplane signal connector SL2_CPU2_PA1 si...

Page 23: ...ST_PA2 backplane signal connector SL2_CPU2_PA1 signal connector on system board BP_DST_PB2 backplane signal connector SL3_CPU1_PB2 signal connector on system board and SL4_CPU1_PA2 signal connector on system board BP_DST_PA1 backplane signal connector and BP_DST_PB1 backplane signal connector SIG_PWR_2 system board power connector BP_PWR_1 backplane power connector Riser 1 R1 paddle card on Riser ...

Page 24: ...or and BP_DST_PB2 backplane signal connector SL1_CPU2_PB1 signal connector on system board CTRL_DST_PA1 fPERC input connector SIG_PWR_2 system board power connector BP_PWR_1 backplane power connector CTRL_SRC_PA1 fPERC controller connector BP_DST_PA1 backplane signal connector and BP_DST_PB1 backplane signal connector CTRL_SRC_PB1 fPERC controller connector BP_DST_PA2 backplane signal connector an...

Page 25: ...m board power connector BP_PWR_1 backplane power connector CTRL_SRC_SB1 fPERC controller connector BP_DST_SB1 backplane signal connector SL3_CPU1_PB2 signal connector on system board CTRL_DST_PA1 fPERC input connector Figure 25 16 x 2 5 inch SAS SATA with fPERC and Riser 1C Component installation guidelines 25 ...

Page 26: ... 16 16 x 2 5 inch SAS SATA 8 x 2 5 inch NVMe with fPERC From To SIG_PWR_1 system board power connector BP_PWR_1 backplane power connector CTRL_SRC_SB1 fPERC controller connector BP_DST_SB1 backplane signal connector SL3_CPU1_PB2 signal connector on system board CTRL_DST_PA1 fPERC input connector SL1_CPU2_PB1 signal connector on system board BP_DST_PA1 backplane signal connector SL2_CPU2_PA1 signal...

Page 27: ...1 backplane power connector CTRL_SRC_PB1 fPERC controller connector DST_SB1 backplane expander signal connector SL3_CPU1_PB2 signal connector on system board CTRL_DST_PA1 fPERC input connector SIG_PWR_2 system board power connector BP_PWR_2 backplane power connector Figure 28 24 x 2 5 inch SAS SATA with expander fPERC and Riser 1C Component installation guidelines 27 ...

Page 28: ... expander and fPERC Table 19 24 x 2 5 inch SAS SATA 8 universal 16 SAS with expander and fPERC From To SIG_PWR_1 system board power connector BP_PWR_1 backplane power connector CTRL_SRC_SB1 fPERC controller connector DST_SB1 backplane signal connector SL3_CPU1_PB2 signal connector on system board CTRL_DST_PA1 fPERC input connector SL1_CPU2_PB1 signal connector on system board BP_DST_PA1 backplane ...

Page 29: ...nector BP_PWR_1 backplane power connector APERC_CTRL_SRC_SA1 adapter PERC controller connector DST_SB1 backplane expander signal connector SIG_PWR_2 system board power connector BP_PWR_2 backplane power connector SL3_CPU1_PB2 signal connector on system board CTRL_DST_PA1 fPERC input connector Figure 31 24 x 2 5 inch SAS SATA with dual controller expander fPERC and APERC in Riser 2 Component instal...

Page 30: ... SATA 2 x 2 5 inch SAS with expander and fPERC Table 22 24 x 2 5 inch SAS SATA 2 x 2 5 inch SAS with expander and fPERC From To SIG_PWR_1 system board power connector BP_PWR_1 backplane power connector CTRL_SRC_SB1 fPERC controller connector DST_SB1 backplane expander signal connector SIG_PWR_2 system board power connector BP_PWR_2 backplane power connector SL3_CPU1_PB2 signal connector on system ...

Page 31: ...r DST_SB1 backplane expander signal connector SIG_PWR_2 system board power connector BP_PWR_2 backplane power connector SL3_CPU1_PB2 signal connector on system board CTRL_DST_PA1 fPERC input connector SIG_PWR_0 system board power connector BP_PWR_1 rear backplane power connector SL7_CPU1_PA5 signal connector on system board BP_DST_PA1 rear backplane expander signal connector and BP_DST_PB1 rear ba...

Page 32: ...B1 fPERC controller connector DST_SB1 backplane expander signal connector SIG_PWR_2 system board power connector BP_PWR_2 backplane power connector SL3_CPU1_PB2 signal connector on system board CTRL_DST_PA1 fPERC input connector SIG_PWR_0 system board power connector BP_PWR_1 rear backplane power connector SRC_SA1 backplane expander signal connector BP_DST_SA1 rear backplane expander signal connec...

Page 33: ...tem board power connector BP_PWR_2 backplane power connector SL3_CPU1_PB2 signal connector on system board CTRL_DST_PA1 fPERC input connector SIG_PWR_0 system board power connector BP_PWR_1 rear backplane power connector SL4_CPU1_PA2 signal connector on system board BP_DST_PA1 rear backplane signal connector and BP_DST_PB1 rear backplane signal connector SL7_CPU1_PA5 signal connector on system boa...

Page 34: ... CTRL_SRC_SB1 fPERC controller connector DST_SB1 backplane expander signal connector SIG_PWR_2 system board power connector BP_PWR_2 backplane power connector SL3_CPU1_PB2 signal connector on system board CTRL_DST_PA1 fPERC input connector SIG_PWR_0 system board power connector BP_PWR_1 rear backplane power connector APERC_CTRL_SRC_SA1 adapter PERC controller connector BP_DST_SA1 rear backplane ex...

Page 35: ... CTRL_SRC_SB1 fPERC controller connector DST_SB1 backplane expander signal connector SIG_PWR_2 system board power connector BP_PWR_2 backplane power connector SL3_CPU1_PB2 signal connector on system board CTRL_DST_PA1 fPERC input connector SIG_PWR_0 system board power connector BP_PWR_1 rear backplane power connector APERC_CTRL_SRC_SA1 adapter PERC controller connector BP_DST_SA1 rear backplane ex...

Page 36: ...kplane power connector SL3_CPU1_PB2 signal connector on system board DST_PB2 backplane switch signal connector SL4_CPU1_PA2 signal connector on system board DST_PA2 backplane switch signal connector SL1_CPU2_PB1 signal connector on system board DST_PB1 backplane switch signal connector SL2_CPU2_PA1 signal connector on system board DST_PA1 backplane switch signal connector 36 Component installation...

Page 37: ...roller connector DST_PB2 backplane switch signal connector SL3_CPU1_PB2 signal connector on system board CTRL_DST_PA1 fPERC input connector SIG_PWR_2 system board power connector BP_PWR_2 backplane power connector CTRL_SRC_PA1 fPERC controller connector DST_PA2 backplane switch signal connector CTRL_SRC_PB1 fPERC controller connector DST_PB2 backplane switch signal connector SL1_CPU2_PB1 signal co...

Page 38: ...eft control panel LCP Right control panel connector Right control panel RCP Front VGA connector VGA on RCP BOSS_CARD_PWR BOSS S2 module power connector on system board BOSS_PWR BOSS S2 module power connector on BOSS S2 module SL6_PCH_PA4 BOSS signal connector on system board BOSS signal on BOSS S2 card module 38 Component installation guidelines ...

Page 39: ...stem board power connector BP_PWR backplane power connector CTRL_DST_PA1 fPERC input connector SL3_CPU1_PB2 Signal connector on system board CTRL_SRC_PA1 fPERC output connector DST_PA3 backplane signal connector Figure 42 10 x 2 5 inch NVMe and 2 x 2 5 inch NVMe Component installation guidelines 39 ...

Page 40: ...plane power connector SIG_PWR_0 system board power connector REAR_HDD_PWR Rear HDD module power connector PADDLE R1d Paddle R1d connector on system board DST_SA1 rear backplane signal connector Figure 43 8 x 2 5 inch NVMe without fPERC Table 33 8 x 2 5 inch NVMe without fPERC From To SL1_CPU2_PB1 Signal connector on system board DST_PA1 backplane signal connector SL2_CPU2_PA1 Signal connector on s...

Page 41: ...SAS with front PERC module From To SIG_PWR_1 system board power connector BP_PWR backplane power connector CTRL_DST_PA1 fPERC connector SL3_CPU1_PB2 Signal connector on system board Figure 45 8 x 2 5 inch all NVME with front PERC module Component installation guidelines 41 ...

Page 42: ...wer connector BP_PWR backplane power connector Drive backplane Depending on your system configuration the drive backplanes supported are listed here Table 36 Supported backplane options System Supported hard drives options PowerEdge R750 2 5 inch x 8 NVMe backplane 2 5 inch x 16 SAS SATA or NVMe backplane 2 x 8 NVMe 2 5 inch x 24 SAS SATA NVMe backplane Figure 46 8 x 2 5 inch drive backplane 1 BP_...

Page 43: ...l cable to system board Figure 48 24 x 2 5 inch drive backplane 1 DST_SA1 2 SRC_SA1 3 DST_SB1 4 BP_PWR_1 5 BP_DST_PA1 PCIe NVMe connector 6 BP_PWR_2 7 BP_ DST_PB1 PCIe NVMe connector 8 BP_PWR_CTRL 9 BP_ DST_PA2 PCIe NVMe connector 10 BP_ DST_PB2 PCIe NVMe connector Figure 49 24 x 2 5 inch NVMe switched backplane 1 BP_PWR_CTRL2 2 BP_PWR_2 3 BP_PWR_1 4 BP_PWR_CTRL1 Component installation guidelines ...

Page 44: ...However if a F1 F2 pause occurs with an error message see Troubleshooting expansion cards section in the Dell EMC PowerEdge Servers Troubleshooting Guide at www dell com poweredgemanuals Expansion card installation guidelines Figure 51 Expansion card slot connectors 1 Riser 4 slot 7 and slot 8 2 Riser 3 slot 4 and slot 5 3 Riser 2 slot 3 and slot 6 4 Riser 1 slot 1 and slot 2 The following table d...

Page 45: ...d 5 Processor 2 Full height Half length x8 x8 R4A 7 Processor 2 Full height Half length x16 Config3 1 with 4x FH 1x SNAPI LP and 1x LP R1A 2 Processor 1 Full height double width Full length x16 R2B SNAPI 3 and 6 Processor 1 and 2 Low profile Half length x8 x8 x8 R3B 4 and 5 Processor 2 Full height Half length x8 x8 R4A 7 Processor 2 Full height double width Full length x16 Config3 2 with 4x FH 1x ...

Page 46: ... profile Half length x16 x16 R4B 7 and 8 Processor 2 Full height Half length x8 x8 Config7 with 2x FH 2x LP and R1 R3 paddle cards R2A 3 and 6 Processor 1 and 2 Low profile Half length x16 x16 R4B 7 and 8 Processor 2 Full height Half length x8 x8 R1 paddle card NA NA NA NA NA R3 paddle card NA NA NA NA NA Config8 with 2x FH and 1x LP R1B 1 and 2 Processor 1 Full height Half length x8 x8 R2A 3 Proc...

Page 47: ...Figure 53 Riser 1B 1 Slot 2 2 Slot 1 Figure 54 Riser 1C 1 Slot 2 2 Slot 1 Figure 55 Riser 1A FL 1 Slot 2 Component installation guidelines 47 ...

Page 48: ...Figure 56 Riser 1C FL 1 Slot 2 2 Slot 1 Figure 57 Riser 2A 1 Slot 3 2 Slot 6 Figure 58 Riser 2B SNAPI 1 Slot 3 2 Slot 6 48 Component installation guidelines ...

Page 49: ...Figure 59 Riser 3A 1 Slot 5 Figure 60 Riser 3B 1 Slot 5 2 Slot 4 Figure 61 Riser 4A 1 Slot 7 Component installation guidelines 49 ...

Page 50: ...e slot priority indicated All the other expansion cards should be installed in the card priority and slot priority order Table 38 Configuration 0 R1B R4B Card type Slot priority Maximum number of cards Inventec VGA 8 1 Inventec Serial 8 1 Inventec FPERC 10 15 Integrated slot 2 Foxconn FPERC 11 Integrated slot 2 Foxconn FPERC HBA11 Integrated slot 2 Foxconn APERC 10 15 2 1 1 Foxconn APERC 11 2 1 1 ...

Page 51: ...l 4 8 1 NVIDIA GPU T4 LP 3 6 2 Inventec FPERC 10 15 Integrated slot 2 Foxconn FPERC11 Integrated slot 2 Foxconn FPERCHBA11 Integrated slot 2 Foxconn APERC 10 15 2 1 1 Foxconn APERC11 2 1 1 Inventec APERC 10 15 2 1 1 Foxconn APERC HBA11 2 1 1 Broadcom NIC 25Gb 5 4 7 2 1 5 Mellanox NIC 25Gb 6 3 2 Broadcom NIC 25Gb 6 3 2 Emulex HBA FC32 5 4 7 2 1 5 Qlogic HBA FC32 5 4 7 2 1 5 Emulex HBA FC32 6 3 2 Ql...

Page 52: ... APERC HBA 11 2 3 1 Mellanox NIC 100Gb 7 2 2 Mellanox NIC 25Gb 7 2 2 Mellanox NIC 25Gb 6 3 2 Broadcom NIC 25Gb 6 3 2 Emulex HBA FC32 5 4 7 2 4 Qlogic HBA FC32 5 4 7 2 4 Emulex HBA FC32 6 3 2 Qlogic HBA FC32 6 3 2 Emulex HBA FC16 5 4 7 2 4 QLogic HBA FC16 5 4 7 2 4 Emulex HBA FC16 6 3 2 QLogic HBA FC16 6 3 2 Mellanox OCP 25Gb Integrated slot 1 Broadcom OCP 25Gb Integrated slot 1 Inventec BOSS S2 Ad...

Page 53: ... FC32 5 4 7 2 4 Emulex HBA FC32 6 3 2 Qlogic HBA FC32 6 3 2 Emulex HBA FC16 5 4 7 2 4 QLogic HBA FC16 5 4 7 2 4 Emulex HBA FC16 6 3 2 QLogic HBA FC16 6 3 2 Mellanox OCP 25Gb Integrated slot 1 Broadcom OCP 25Gb Integrated slot 1 Inventec BOSS S2 Adapter Integrated slot 1 Table 42 Configuration 3 1 R1A R2B R3B R4A FL Card type Slot priority Maximum number of cards Inventec VGA 4 8 1 Inventec Serial ...

Page 54: ...lanox OCP 25Gb Integrated slot 1 Broadcom OCP 25Gb Integrated slot 1 Inventec BOSS S2 Adapter Integrated slot 1 Samsung PCIe SSD 5 4 7 2 5 Table 43 Configuration 3 2 R1A R2B R3B R4A HL Card type Slot priority Maximum number of cards Inventec VGA 4 8 1 Inventec Serial 4 8 1 NVIDIA GPU T4 FH 7 2 2 Inventec FPERC 10 15 Integrated slot 2 Foxconn FPERC 10 15 Integrated slot 2 Foxconn FPERC 11 Integrate...

Page 55: ...IA GPU A10 7 2 3 NVIDIA GPU RTX A40 7 1 NVIDIA GPU T4 FH 5 1 NVIDIA GPU T4 LP 3 6 2 NVIDIA GPU M10 7 1 Inventec FPERC 10 15 Integrated slot 2 Foxconn FPERC 10 15 Integrated slot 2 Foxconn FPERC 11 Integrated slot 2 Foxconn FPERC HBA 11 Integrated slot 2 Mellanox NIC 100Gb 5 7 2 1 4 Mellanox NIC 100Gb 6 3 2 Mellanox NIC 25Gb 5 7 2 1 4 Broadcom NIC 25Gb 5 7 2 1 4 Mellanox NIC 25Gb 6 3 2 Broadcom NIC...

Page 56: ... Mellanox NIC 100Gb 6 3 2 Mellanox NIC 25Gb 5 7 2 1 4 Broadcom NIC 25Gb 5 7 2 1 4 Mellanox NIC 25Gb 6 3 2 Broadcom NIC 25Gb 6 3 2 Emulex HBA FC32 5 7 2 1 4 Qlogic HBA FC32 5 7 2 1 4 Emulex HBA FC32 6 3 2 Qlogic HBA FC32 6 3 2 Emulex HBA FC16 5 7 2 1 4 QLogic HBA FC16 5 7 2 1 4 Emulex HBA FC16 6 3 2 QLogic HBA FC16 6 3 2 Mellanox OCP 25Gb Integrated slot 1 Broadcom OCP 25Gb Integrated slot 1 Invent...

Page 57: ...com OCP 25Gb Integrated slot 1 Inventec BOSS S2 Adapter Integrated slot 1 Table 47 Configuration 6 R1B R2A R4B Card type Slot priority Maximum number of cards Inventec Serial 8 1 Inventec FPERC 10 15 Integrated slot 1 Foxconn FPERC 10 15 Integrated slot 1 Foxconn FPERC 11 Integrated slot 1 Foxconn FPERC HBA 11 Integrated slot 1 Foxconn APERC 10 15 2 1 3 1 Foxconn APERC 11 2 1 3 1 Inventec APERC 10...

Page 58: ...m NIC 25Gb 7 1 Mellanox NIC 25Gb 6 3 1 Broadcom NIC 25Gb 6 3 3 Emulex HBA FC32 7 3 Qlogic HBA FC32 7 2 Emulex HBA FC32 6 3 2 Qlogic HBA FC32 6 3 3 Emulex HBA FC16 7 3 QLogic HBA FC16 7 2 Emulex HBA FC16 6 3 2 QLogic HBA FC16 6 3 3 Mellanox OCP 25Gb Integrated slot 2 Broadcom OCP 25Gb Integrated slot 2 Inventec BOSS S2 Adapter Integrated slot 1 Table 49 Configuration 8 R1B R2A Card type Slot priori...

Page 59: ...ted slot 1 Inventec BOSS S2 Adapter Integrated slot 1 Table 50 Configuration 9 R2A Card type Slot priority Maximum number of cards Inventec Serial 8 1 Foxconn APERC 10 15 3 1 Foxconn APERC 11 3 1 Inventec APERC 10 15 3 1 Foxconn APERC HBA 11 3 1 Mellanox NIC 100Gb 3 1 Mellanox NIC 25Gb 3 1 Broadcom NIC 25Gb 3 1 Emulex HBA FC32 3 1 Qlogic HBA FC32 3 1 Emulex HBA FC16 3 1 QLogic HBA FC16 3 1 Mellano...

Page 60: ... HB M2 Y 1555 GB sec 250W PCIe Gen4x16 NVLink bridge 8 64 GB sec 5 PCIe 4 0 DW FHFL CPU 8 pin HPC AI Database Analytics NVIDIA T4 16 GB GD DR 6 Y 300 GB sec 70W PCIe Gen3x16 32 GB sec PCIe 3 0 SW HHHL N A Inferenci ng Edge VDI NVIDIA T4 16 GB GD DR 6 Y 300 GB sec 70W PCIe Gen3x16 32 GB sec PCIe 3 0 SW FHHL N A Inferenci ng Edge VDI System memory System memory guidelines The PowerFlex custom node R...

Page 61: ...Slots B7 and B15 Slots B2 and B10 Slots B6 and B14 Slots B4 and B12 Slots B8 and B16 Table 53 Supported memory matrix DIMM type Rank Capacity DIMM rated voltage and speed Operating Speed 1 DIMM per channel DPC 2 DIMMs per channel DPC RDIMM 1 R 8 GB DDR4 1 2 V 3200 MT s 3200 MT s 3200 MT s 2 R 16 GB 32 GB 64 GB DDR4 1 2 V 3200 MT s 3200 MT s 3200 MT s LRDIMM 4 R 128 GB DDR4 1 2 V 3200 MT s 3200 MT ...

Page 62: ...tion Single processor Optimizer Independent channel population order A 1 A 2 A 3 A 4 A 5 A 6 A 7 A 8 A 9 A 10 A 11 A 12 A 13 A 14 A 15 A 16 1 2 4 6 8 12 or 16 DIMMs are allowed Dual processor Start with processor1 Processor 1 and processor 2 population should match Optimizer Independent channel population order A 1 B 1 A 2 B 2 A 3 B 3 A 4 B 4 A 5 B 5 A 6 B 6 A 7 B 7 A 8 B 8 A 9 B 9 A 10 B 10 A 11 ...

Page 63: ...io In VMware ESXI environment if BPS goal is changed between App Direct Mode and Memory Mode it is recommended to sanitize the Intel Persistent Memory 200 series BPS before creating a new goal Populate Intel Persistent Memory 200 series BPS in DIMM slot 1 unless Intel Persistent Memory 200 series BPS is the only DIMM in that channel and then populate in DIMM slot 0 For more information about the s...

Page 64: ... 1024 MM or AD 4 4 128 256 512 1024 AD 4 4 256 256 1024 1024 AD 4 4 16 512 64 2048 AD 4 4 32 512 128 2048 MM or AD 4 4 64 512 256 2048 MM or AD 4 4 128 512 512 2048 MM or AD 4 4 256 512 1024 2048 AD Table 57 Intel Persistent Memory 200 series BPS Configuration 2 6 x RDIMMs LRDIMMs 1 x Intel Persistent Memory 200 series BPS per processor Total No of RDIMMs LRDIMMs Total No of Intel Persistent Memor...

Page 65: ...ty GB Total Standard Memory Capacity GB Total PM Capacity GB Supported Modes 8 1 16 128 128 128 AD 8 1 32 128 256 128 AD 8 1 64 128 512 128 AD 8 1 128 128 1024 128 AD 8 1 256 128 2048 128 AD 8 1 16 256 128 256 AD 8 1 32 256 256 256 AD 8 1 64 256 512 256 AD 8 1 128 256 1024 256 AD 8 1 256 256 2048 256 AD 8 1 16 512 128 512 AD 8 1 32 512 256 512 AD 8 1 64 512 512 512 AD 8 1 128 512 1024 512 AD 8 1 2...

Page 66: ...6 512 2048 2048 AD Table 60 Intel Persistent Memory 200 series BPS Configuration 5 8 x RDIMMs LRDIMMs 8 x Intel Persistent Memory 200 series BPS per processor Total No of RDIMMs LRDIMMs Total No of Intel Persistent Memory 200 series BPS DIMMs 1 R LRDIMM capacity GB 1 Intel Persistent Memory 200 series BPS capacity GB Total Standard Memory Capacity GB Total PM Capacity GB Supported Modes 8 8 16 128...

Page 67: ...system supports memory configurations with 1 2 or 4 NVDIMM Ns per processor Supported configurations have dual processors and a minimum of 8x RDIMMs Maximum of 8 NVDIMM Ns can be installed in a system NVDIMM Ns or RDIMMs must not be mixed with LRDIMMs DDR4 NVDIMM Ns must be populated only on the black release tabs on processor 1 and 2 General memory guideline rules are also applicable All RDIMMs a...

Page 68: ...r2 B13 14 15 16 NOTE Populate only A slots for single processor configuration NVDIMM sizing options The following are the supported memory configurations when using NVDIMMs Table 63 Supported NVDIMM memory configurations Capacity Con fig Shorthand RDIMMs NVDIMMs No CPU per system No of RDIMMs CPU No of NVDIMMs per server Total memory capacity TB TiB Total Std volatile memory capacity Total NVDIMM ...

Page 69: ...GPU Accelerator enablement kit Hard drives Hard drives SSD Memory Network cards Standard PCIe adapter LP FH Network cards OCP PCIe SSD card Power cords Power supplies Quick sync TPM Processor enablement thermal kits Serial COM port daughter card Cables Fans Heat sink Risers Rail CMA BOSS S2 module kit The BOSS S2 module supports up to two M 2 SSDs NOTE To enable the BOSS S2 module in the system en...

Page 70: ... 1 BOSS S2 module 1 or 2 BOSS S2 card carrier 1 or 2 M 2 SSD 2 M 2 240 GB information label 2 M 2 480 GB information label 1 BOSS card filler 1 Tech sheet For detailed instructions for removing and installing the BOSS S2 blank and card see the BOSS S2 replacement procedure in the PowerFlex custom node R750 Field Replaceable Unit Guide 70 Upgrade kits ...

Page 71: ...ssor 1 and processor 2 2 Cables Power cable 2x 6 2 pin power cables 2 x 8 pin power cables Power cable 2x 6 2 pin power cables 2 x 8 pin power cables Foam Mylar foam 1 Mylar foam 1 FL Full Length HL Half Length HPR High Performance SLVR Silver NOTE The Riser R3B is shipped with the GPU FL kit however riser R3B does not support GPU NOTE The configuration 3 1 supports GPU only on slots 2 and 7 Table...

Page 72: ...M port see the serial COM port replacement procedure in the PowerFlex custom node R750 Field Replaceable Unit Guide VGA port kit The VGA port kit contains the components listed in the table Table 69 VGA port kit Components Quantity VGA port card 1 Cable 1 For detailed instructions for removing and installing the front VGA port see the VGA port replacement procedure in the PowerFlex custom node R75...

Page 73: ...components and cables correctly you must be able to identify the connectors on the system board System board connectors System board jumpers and connectors on the R750 system are described as follows Figure 65 System board jumpers and connectors Table 70 System board jumpers and connectors Item Connector Description 1 LFT_CP Left control panel connector 2 BAT_SIG NVDIMM battery signal 3 PSU 2 Powe...

Page 74: ...for GPU only 19 IO_RISER1 CPU1 Riser 1 20 SIG_PWR_0 Power connector 0 use for GPU only Rear BP 21 PSU 1 Power supply unit 1 22 SL6_PCH_PA4 PCIe connector 6 23 FRONT_VIDEO Front VGA 24 BOSS_PWR BOSS card power 25 RGT_CP Right control panel connector 26 2U FAN6 Fan 6 27 SIG_PWR_2 Power connector 2 use for BP only 28 A11 A3 A15 A7 A9 A1 A13 A5 DIMM for CPU 1 channels A B C D 29 2U FAN5 Fan 5 30 SL4_C...

Page 75: ...assword jumper enables or disables password features and clears any password s currently in use CAUTION Many repairs may only be done by a certified service technician You should only perform troubleshooting and simple repairs as authorized in your product documentation or as directed by the online or telephone service and support team Damage due to servicing that is not authorized by Dell is not ...

Page 76: ... from pins 4 and 6 to pins 2 and 4 9 Replace the system cover 10 Reconnect the peripherals and connect the system to the electrical outlet and then power on the system 11 Assign a new system and or setup password 76 Jumpers and connectors ...

Page 77: ...ences a thermal error for example the ambient temperature is out of range or there is a fan failure Ensure that none of the following conditions exist A cooling fan has been removed or has failed System cover air shrouds or back filler bracket has been removed Ambient temperature is too high External airflow is obstructed If the problem persists see Getting help Electrical indicator The indicator ...

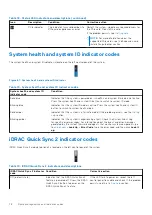
Page 78: ... system ID mode is active Press the system health and system ID button to switch to system health mode Solid amber Indicates that the system is in fail safe mode If the problem persists see the Getting help section Blinking amber Indicates that the system is experiencing a fault Check the System Event Log for specific error messages For information about the event and error messages generated by t...

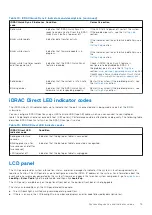
Page 79: ...o indicate that the port is connected and is being used as a part of the iDRAC subsystem You can configure iDRAC Direct by using a USB to micro USB type AB cable which you can connect to your laptop or tablet Cable length should not exceed 3 feet 0 91 meters Performance could be affected by cable quality The following table describes iDRAC Direct activity when the iDRAC Direct port is active Table...

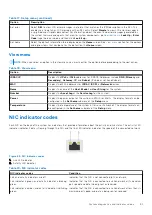
Page 80: ...lays the system information status and error messages or iDRAC IP address Viewing Home screen The Home screen displays user configurable information about the system This screen is displayed during normal system operation when there are no status messages or errors When the system turns off and there are no errors LCD enters the standby mode after five minutes of inactivity Press any button on the...

Page 81: ... User String for the system Number Displays the Asset tag or the Service tag for the system Power Displays the power output of the system in BTU hr or Watts The display format can be configured in the Set home submenu of the Setup menu Temperature Displays the temperature of the system in Celsius or Fahrenheit The display format can be configured in the Set home submenu of the Setup menu NIC indic...

Page 82: ... PSU status indicator codes Power indicator codes Condition Green Indicates that a valid power source is connected to the PSU and the PSU is operational Blinking amber Indicates an issue with the PSU Not powered on Indicates that the power is not connected to the PSU Blinking green Indicates that the firmware of the PSU is being updated CAUTION Do not disconnect the power cord or unplug the PSU wh...

Page 83: ...tes an issue with the PSU Not powered on Indicates that the power is not connected to the PSU Blinking green When hot plugging a PSU it blinks green five times at a rate of 4 Hz and powers off This indicates a PSU mismatch due to efficiency feature set health status or supported voltage CAUTION If two PSUs are installed both the PSUs must have the same type of label for example Extended Power Perf...

Page 84: ...ready for removal NOTE The drive status indicator remains off until all drives are initialized after the system is powered on Drives are not ready for removal during this time Blinks green amber and then powers off Indicates that there is an unexpected drive failure Blinks amber four times per second Indicates that the drive has failed Blinks green slowly Indicates that the drive is rebuilding Sol...

Page 85: ...e diagnostics start executing the tests on all the detected devices Running the Embedded System Diagnostics from Boot Manager Run the Embedded System Diagnostics ePSA if your system does not boot 1 When the system is booting press F11 2 Use the up arrow and down arrow keys to select System Utilities Launch Diagnostics 3 Alternatively when the system is booting press F10 select Hardware Diagnostics...

Page 86: ...r product category b Select your product segment c Select your product The support page that lists the various support categories is displayed 5 For contact details of Dell Global Technical Support a Click Contact Technical Support b The Contact Technical Support page is displayed with details to call chat or e mail the Dell Global Technical Support team Accessing system information by using QRL Y...

Page 87: ...ts hardware issues both proactively and predictively Automated case creation When an issue is detected SupportAssist automatically opens a support case with Dell EMC Technical Support Automated diagnostic collection SupportAssist automatically collects system state information from your devices and uploads it securely to Dell EMC This information is used by Dell EMC Technical Support to troublesho...

Page 88: ...e Getting Started Guide document that is shipped with your system www dell com poweredgemanuals Configuring your system For information about the iDRAC features configuring and logging in to iDRAC and managing your system remotely see the Integrated Dell Remote Access Controller User s Guide For information about understanding Remote Access Controller Admin RACADM subcommands and supported RACADM ...

Page 89: ...the Dell EMC SupportAssist Enterprise User s Guide https www dell com serviceabilitytools For information about partner programs enterprise systems management see the OpenManage Connections Enterprise Systems Management documents www dell com openmanagemanuals Working with the Dell PowerEdge RAID controllers For information about understanding the features of the Dell PowerEdge RAID controllers PE...

Reviews: