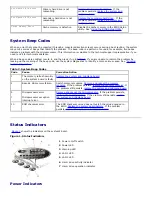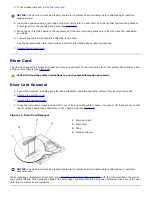
2
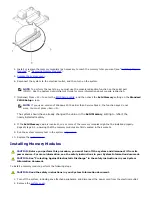
Expansion-card latch
3
Expansion-card bracket slot
4
Riser-card slot
5
Riser card
Expansion-Card Removal
CAUTION:
Read the safety instructions in your
System Information
document.
1. Turn off the system, including any attached peripherals, and disconnect the system from its electrical outlet.
2.
Remove the system cover
.
3. Release the expansion-card latch (see
Figure 11
).
4. Remove any cables attached to the expansion card.
5. Grasp the expansion card out and pull it away from the riser-card connector.
Ensure that the expansion card's metal bracket is free of its slot.
6. If you are removing the card permanently, install a metal filler bracket over the empty card slot opening.
NOTE:
Installing a filler bracket over an empty expansion slot is necessary to maintain Federal
Communications Commission (FCC) certification of the system. The brackets also keep dust and dirt
out of the system and aid in proper cooling and airflow inside the system.
7.
Replace the system cover
.
8. Reconnect the system and peripherals to the power source, and then turn on the system.
Expansion-Card Replacement
To install a replacement or an additional expansion card, perform the following steps:
1. Prepare the replacement expansion card for installation.
See the documentation that came with the expansion card for information about configuring the card, making
internal connections, or customizing the card for the system.
2. If the replacement card is an identical replacement, ensure that any jumpers or configuration switches are set in an
identical manner as the expansion card you just removed.
Summary of Contents for PowerVault 715N
Page 10: ...Back to Contents Page ...


