3. If not already installed,
install the riser card
.
NOTICE:
The riser card must be properly seated in its system board connector before attempting to install an
expansion card.
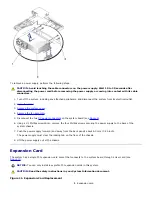
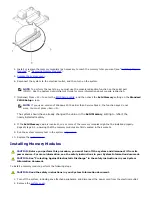
4. Insert the expansion card's card-edge connector firmly into the riser card, and ensure that the mounting bracket
enters its slot on the chassis back panel (see
Figure 11
).
5. When the card is fully seated in the connector and the card-mounting bracket is in its slot, close the expansion-
card latch.
6. Connect any cables that should be attached to the card.
See the documentation that came with the card for information about cable connections.
7.
Replace the system cover
.
Riser Card
The riser card supports a single PCI expansion card and connects to the riser-card slot on the system board and the side
of the system chassis (see
Figure 12
).
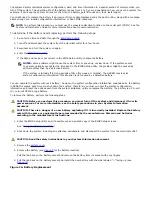
CAUTION:
Read the safety instructions in your
System Information
document.
Riser Card Removal
1. Turn off the system, including any attached peripherals, and disconnect the system from its electrical outlet.
2.
Remove the system cover
.
3.
Remove the expansion card
.
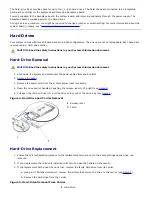
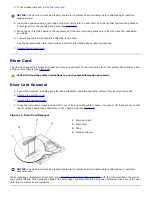
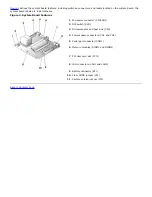
4. Grasp the riser card on each end and lift it out of its slot on the system board. Use care to lift it out evenly so that
the metal tabs easily leave their slots on the chassis wall (see
Figure 12
).
Figure 12. Riser Card Removal
1
Riser-card slot
2
Riser card
3
Tabs
4
Slots on chassis
NOTICE:
The riser card must be properly seated in its system board connector before attempting to install an
expansion card.
When installing a replacement riser card, align
the tabs on the back of the riser card
with the mating slots on the wall of
the system chassis. When properly aligned, the card-edge connector should be properly positioned. Firmly press the riser
card into its system board connector.
Summary of Contents for PowerVault 715N
Page 10: ...Back to Contents Page ...


