92
Installing System Components
Internal USB Cable
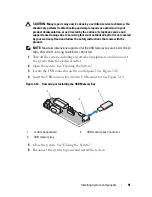
Removing the Internal USB Cable
1
Turn off the system, including any attached peripherals, and disconnect
the system from the electrical outlet.
2
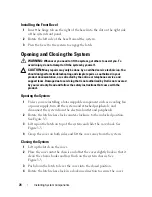
Open the system. See "Opening the System".
3
Remove the fan bracket. See "Removing the Fan Bracket".
4
Remove the USB cable from the appropriate connector on the Control
Panel.
5
Remove the USB cable from the cable routing guides on the inside of the
chassis. If applicable, remove any other cables from the cable routing
guides.
6
Remove the USB cable from the connector on the system board.
Installing the Internal USB Cable
1
Turn off the system, including any attached peripherals, and disconnect
the system from the electrical outlet.
2
Open the system. See "Opening the System".
3
Remove the fan bracket. See "Removing the Fan Bracket".
4
Connect the USB cable to the appropriate connector on the control panel.
5
Route the cable through the cable routing guides on the inside of the
chassis.
6
Connect the USB cable to the connector on the system board.
7
Replace the fan bracket. See "Replacing the Fan Bracket".
8
Close the system. See "Closing the System".
9
Reconnect the system to the electrical outlet, including any attached
peripherals, and turn the system on.
Summary of Contents for PowerVault DL2100
Page 1: ...Dell PowerVault DL2100 Systems Hardware Owner s Manual ...
Page 54: ...54 About Your System ...
Page 164: ...164 Troubleshooting Your System ...
Page 180: ...180 Jumpers and Connectors ...
Page 182: ...182 Getting Help ...
Page 192: ...192 Glossary ...
Page 200: ...200 Index ...

