Installing Enclosure Components
49
CAUTION:
Always wear a wrist grounding strap when handling equipment with static-sensitive components.
1
Wait until the LED indicators on the
physical disk
carrier stop flashing.
2
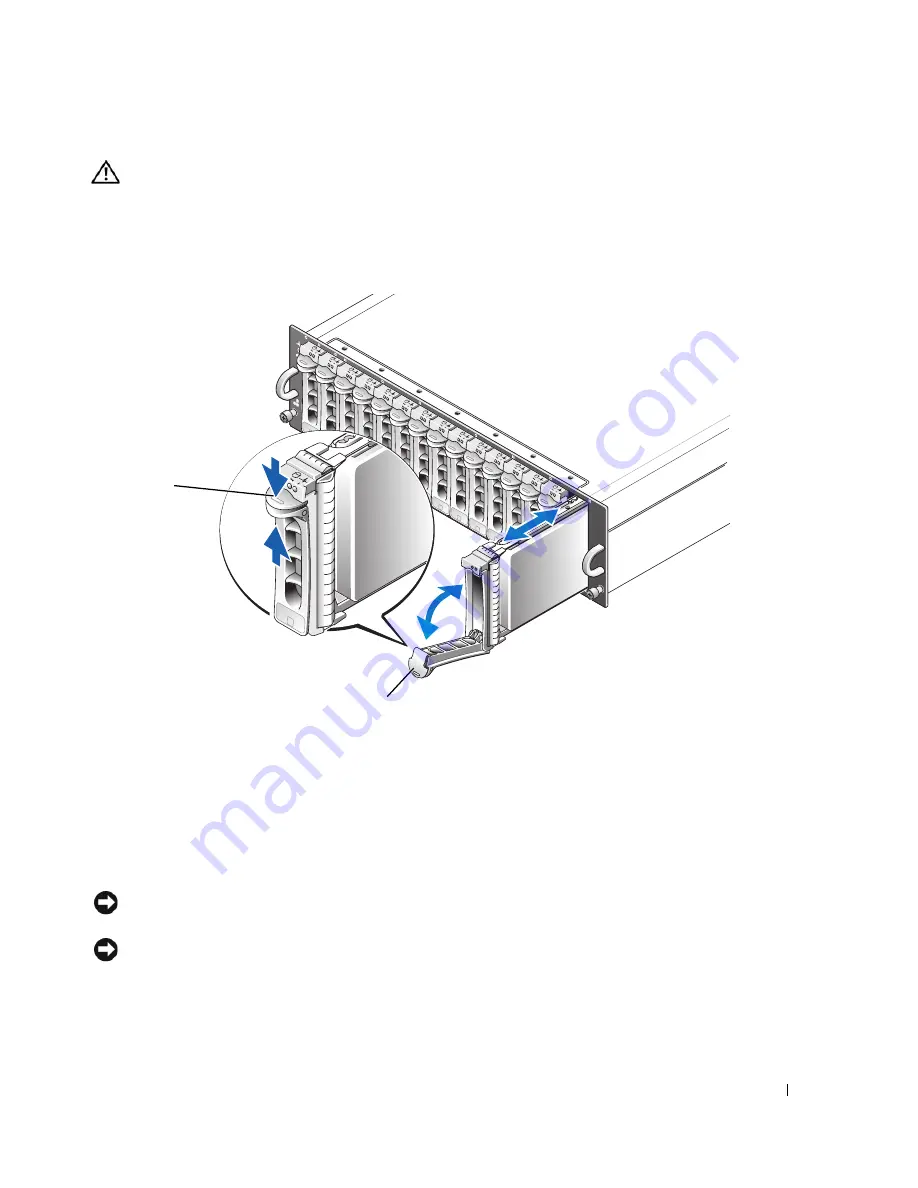
Squeeze the release mechanism on the front of the
physical disk
carrier (see Figure 4-2).
Figure 4-2.
Installing and Removing Physical Disks
3
Open the
physical disk
carrier handle by rotating it downward.
4
Gently but firmly pull the
physical disk
carrier from its slot while supporting the weight of the disk
from the bottom.
Installing SAS Physical Disks in the Enclosure
NOTICE:
To ensure proper airflow for enclosure cooling, each slot should contain either an active physical disk or
a disk blank.
NOTICE:
Always wear a wrist grounding strap when handling equipment with static-sensitive components.
1
Perform the following steps to install the new
physical disk
into the carrier:
a
If you are replacing a
physical disk
in the carrier, remove the four screws that secure the disk to its
carrier and remove the disk (see Figure 4-3).
1
carrier release mechanism
2
disk carrier handle
1
2
Summary of Contents for PowerVault MD3000
Page 68: ...68 Troubleshooting Your Enclosure ...
Page 100: ...100 Glossary ...


