116
Installing System Components
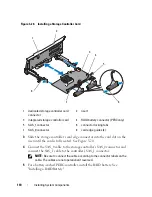
Installing the Cable Retention Bracket
1
Insert the hooks and tabs of the cable retention bracket into the slots in
the chassis wall and slide the bracket back until the latch engages.
2
Install the cooling fan bracket. See "Replacing the Fan Bracket."
3
Install the cooling shroud. See "Installing the Cooling Shroud."
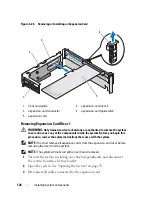
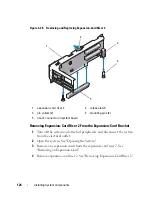
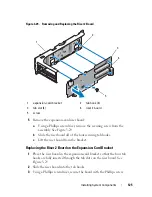
Expansion Cards and Expansion-Card Risers
The system supports up to four PCI Express (PCIe) expansion cards on two
expansion-card risers.
•
Expansion-card riser 1 provides two
PCIe x4-link Gen 2 expansion slots.
•
Expansion-card riser 2 is offered in two versions:
–
The standard expansion-card riser 2 provides two
PCIe x8-link Gen 2
expansion slots.
–
The optional expansion-card riser 2 provides one PCIe x16-link
Gen 2
expansion slot.
CAUTION:
Expansion cards can only be plugged into the slots on the expansion-
card risers. Do not plug any expansion cards into the riser connectors on the
system board.
To identify expansion slots, see "Expansion-Card Riser-Board Components
and PCIe Buses."
Expansion Card Installation Guidelines
Observe the following notes and guidelines regarding the expansion-card
slots:
•
PCI Express Generation 2 and Generation 1 expansion cards are supported
in all slots.
•
In slots 2, 3, and 4, expansion cards can have a maximum length of
24.13
cm (9.5-inch). Slot 1 supports a full-length (30.99-cm [12.2-inch])
expansion card.
•
The system supports three full-height expansion cards and one low-profile
expansion card (slot 2).
•
Although slots 1 and 2 are physically PCIe x8 connectors, they function
only as PCIe x4-link slots.
Summary of Contents for PowerVault NX3000
Page 1: ...Dell PowerVault NX3000 Systems Hardware Owner s Manual ...
Page 180: ...180 Jumpers and Connectors ...
Page 182: ...182 Getting Help ...
Page 192: ...192 Glossary ...
Page 200: ...200 Index ...


