282
Adding and Replacing Parts
5
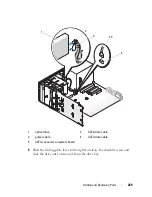
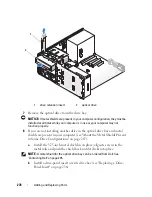
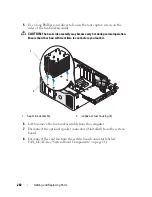
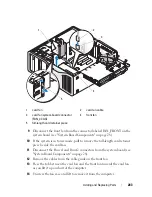
Use a long Phillips screwdriver to loosen the four captive screws on the
sides of the heat-sink assembly.
CAUTION:
The heat-sink assembly may become very hot during normal operation.
Ensure that it has had sufficient time to cool before you touch it.
6
Lift to remove the heat-sink assembly from the computer.
7
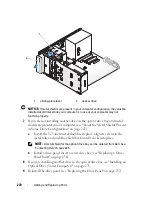
Disconnect the optional speaker connector (if installed) from the system
board.
8
Disconnect the card fan from the system board connector labeled
FAN_CCAG (see "System Board Components" on page 28.)
1
heat sink assembly
2
captive screw housing (4)
2
1
Summary of Contents for Precision NX046
Page 1: ...w w w d e l l c o m s u p p o r t d e l l c o m Dell Precision T5400 User s Guide Model DCTA ...
Page 18: ...18 Finding Information ...
Page 43: ...About Your Computer 43 ...
Page 44: ...44 About Your Computer ...
Page 88: ...88 Securing Your Computer ...
Page 120: ...120 Troubleshooting ...
Page 140: ...140 Troubleshooting Tools ...
Page 238: ...238 Adding and Replacing Parts 1 drive panel tabs 2 drive panel 2 Tower Orientation 1 ...
Page 286: ...286 Adding and Replacing Parts ...
Page 287: ...Adding and Replacing Parts 287 ...
Page 288: ...288 Adding and Replacing Parts ...
Page 296: ...296 Getting Help ...
Page 316: ...316 Glossary ...


