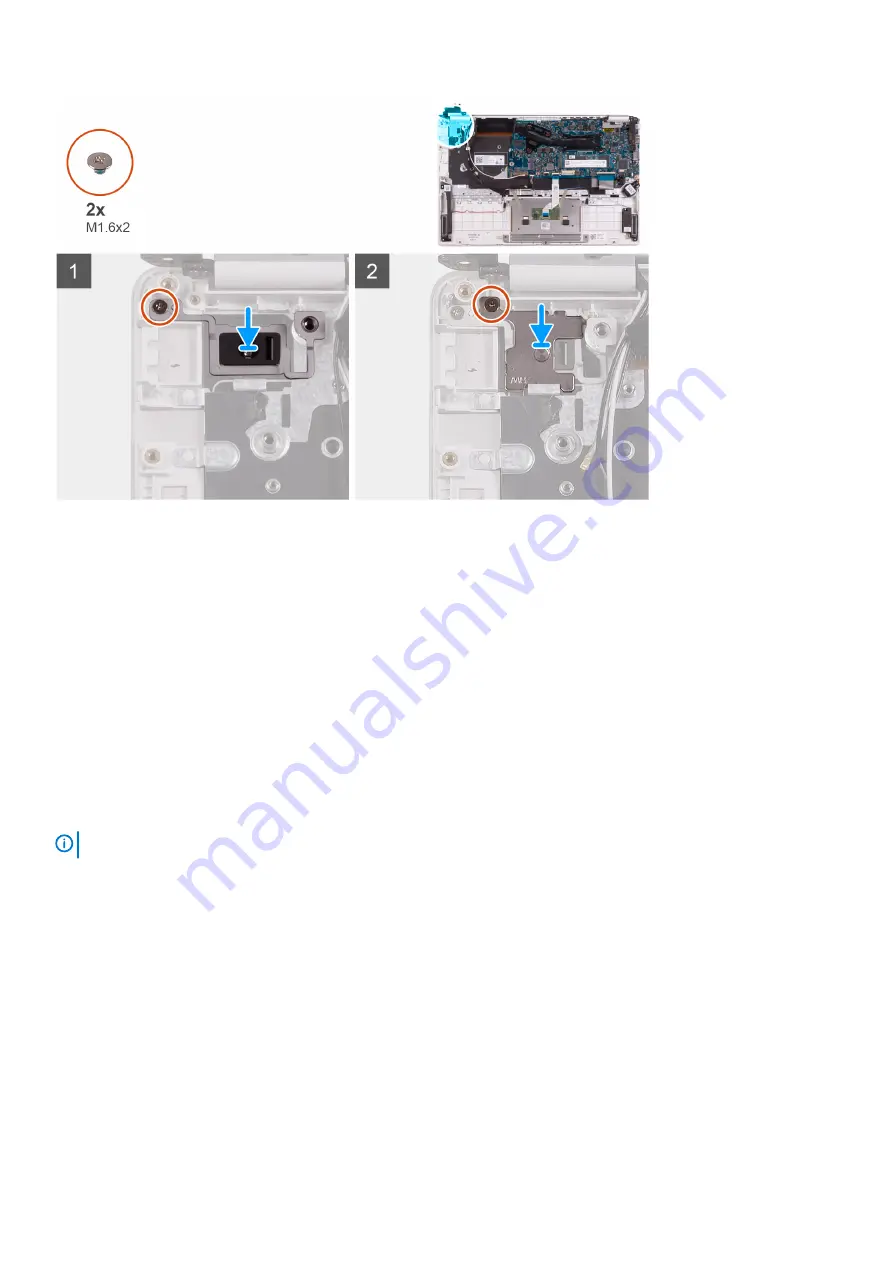
1. Align the screw hole on the power-button board with the screw hole on the palm-rest and keyboard assembly.
2. Replace the screw (M1.6x2) that secures the power-button board to the palm-rest and keyboard assembly.
3. Align the screw hole on the power-button bracket with the screw hole on the palm-rest and keyboard assembly.
4. Replace the screw (M1.6x2) that secures the power-button bracket to the palm-rest and keyboard assembly.
1. Install the
2. Install the
3. Install the
.
4. Install the
.
5. Install the
.
6. Follow the procedure in
After working inside your computer
.
Power button with fingerprint reader
Removing the power button with fingerprint reader
NOTE:
This procedure is only applicable for computers shipped with a fingerprint reader.
1. Follow the procedure in
Before working inside your computer
.
2. Remove the
3. Remove the
.
4. Remove the
5. Remove the
.
6. Remove the
The following image indicates the location of power button with fingerprint reader and provides a visual representation of the removal
procedure.
42
Removing and installing components
Summary of Contents for Vostro 5391
Page 1: ...Dell Vostro 5391 Service Manual Regulatory Model P114G Regulatory Type P114G001 ...
Page 33: ...Removing and installing components 33 ...
Page 43: ...Removing and installing components 43 ...
Page 45: ...Removing and installing components 45 ...
Page 51: ...Removing and installing components 51 ...


