background image

Installing the Subscriber Identity Module (SIM) Card

NOTE: To remove or locate the SIM card, see 

Removing The Subscriber Identity Module (SIM) Card

.

1.

Place the SIM card on the SIM card holder.

2.

Slide the SIM card holder together with the SIM card into its compartment until you hear a click.

3.

Follow the procedures in 

After Working Inside Your Computer

.

40

Summary of Contents for Vostro V130

Page 1: ...Dell Vostro V130 Service Manual Regulatory Model Regulatory Model P16S ...

Page 2: ...2 ...

Page 3: ...cards with care Do not touch the components or contacts on a card Hold a card by its edges or by its metal mounting bracket Hold a component such as a processor by its edges not by its pins CAUTION When you disconnect a cable pull on its connector or on its pull tab not on the cable itself Some cables have connectors with locking tabs if you are disconnecting this type of cable press in on the loc...

Page 4: ...f Your Computer CAUTION To avoid losing data save and close all open files and exit all open programs before you turn off your computer 1 Shut down the operating system In Windows Vista Click Start then click the arrow in the lower right corner of the Start menu as shown below and then click Shut Down In Windows XP Click Start Turn Off Computer Turn Off The computer turns off after the operating s...

Page 5: ...s an ExpressCard 2 Connect any telephone or network cables to your computer CAUTION To connect a network cable first plug the cable into the network device and then plug it into the computer 3 Replace the battery 4 Connect your computer and all attached devices to their electrical outlets 5 Turn on your computer 5 ...

Page 6: ...6 ...

Page 7: ...3 Remove the base cover 4 Lift the black cable release clip to release the battery cable from the connector on the system board and disconnect the battery cable 5 Remove the screws that secure the battery to the computer 6 Lift the battery up and away from the computer NOTE To replace the battery see Installing The Battery 7 ...

Page 8: ...tery bay 2 Replace and tighten the screws that secure the battery to the computer 3 Connect the battery cable to the system board and press down the cable release clip to lock the battery cable 4 Install the base cover 5 Install the Secure Digital SD Card 6 Follow the procedures in After working inside your computer 8 ...

Page 9: ...al SD Card Removing The Secure Digital SD Card 1 Follow the procedures in Before Working On Your Computer 2 Press in on the SD card to release the SD card from the computer 3 Slide the SD card out of the computer 9 ...

Page 10: ...l SD card Installing the Secure Digital SD Card NOTE To remove or locate the Secure Digital card see Removing the Secure Digital SD card 1 Slide the SD card into its slot until it clicks into place 2 Follow the procedures in After working inside your computer 10 ...

Page 11: ...computer Lift it up and away from the computer NOTE To replace the base cover see Installing The Base Cover Installing The Base Cover NOTE To remove or locate the base cover see Removing The Base Cover 1 Slide the base cover to align the screw holes correctly with the computer 2 Tighten the screws that secure the base cover to the computer 3 Install the Secure Digital SD card 4 Follow the procedur...

Page 12: ...12 ...

Page 13: ...ur Computer 2 Remove the Secure Digital SD card 3 Remove the base cover 4 Remove the battery 5 Disconnect the speaker and system board cables from the audio board 6 Remove the screws that secure the audio board and the hard drive to the computer 7 Lift and remove the hard drive and audio board assembly from the computer 13 ...

Page 14: ...8 Slide the audio board from the hard drive 9 Remove the screws that secure the hard drive bracket to the hard drive 14 ...

Page 15: ...ve And Audio Board Assembly 1 Attach the hard drive bracket to the hard drive 2 Tighten the screws to secure the hard drive bracket to the hard drive 3 Connect the audio board to the hard drive 4 Tighten the screws to secure the audio board and hard drive to the computer 5 Connect the hard drive data and speaker cable to the audio board 6 Install the battery 7 Install the base cover 8 Install the ...

Page 16: ...16 ...

Page 17: ... Remove the card reader board 6 Disconnect the coin cell battery cable from the system board 7 Release and remove the coin cell battery from the computer NOTE To replace the coin cell battery see Installing The Coin Cell Battery Installing The Coin Cell Battery NOTE To remove or locate the coin cell battery see Removing The Coin Cell Battery 1 Place the coin cell battery in its location 17 ...

Page 18: ... cell battery cable to the system board 3 Install the card reader board 4 Install the battery 5 Install the base cover 6 Install the secure digital SD card 7 Follow the procedures in After working inside your computer 18 ...

Page 19: ...Remove the Secure Digital SD card 3 Remove the base cover 4 Remove the battery 5 Disconnect the antenna cables from the WLAN card 6 Remove the screw that secures the WLAN card to the computer 7 Slide and remove the WLAN card out from its slot on the system board NOTE To install the WLAN card see Installing The Wireless Local Area Network WLAN Card 19 ...

Page 20: ...ard into its connector at a 45 degree angle 2 Replace and tighten the screw that secures the WLAN card to the computer 3 Connect the black and white antenna cables to their respective connectors marked on the WLAN card 4 Install the battery 5 Install the base cover 6 Install the Secure Digital SD card 7 Follow the procedures in After Working Inside Your Computer 20 ...

Page 21: ...ss local area network WLAN card 7 Remove the wireless wide area network WWAN card 8 Remove the LED cover 9 Remove the memory 10 Remove the keyboard 11 Remove the card reader 12 Remove the coin cell battery 13 Remove the thermal fan 14 Remove the system board 15 Remove the cloth tapes to release the antenna cables from the computer 16 Release the antenna camera and display cables from the computer ...

Page 22: ...base of the computer 3 Tighten the screws to secure the palmrest and display assembly to the base of the computer 4 Route the antenna cables to their original position and use the cloth tape to secure them to the computer 5 Install the system board 6 Install the thermal fan 7 Install the coin cell battery 8 Install the card reader 9 Install the keyboard 10 Install the memory 11 Install the LED cov...

Page 23: ...d and remove it from the system board NOTE To replace the system board see Installing The Media Board Installing The Media Board NOTE To remove or locate the system board see Removing The Media Board 1 Replace and gently push the media board into its slot on the system board 2 Install the LED cover 3 Follow the procedures in After Working Inside Your Computer 23 ...

Page 24: ...24 ...

Page 25: ...e display closure sensor 6 Remove the audio board and the hard drive 7 Remove the cloth tapes that secures the speaker cable to the computer 8 Disconnect the touchpad cable from its connector on the system board 9 Remove the screws that secure the speaker to the computer 10 Disconnect the speaker cable from the audio board and release it from its routing guides on the computer 25 ...

Page 26: ...2 Tighten the screws that secure the speaker to the computer 3 Route the speaker cable back into its routing guide on the computer 4 Secure the speaker cable to computer using the cloth tapes provided 5 Install the audio board and the hard drive 6 Install the display closure sensor 7 Install the battery 8 Install the base cover 9 Install the Secure Digital SD card 10 Follow the procedures in After...

Page 27: ...move the wireless wide area network WWAN card 7 Remove the LED cover 8 Remove the memory 9 Remove the keyboard 10 Remove the thermal fan 11 Remove the system board 12 Remove the palmrest assembly and display assembly 13 Remove the screw covers from the display bezel 14 Remove the screws that secure the display bezel to the display assembly 15 Using a plastic scribe pry under the display bezel to r...

Page 28: ...16 Lift the display bezel and remove it from the display assembly 28 ...

Page 29: ...Display Bezel NOTE To remove or locate the display bezel see Removing The Display Bezel 1 Align the display bezel with the display assembly and gently snap it into place 2 Replace and tighten the screws to secure the display bezel to the display assembly 3 Replace the screw covers 29 ...

Page 30: ... the keyboard 8 Install the memory 9 Install the LED cover 10 Install the wireless wide area network WWAN card 11 Install the wireless local area network WLAN card 12 Install the battery 13 Install the base cover 14 Install the secure digital SD Card 15 Follow the procedures in After Working Inside Your Computer 30 ...

Page 31: ...the camera module 7 Using a plastic scribe pry the camera to release it from the display back cover NOTE To replace the camera see Installing The Camera Installing the Camera NOTE To remove or locate the camera see Removing The camera 1 Connect the camera cable to the camera 2 Secure the camera to the display cover 3 Replace the display bezel 4 Replace the battery 5 Replace the base cover 6 Replac...

Page 32: ...7 Follow the procedures in After working inside your computer 32 ...

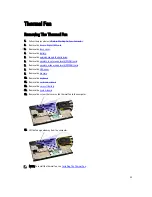
Page 33: ...ve the wireless local area network WLAN card 7 Remove the wireless wide area network WWAN card 8 Remove the LED cover 9 Remove the memory 10 Remove the keyboard 11 Remove the card reader board 12 Remove the coin cell battery 13 Remove the system board 14 Remove the screw that secures the thermal fan to the computer 15 Lift the fan up and away from the computer NOTE To install the thermal fan see I...

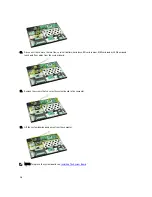
Page 34: ...m board 4 Install the system board 5 Install the coin cell battery 6 Install the card reader board 7 Install the keyboard 8 Install the memory 9 Install the LED cover 10 Install the wireless wide area network WWAN card 11 Install the wireless local area network WLAN card 12 Install the audio board and the hard drive 13 Install the battery 14 Install the base cover 15 Install the Secure Digital SD ...

Page 35: ...5 Remove the wireless local area network WLAN card 6 Remove the wireless wide area network WWAN card 7 Remove the LED cover 8 Remove the memory 9 Remove the keyboard 10 Pull the blue tab to disconnect the display cable from the system board 11 Turn the computer over and remove the cloth tapes to release the antenna cables from the computer 12 Remove the antenna cables gently 35 ...

Page 36: ...rd reader SIM card reader LED board and touch pad flex cables from the system board 14 Remove the screws that secures the system board to the computer 15 Lift the system board up and away from the computer NOTE To replace the system board see Installing The System Board 36 ...

Page 37: ...r cable touch pad flex cable and LED board cable to the system board 4 Replace and guide the antenna cables back through the cloth tapes to its original positions 5 Turn the computer over and connect the display cable to the computer 6 Install the keyboard 7 Install the memory 8 Install the LED cover 9 Install the wireless wide area network WWAN card 10 Install the wireless local area network WLAN...

Page 38: ...38 ...

Page 39: ...ecure Digital SD card 3 Remove the base cover 4 Remove the battery 5 Insert a paper clip into the small hole on the SIM card holder to release the SIM card holder out of its slot 6 Slide the SIM card holder out from the system 7 Remove the SIM card from the SIM card holder NOTE To replace the SIM card see Installing The Subscriber Identity Module SIM Card 39 ...

Page 40: ...e the SIM card see Removing The Subscriber Identity Module SIM Card 1 Place the SIM card on the SIM card holder 2 Slide the SIM card holder together with the SIM card into its compartment until you hear a click 3 Follow the procedures in After Working Inside Your Computer 40 ...

Page 41: ...e memory module from its connector on the system board by drawing the module from the system board at 45 degree angle NOTE To replace the memory see Installing The Memory Installing The Memory NOTE To remove or locate the memory see Removing the Memory 1 Push the memory module into the memory slot 2 Press the clips to secure the memory module to the system board 3 Install the LED cover 4 Follow th...

Page 42: ...42 ...

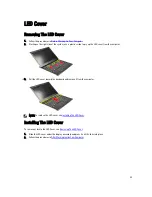
Page 43: ... the computer 3 Pull the LED cover toward the keyboard and remove it from the computer NOTE To replace the LED cover see Installing The LED Cover Installing The LED Cover To remove or locate the LED Cover see Removing The LED Cover 1 Slide the LED cover under the display assembly and press it until it clicks into place 2 Follow the procedures in After Working Inside Your Computer 43 ...

Page 44: ...44 ...

Page 45: ...move the Secure Digital SD Card 3 Remove the base cover 4 Remove the battery 5 Disconnect the antenna cables from the WWAN card 6 Remove the screw that secures the WWAN card to the computer 7 Slide the WWAN card from its connector and remove it from the computer NOTE To replace the WWAN card see Installing The Wireless Wide Area Network WWAN Card 45 ...

Page 46: ...N Card 1 Insert the WWAN card into its connector at a 45 degree angle 2 Replace and tighten the screw that secures the WWAN card to the computer 3 Connect the antenna cables to the WWAN card 4 Install the battery 5 Install the base cover 6 Install the Secure Digital SD card 7 Follow the procedures in After Working Inside Your Computer 46 ...

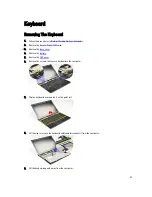
Page 47: ...SD card 3 Remove the base cover 4 Remove the battery 5 Remove the LED cover 6 Remove the screws that secure keyboard to the computer 7 Flip the keyboard over and lay it on the palm rest 8 Lift the clip to release the keyboard cable and disconnect it from the computer 9 Lift the keyboard up and away from the computer 47 ...

Page 48: ...yboard see Removing the Keyboard 1 Place the keyboard on the palmrest with the bottom side up 2 Connect the keyboard cable to its connector on the system board 3 Turn the keyboard over and lay it on the palmrest 4 Replace and tighten the screws that secures the keyboard to the palmrest 5 Install the LED cover 48 ...

Page 49: ...6 Install the battery 7 Install the base cover 8 Install the Secure Digital SD card 9 Follow the procedures in After Working Inside Your Computer 49 ...

Page 50: ...50 ...

Page 51: ...move the base cover 4 Remove the battery 5 Remove the audio and hard drive assembly 6 Disconnect the card reader cable from the system board 7 Remove the screws that secure the card reader board to the computer 8 Lift the card reader board and remove it from the computer NOTE To replace the card reader board see Installing The Card Reader Board 51 ...

Page 52: ...the card reader board bay 2 Connect card reader cable to the system board 3 Replace and tighten the screws that secure the card reader board to the computer 4 Install the audio and hard drive assembly 5 Install the battery 6 Install the base cover 7 Install the Secure Digital SD card 8 Follow the procedures in After working inside your computer 52 ...

Page 53: ... Remove the battery 5 Disconnect and release the flex cable that connects the display closure sensor board to the system board 6 Remove the screws that secures the display closure sensor to the computer 7 Lift the display closure sensor up and away from the computer along with its flex cable NOTE To install the display closure sensor see Installing The Display Closure Sensor 53 ...

Page 54: ...or 1 Connect the flex cable connecting the display closure sensor board to the system board 2 Replace and tighten the screws that secures the display closure sensor to the computer 3 Install the battery 4 Install the base cover 5 Install the Secure Digital SD card 6 Follow the procedures in After Working Inside Your Computer 54 ...

Page 55: ...ve the LED cover 8 Remove the memory 9 Remove the keyboard 10 Remove the thermal fan 11 Remove the system board 12 Remove the palmrest and display assembly 13 Remove the display bezel 14 Remove the display hinges 15 Remove the screws that secure the display panel to the display back cover 16 Lift the display panel along with its cable from the display back cover 17 Remove the adhesive tape that se...

Page 56: ...nd tighten the screws that secure the display panel to the display back cover 4 Install the display hinges 5 Remove the display bezel 6 Install the palmrest and display assembly 7 Install the system board 8 Install the thermal fan 9 Install the keyboard 10 Install the memory 11 Install the LED cover 12 Install the wireless local area network WLAN card 13 Install the wireless wide area network WWAN...

Page 57: ...ve the wireless local area network WLAN card 6 Remove the wireless wide area network WWAN card 7 Remove the LED cover 8 Remove the memory 9 Remove the keyboard 10 Remove the system board 11 Remove the palmrest and display assembly 12 Remove the display bezel 13 Remove the screws that secures the cable holders 14 Remove the cable holders 15 Remove the screws securing the display hinges 57 ...

Page 58: ...rt the cable holders in both the display hinges 4 Replace and tighten the screws securing each cable holder 5 Install the display bezel 6 Install the palmrest and display assembly 7 Install the system board 8 Install the keyboard 9 Install the memory 10 Install the LED cover 11 Install the wireless wide area network WWAN card 12 Install the wireless local area network WLAN card 13 Install the batt...

Page 59: ...ure Digital SD card 3 Remove the base cover 4 Remove the battery 5 Remove the SIM card 6 Disconnect the SIM board cable from the system board 7 Remove the screws that secure the SIM board to the computer 8 Gently peel the SIM board data cable off the metal bracket on the computer 9 Lift the SIM board and the SIM board data cable up and away from the computer 59 ...

Page 60: ...bscriber Identity Module SIM Board 1 Place the SIM board into its slot 2 Tighten the screws to secure the SIM board to the computer 3 Connect the SIM board cable to the system board 4 Stick the flex cable on the metal bracket 5 Install the battery 6 Install the base cover 7 Install the Secure Digital SD card 8 Install the SIM card 9 Follow the procedures in After Working Inside Your Computer 60 ...

Page 61: ...you see the Microsoft Windows desktop Then shut down your computer and try again System Setup Screens Menu Appears on top of the System Setup window This field provides a menu to access the System Setup options Press Left Arrow and Right Arrow keys to navigate As a Menu option is highlighted the Options List lists the options that define the hardware installed on your computer Options List Appears...

Page 62: ...lays the BIOS revision System Date Resets the date on the computer s internal calendar System Time Resets the time on the computer s internal clock Processor Type Displays the type of processor Processor Cores Displays the number of processor cores Processor ID Displays the processor ID Processor Speed Displays the speed of the processor Processor Minimum Clock Speed Displays the minimum clock spe...

Page 63: ...o the on board network card Default Enabled SATA Mode Change the SATA controller mode to either ATA or AHCI Default AHCI External USB ports Enable or disable the external USB ports Default Enabled Camera Enable or disable the camera Default Enabled Microphone Enable or disable the microphone Default Enabled DBC Panel Enable or disable the DBC Panel function Default Enabled Performance Intel SpeedS...

Page 64: ...dmin Password Status Specifies whether an admin password has been assigned Admin Password Allows you to set an admin password System Password Status Specifies whether a system password has been assigned System Password Allows you to set a system password Password on Boot Enable or disable authentication every time your computer boots Password Bypass Allows you to bypass the system and hard drive p...

Page 65: ...Exit This section allows you to save discard and load default settings before exiting from System Setup 65 ...

Page 66: ...66 ...

Page 67: ...lure with AC adapter present Constantly blinking amber light Fatal battery failure with AC adapter present Light off Battery in full charge mode with AC adapter present Blue light on Battery in charge mode with AC adapter present Battery Charge And Health To check the battery charge press and release the status button on the battery charge gauge to illuminate the charge level lights Each light rep...

Page 68: ...orted memory modules 2 If memory is already present reseat the module s one at a time in each slot 3 Try known good memory from another computer or replace the memory 4 Replace the system board System board error 1 Reseat the processor 2 Replace the system board 3 Replace the processor Display panel error 1 Reseat the display cable 2 Replace the display panel 3 Replace the video card system board ...

Page 69: ...oard Modem error 1 Reseat the modem 2 Replace the modem 3 Replace the system board System board error Replace the system board Option ROM error 1 Reseat the device 2 Replace the device 3 Replace the system board Storage device error 1 Reseat the hard drive and optical drive 2 Test the computer with just the hard drive and just the optical drive 3 Replace the device that is causing the failure 4 Re...

Page 70: ...70 ...

Page 71: ...sit support dell com 2 Verify your country or region in the Choose a Country Region drop down menu at the bottom of the page 3 Click Contact Us on the left side of the page 4 Select the appropriate service or support link based on your need 5 Choose the method of contacting Dell that is convenient for you 71 ...

Reviews: