


46
| Replacing
the
Display
Assembly
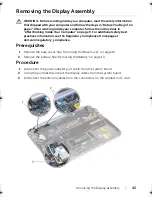
Replacing the Display Assembly
WARNING: Before working inside your computer, read the safety information
that shipped with your computer and follow the steps in "Before You Begin" on
page 7. After working inside your computer, follow the instructions in
"After Working Inside Your Computer" on page 9. For additional safety best
practices information, see the Regulatory Compliance Homepage at
dell.com/regulatory_compliance.
Procedure
1
Slide the tabs on the palm-rest assembly into the slots on the display hinges.
2
Replace the screws that secure the display assembly to the palm-rest assembly.
3
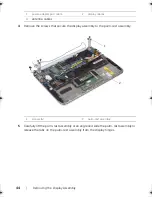
Connect the antenna cables to the wireless mini-card.
4
Connect the power-adapter port cable and display cables to the system board.
Postrequisites
1
Replace the battery. See "Replacing the Battery" on page 14.
2
Replace the base cover. See "Replacing the Base Cover" on page 12.
3
Follow the instructions in "After Working Inside Your Computer" on page 9.
book.book Page 46 Tuesday, October 23, 2012 12:44 AM
Summary of Contents for XPS 12
Page 16: ...16 Removing the Wireless Mini Card 1 antenna cables 2 2 wireless mini card 3 screw ...
Page 20: ...20 Removing the mSATA Card 1 mSATA card connector 2 mSATA card 3 screw 3 2 1 ...
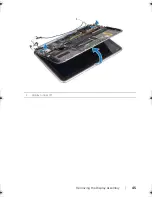
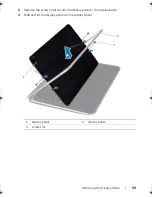
Page 45: ...Removing the Display Assembly 45 1 display hinges 2 1 ...
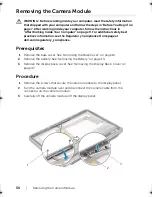
Page 51: ...Removing the Camera Module 51 1 screws 2 2 camera cable connector 3 camera module ...
Page 53: ...Replacing the Camera Module 53 ...
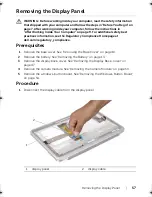
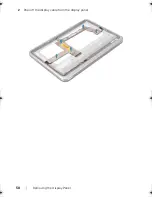
Page 58: ...58 Removing the Display Panel 2 Peel off the display cable from the display panel ...
Page 60: ...60 Removing the Display Panel ...


