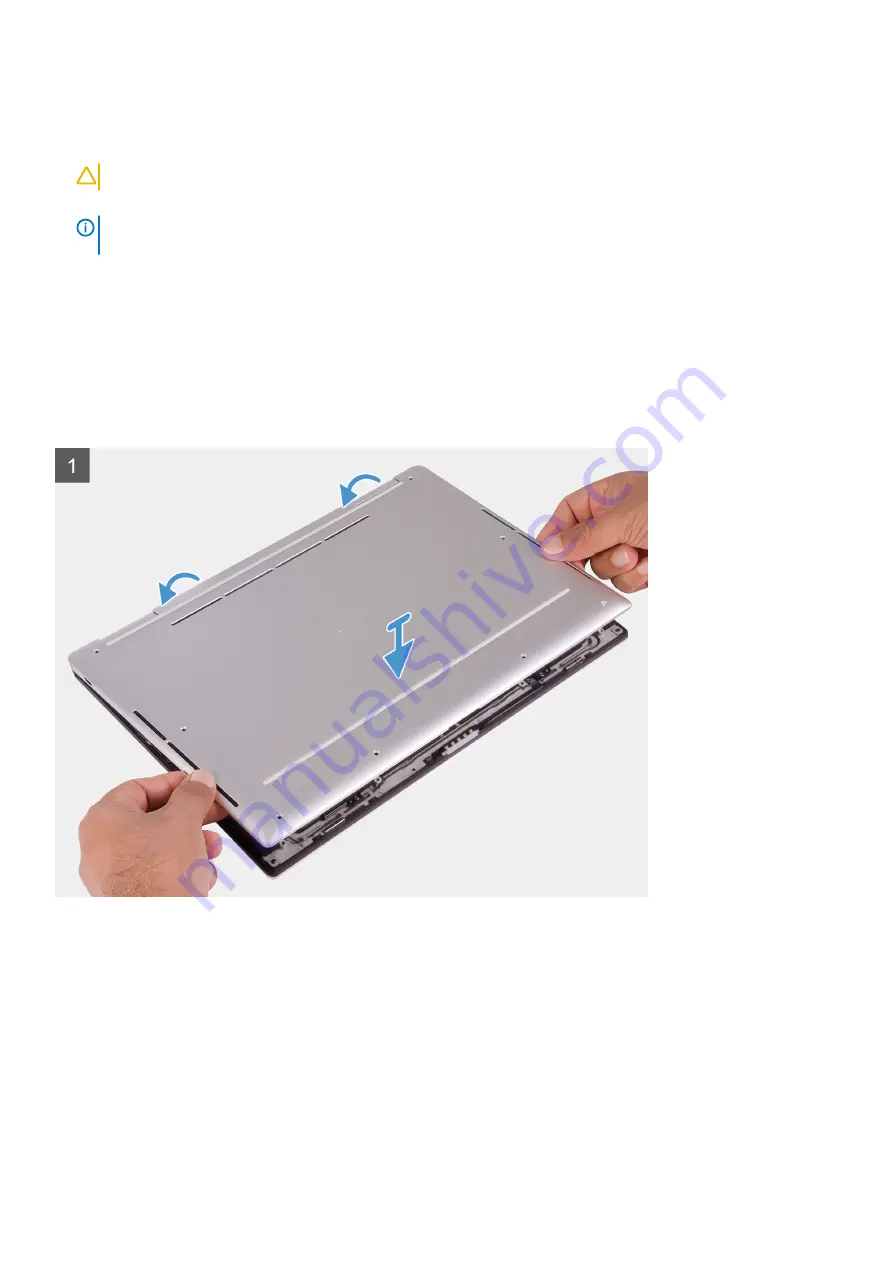
Steps
1. Remove the eight Torx screws (M2x4.5) that secure the base cover to the palm-rest assembly.
2. Starting from the bottom-left corner, pry the base cover in the direction of the arrows to release it from the palm-rest assembly.
CAUTION:
Do not pull on or pry the base cover from the top as it may damage the base cover.
3. Hold both sides of the base cover and rotate from front to back to remove from palm rest assembly.
NOTE:
The pins at the bottom of the base cover for grounding the antennas and the audio board are fragile. Place
the base cover on a clean surface to avoid damage to the pins.
Installing the base cover
Prerequisites
If you are replacing a component, remove the existing component before performing the installation procedure.
About this task
The following images indicate the location of the base cover and provide a visual representation of the installation procedure.
12
Removing and installing components
Summary of Contents for XPS 13 7390 2-in-1
Page 1: ...XPS 13 7390 2 in 1 Service Manual Regulatory Model P103G Regulatory Type P103G001 ...
Page 10: ...10 Removing and installing components ...
Page 11: ...Removing and installing components 11 ...
Page 25: ...Removing and installing components 25 ...


