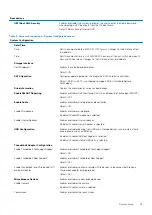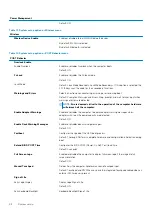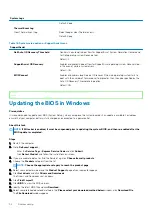
11. Click
Save
to save the file on your computer.
12. Click
Run
to install the updated BIOS settings on your computer.
Follow the instructions on the screen.
Identifier
GUID-FF16F9F9-DE03-4BB8-ABEA-583B0704A774
Version
1
Status
Released
Updating BIOS on systems with BitLocker enabled
CAUTION:
If BitLocker is not suspended before updating the BIOS, the next time you reboot the system it will not
recognize the BitLocker key. You will then be prompted to enter the recovery key to progress and the system will ask for
this on each reboot. If the recovery key is not known this can result in data loss or an unnecessary operating system re-
install. For more information on this subject, see Knowledge Article:
https://www.dell.com/support/article/sln153694
Identifier
GUID-43C1C370-5E1F-4C5E-9478-C68279DBEC6E
Version
1
Status
Released
Updating your system BIOS using a USB flash drive
About this task
If the system cannot load into Windows but there is still a need to update the BIOS, download the BIOS file using another system and save
it to a bootable USB Flash Drive.
NOTE:
www.dell.com/support/article/sln143196/
Steps
1. Download the BIOS update .EXE file to another system.
2. Copy the file e.g. O9010A12.EXE onto the bootable USB Flash drive.
3. Insert the USB Flash drive into the system that requires the BIOS update.
4. Restart the system and press F12 when the Dell Splash logo appears to display the One Time Boot Menu.
5. Using arrow keys, select
USB Storage Device
and click Return.
6. The system will boot to a Diag C:\> prompt.
7. Run the file by typing the full filename e.g. O9010A12.exe and press Return.
8. The BIOS Update Utility will load, follow the instructions on screen.
Figure 1. DOS BIOS Update Screen
System setup
51
Summary of Contents for XPS 13 9300
Page 1: ...XPS 13 9300 Service Manual Regulatory Model P117G Regulatory Type P117G001 ...
Page 12: ...12 Removing and installing components ...
Page 13: ...Removing and installing components 13 ...
Page 15: ...Removing and installing components 15 ...
Page 27: ...Removing and installing components 27 ...
Page 30: ...30 Removing and installing components ...


