5. power cable
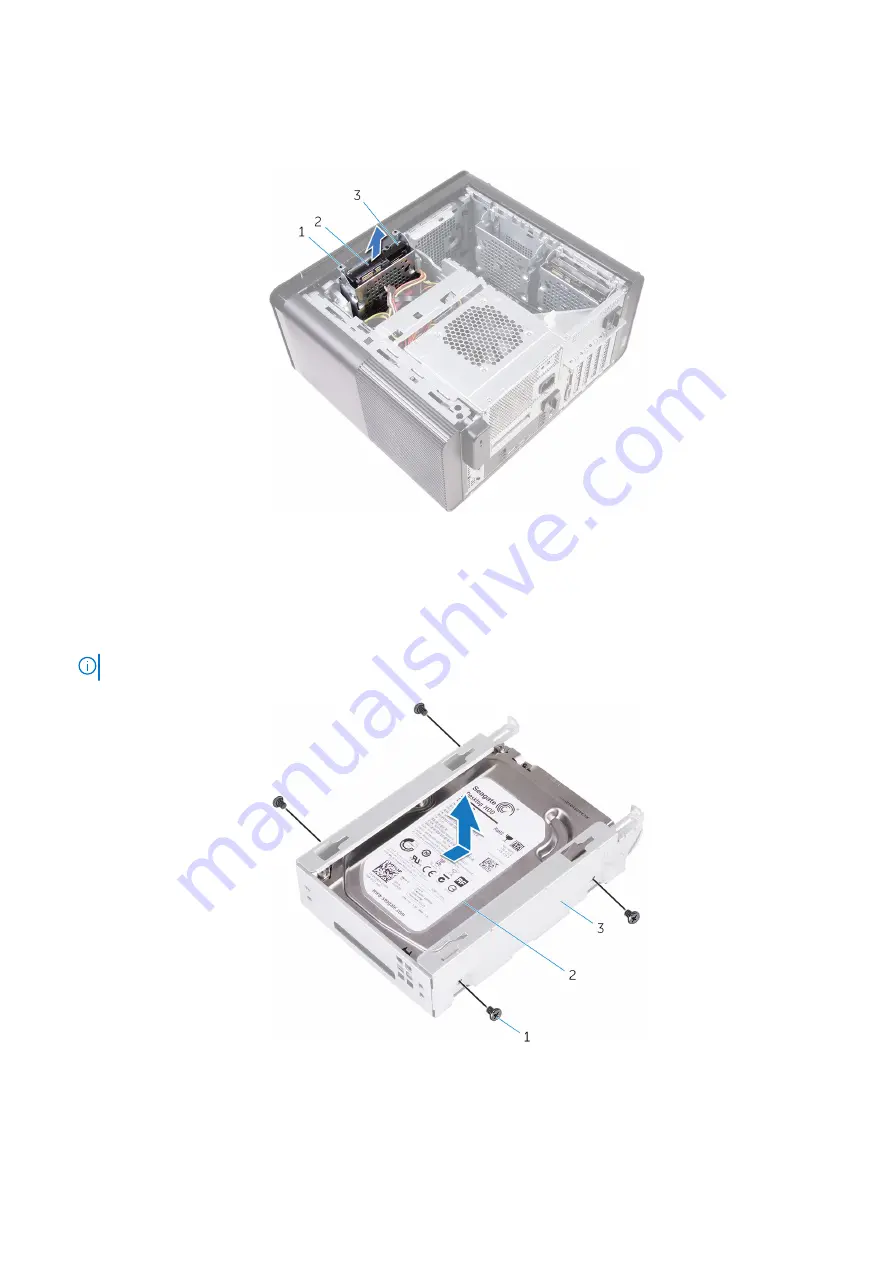
3. Lift the hard-drive cage off the chassis.
Figure 15. Removing the hard-drive cage
a. hard-drive cage
b. tab
c. hard-drive assembly
4. Remove the screws that secure the hard drive to the hard-drive cage.
5. Lift the hard drive off the hard-drive cage.
NOTE:
Note the orientation of the hard drive to replace it correctly.
Figure 16. Removing the hard drive from the bracket
a. #6-32 X 1/4'' screws (4)
b. hard drive
c. hard-drive cage
32
Removing the primary hard-drive
Summary of Contents for XPS 8920
Page 1: ...XPS 8920 Service Manual Regulatory Model D24M Regulatory Type D24M001 June 2020 Rev A04 ...
Page 8: ...Chapter 55 Getting help and contacting Dell 102 8 Contents ...
Page 38: ...3 system board 4 M2x2 5 screw 38 Removing the solid state drive ...
Page 101: ...7 Turn on your computer Troubleshooting 101 ...


