Removing the chassis fan
NOTE:
Before working inside your computer, read the safety information that shipped with your computer and follow
the steps in
Before working inside your computer
. After working inside your computer, follow the instructions in
. For more safety best practices, see the Regulatory Compliance home page at
www.dell.com/regulatory_compliance
Prerequisites
1. Remove the
.
2. Follow the procedure from step 1 to step 2 in “
Removing the power-supply unit
”.
3. Remove the
. (if installed)
4. Remove the
. (if installed)
Procedure
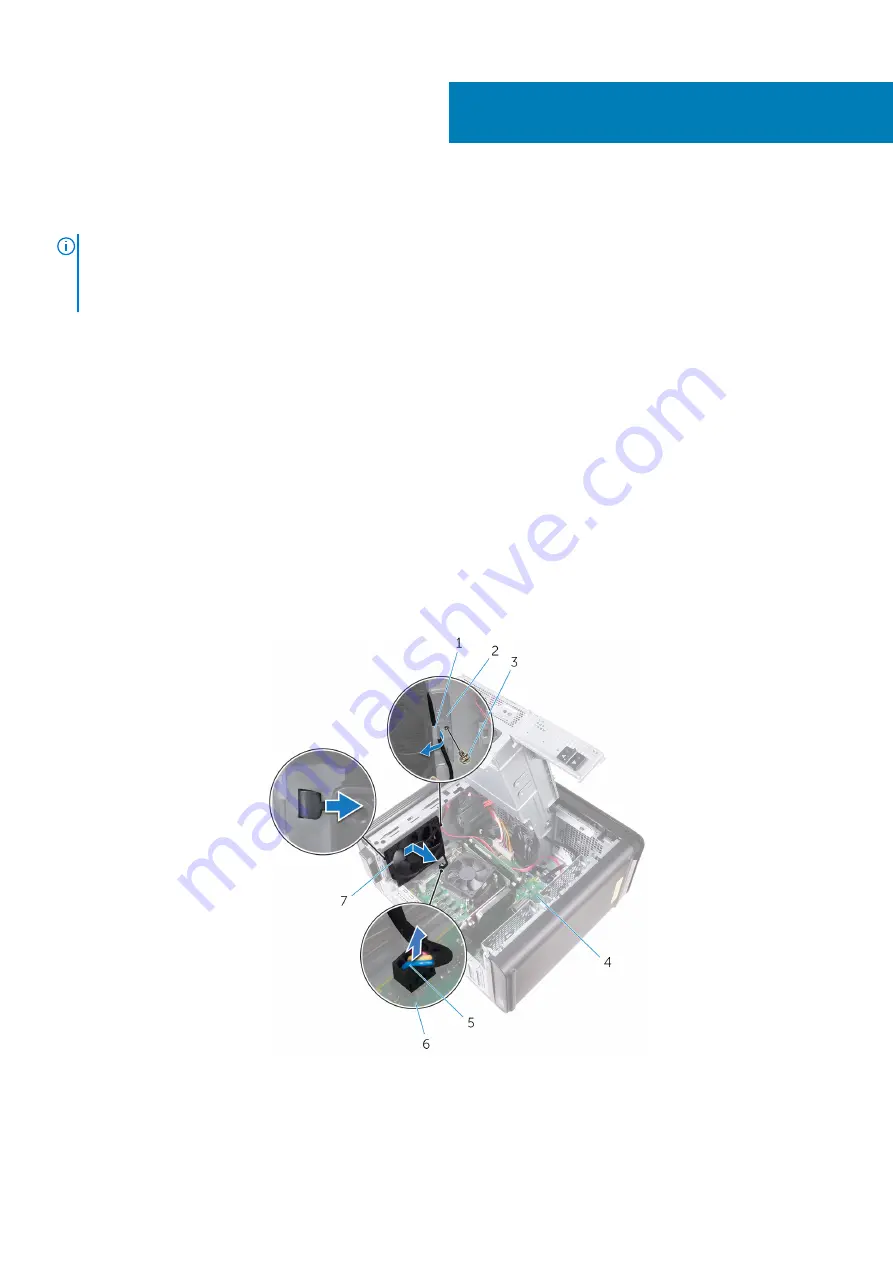
1. Remove the chassis-fan cable from the routing guide on the chassis-fan bracket.
2. Disconnect the chassis-fan cable from the system board.
For more information, see “
3. Remove the screw that secures the chassis-fan bracket to the chassis.
4. Slide the chassis-fan assembly towards the front of the computer to release the fan from the chassis.
5. Lift the chassis-fan assembly off the chassis.
Figure 36. Removing the chassis fan
1. routing guide
2. chassis-fan bracket
3. #6-32x1/4'' screw
4. chassis
5. chassis-fan cable
6. system board
42
72
Removing the chassis fan
Summary of Contents for XPS 8920
Page 1: ...XPS 8920 Service Manual Regulatory Model D24M Regulatory Type D24M001 June 2020 Rev A04 ...
Page 8: ...Chapter 55 Getting help and contacting Dell 102 8 Contents ...
Page 38: ...3 system board 4 M2x2 5 screw 38 Removing the solid state drive ...
Page 101: ...7 Turn on your computer Troubleshooting 101 ...


