background image

ELECTRIC RANDOM ORBITAL SANDER INSTRUCTION MANUAL


706500AN

/

706502AN

/

706510AN

/

706512AN

152 mm (6 in.),127 mm (5 in.); 4,000 – 10,000/min
706522AN
77 mm (3 in. - 2.5mm); 4,000 - 9,000/min
706535AN
70 mm x 198 mm; 5,000 – 8,500/min
INPUT: 220-240 Va.c. 50-60 Hz 150 W (350 W S2 1 m)

Original Instructions

EN

Customer service:

Australia: 1300 742 123
New Zealand: 0800 742 123
Email: sia.au@sia-abrasives.com  

B-E240E-DM-8

-AU

Revision 

2020

/

10

GUARANTEE & WARRANTY

Our goods come with guarantees that cannot be excluded under the Australian Consumer 
Law. You are entitled to a replacement or refund for a major failure and compensation for 
another reasonably foreseeable loss or damage. 

You are also entitled to have the goods repaired or replaced if the goods fail to be of 
acceptable quality and the failure does not amount to a major failure. If the goods cannot be 
repaired, you are entitled to a replacement or refund. 

Any warranty of guarantee offered on our goods or services is in addition to any right and 
remedies that you have as a consumer under Australian Consumer Law.

For extra details about any warranty that we provide, you can contact our Customer Service.

Summary of Contents for 706500AN

Page 1: ...cannot be excluded under the Australian Consumer Law You are entitled to a replacement or refund for a major failure and compensation for another reasonably foreseeable loss or damage You are also ent...

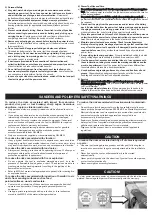
Page 2: ...gs must match the outlet Never modify the plug in any way Do not use any adapter plugs with earthed grounded power tools Unmodified plugs and matching outlets will reduce risk of electric shock b Avoi...

Page 3: ...l toxic dusts from sanding surfaces such as lead painted surfaces woods and metals Contact with or inhalation of these dusts can endanger the health of operator and bystanders Use appropriate personal...

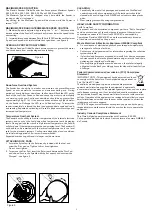
Page 4: ...sounds would be occurred after the plug is securely plug in to the power source and the LED indicator shows Solid Red color at the moment see figure 1 2 Press the power on off button on the button pl...

Page 5: ...r tighten 2 To remove the Disc Pad insert the flat wrench between the Disc Pad and shroud Secure the Spindle with the flat wrench and unscrew the Disc pad see figure 5 CLEANING 1 Periodically blow out...

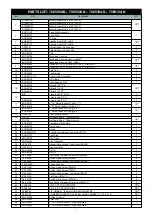
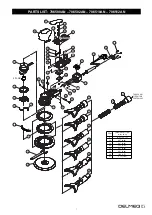
Page 6: ...4 EOS62018 6 Swivel Exhaust Fitting 3 4 19 XPA0022 Pad Wrench 24mm 1 20 21 710122 Multihole Pad 5 125mm velcro EOS50232 Valve Stem Assembly 1 22 EOS50102 Dust Cover 1 23 EOS50129 Spring 1 1 24 EOS502...

Page 7: ...9 31 28 30 10 14 15 11 12 13 39 2 3 4 5 16 17 17 19 20 18 18 46 47 38 40 41 34 35 33 44 TO VACUUM SYSTEM FOR CENTRAL VAC 42 43 XP2 DB1 45 32 Belangrijke informatie Beoogd gebruik Toelichting bij de si...

Page 8: ...oud CV CV Swivel Exhaust Fitting 1 9 OPT 40 N A 1 Pad Supplied With Each Tool 5 16 x 24 thread EOS30042 Valve Stem Assembly 1 11 EOS50102 Dust Cover 1 10 1 12 24 23 EOS50129 Spring 2 1 1 EOS30142 Cord...

Page 9: ...Parts List 706522AN 20 40 22 1 8 3 4 5 6 7 9 10 11 13 24 13 18 15 16 38 39 19 21 28 27 14 25 23 2 36 26 30 29 32 33 34 35 37 31 17 41...

Page 10: ...d Support 1 23 EOS52182 MACHINED HOUSING 1 24 EOS50145 Plug 1 25 EOS50146 Plug 1 26 HN2 04CA Hex Nut M4 1 27 XPA0512 Socket Button Head Cap Screw M4x25 1 28 S7 2006A Button Head Screw M2x6 2 29 XPA076...

Page 11: ...Parts List 706535AN 11 1 2 3 4 5 6 7 8 9 10 11 12 13 14 17 15 15 18 16 19 20 21 22 28 29 23 24 25 26 27 30 31 32 33 34 35 39 40 41 42 43 44 45 46 37 38 36 47...

Page 12: ...ELMEO...

Reviews: