


9
Please note:
when changing the settings, the
oscillation temporarily stops for approximately 10-15
seconds before resuming.
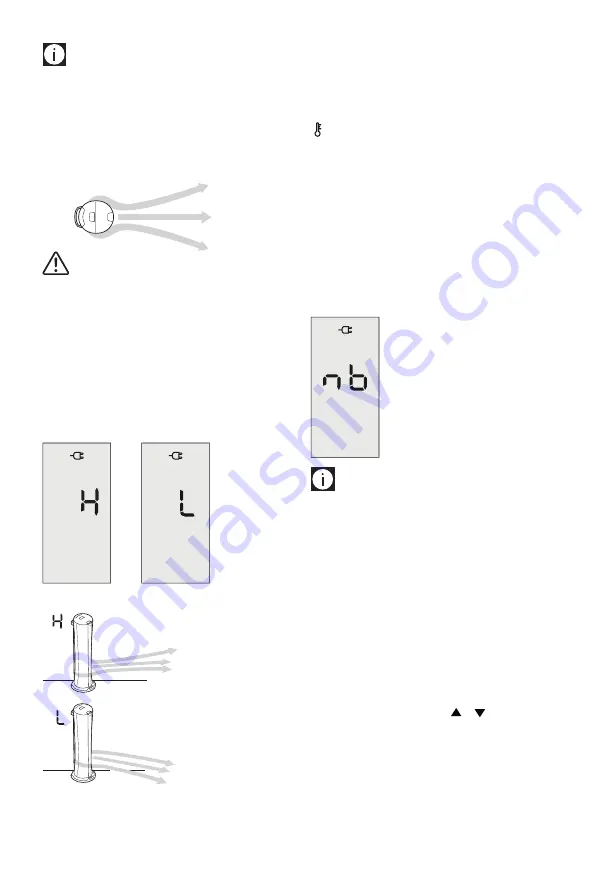
Airflow
The airflow moves around the surface of the appliance
spreading uniformly throughout the room, ensuring a perfect
comfort level.
Important!
NEVER put your hands or any foreign
objects e.g. a knife or foil, into the air outlet (S).
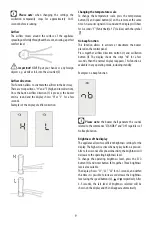
Airflow direction
This function allows to orientate the airflow in the best way.
There are two positions, "H" and "L" (high and low direction).
Once the button airflow direction (I) is pressed, the buzzer
emits a sound and the display shows "H" or "L" for a few
seconds.
Examples of the display of airflow direction:
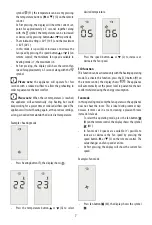
Changing the temperature scale
To change the temperature scale, press the temperature
button (G) and speed button (L) on the remote at the same
time. An acoustic signal will sound and the display will show
for 3 seconds "
F
" (Fahrenheit) or"
C
" (Celsius) with the symbol
.
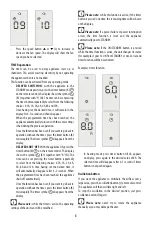
No beep function
This function allows to activate or deactivate the buzzer
placed on the control panel.
Press together airflow direction button (I) and oscillation
button (J). The display shows the script "nb" for a few
seconds, then the normal display reappears. This function is
available in any operating mode, including standby.
Examples: no beep function
Please note:
the buzzer shall generate the sounds
related to the commands "STANDBY" and "ON" regardless of
No Beep function.
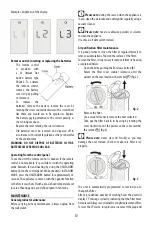
Brightness of the display
The appliance allows two different brightness settings for the
display. The highest is active when any key button is pressed.
After a few seconds of keyboard inactivity, the brightness will
decrease to the operating brightness level.
To change the operating brightness level, press the ECO
button (H) and timer button (K) together. Three brightness
levels are available.
The display shows: "L1", "L2", "L3" for 4-5 seconds, and within
this time it is possible to increase or decrease the brightness
level using the speed buttons (L),
or
respectively. After
4-5 seconds, the last level of brightness selected will be
shown on the display and then disappear automatically.


