Page 16
Page 17
Wall Switch Installation
Air Switch can be disabled if Wall Switch
1.
operation is preferred. The disposer is
shipped with switch in the “off” position.
Attach air switch actuator to the air switch
spout located on the bottom of the
disposer, using the tube provided.
Depress Air Switch once until you hear
2.
the switch audibly “click”.
Remove and discard the Air Switch
3.
actuator and tube.
The disposer may now be activated by a
4.
Wall Switch.
WARNING
If you are not familiar with mechanical and
electrical connections, the Power Cord and Air
Switch should be installed and replaced by a
qualified technician.
STEP 06
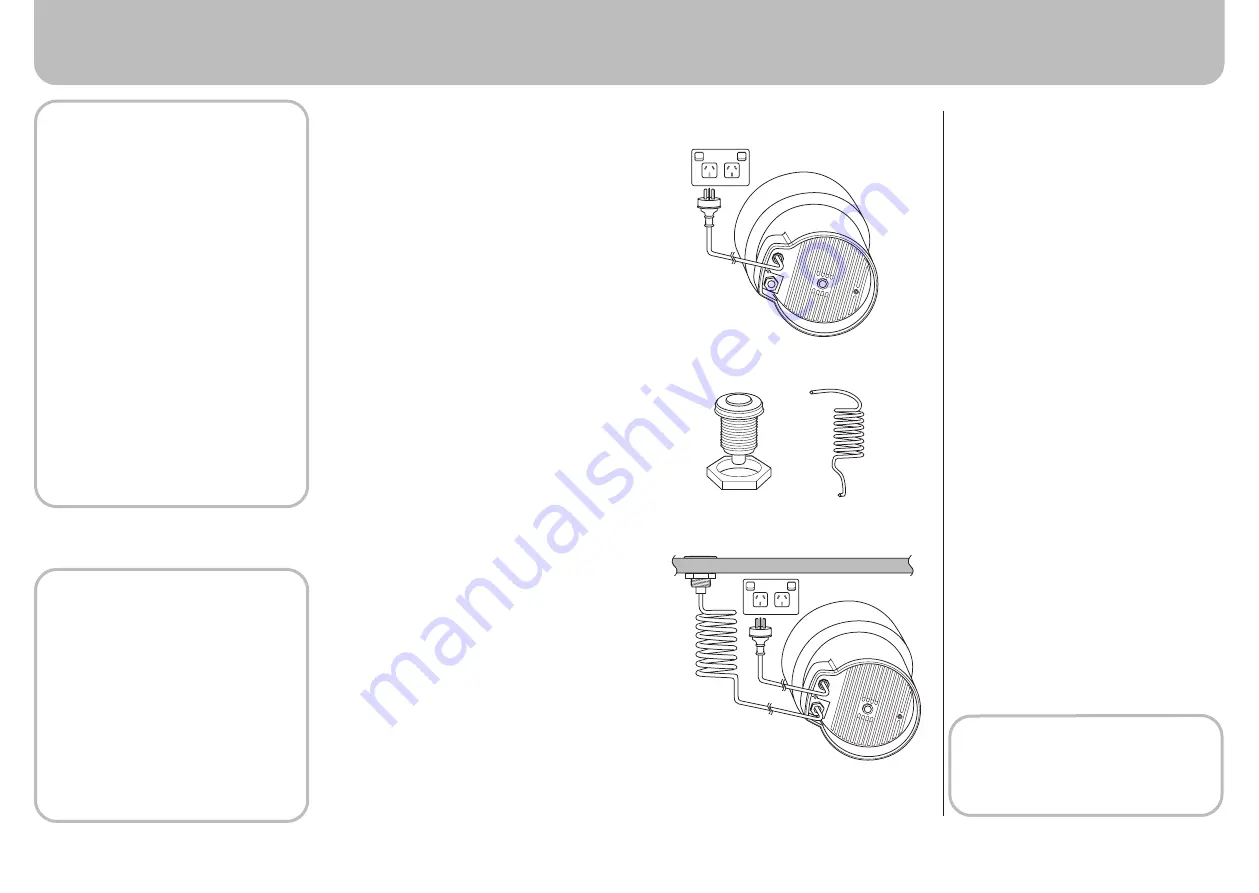
Connect disposer to electrical supply
Connect electrical power to your disposer by
plugging the power cord directly into power
outlet.
STEP 07
Switch Installation
There are two types of on/off switches available
for installation. Install the option that best suits
how you will use your waste disposer.
Air Switch: This installation provides a benchtop
switch that allows the waste disposer to be
controlled with a single press.
Wall Switch: This installation does not use
the Air Switch and requires you to control the
waste disposer with a reqular wall switch.
Air Switch Installation (regular)
The air switch kit includes:
Push button
PVC air switch tube
Make a hole (34.5 mm in diameter) in an
1.
area of kitchen counter convenient for
a push button, or for some sink units,
remove the cap on the pre-existing switch
hole.
Fit the push button bellows in the
2.
prepared hole and screw the nut up
underneath the countertop.
Plug the PVC air switch tube into the
3.
bottom of the push button bellows,
then plug other end of tube into the air
switch spout located at the bottom of the
disposer.
NOTE:
Do not use a wrench to tighten the Air
Switch; it may damage the plastic parts.
Installing Your Waste Disposer
Installing Your Waste Disposer
ELECTRIC SHOCK RISK
Disconnect power before installing or servicing
disposer.
Improper connection of the equipment
grounding conductor may create an electric
shock risk. Check with a qualified electrician
or serviceman first if you are in any doubt as to
whether the appliance is properly grounded.
DO NOT
modify the plug provided with the
appliance; if the plug will not fit the outlet;
have a suitable outlet installed by a qualified
electrician.
This unit is equipped with a three-prong,
grounded plug; plug must be inserted into a
three-holed grounded outlet. The appropriate
outlet must be properly installed and
grounded in accordance with all local codes
and ordinances.
Power plug must be accessible after
installation.
GROUNDING INSTRUCTIONS FOR
CORDED UNITS
This appliance must be grounded. Should a
malfunction or breakdown occur, grounding
provides a path of least resistance for the
electric current, reducing the risk of electric
shock.
The cord on this unit has an equipment-
grounding conductor and a grounding plug
to be plugged into an appropriate outlet. The
outlet used must be properly installed and
grounded in accordance with all local codes
and ordinances.
Air switch
Air switch tube


