1. LOCATION
Place heater on the floor beneath the coldest window in the room, or any other location. Your hea-
ter will reduce the effect of cold drafts. The heater should not be placed immediately below a
power outlet. Do not use this radiator in rooms with a floor area of less than 43 square feet (4 sq.
m.).
2. CONNECTION
The radiator should be connected to a properly polarized A/C 120 V household outlet in perfect
working conditions. Keep loose clothing or bedding, furniture and flammable material away from
the heater’s wall outlet.
3. TURNING ON
Turn the thermostat clockwise to its maximum position. Push down both switches. The switch lights
stay on independently of the thermostat cycling. When room reaches the desired temperature, turn
the thermostat knob counter-clockwise very slowly and carefully until you hear a click. This should
set your heater to maintain the desired temperature by cycling on and off as required.
4. USE OF THERMOSTAT
The thermostat operates according to room air temperature, rather than radiator temperature.
Turning it counter-clockwise to smaller numbers would decrease the temperature; clockwise to
greater numbers would increase the temperature.
Antifreeze function
Turn the thermostat dial to the position and push the switches on. The appliance will maintain a
minimum room temperature of approximately 42°F (5°C), thus preventing freezing while conser-
ving energy.
REMINDER
To completely shut the heater off, ON/OFF switches must be set in the OFF position.
5. COMFORTEMP FUNCTION
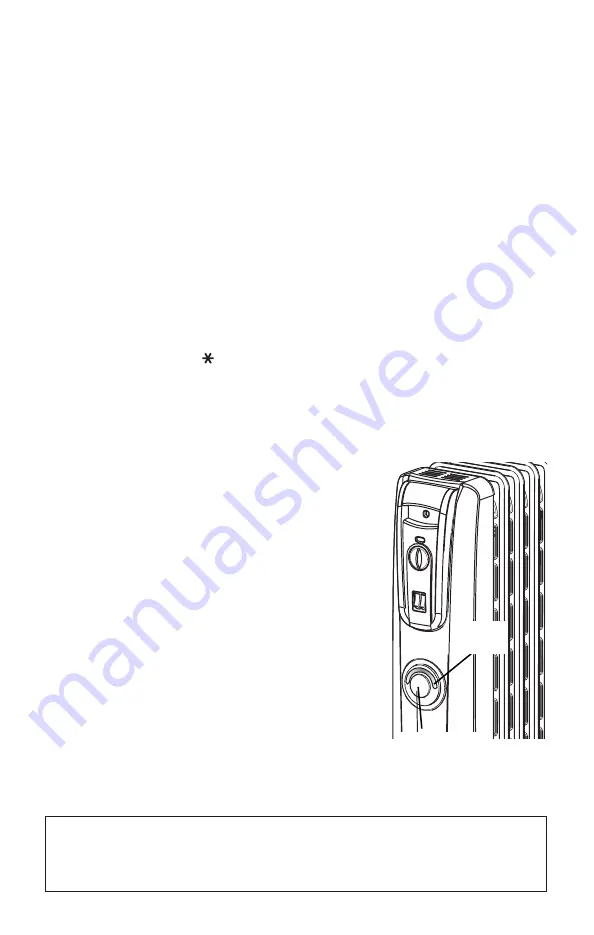
With the two switches and the COMFORTEMP button depressed,
the appliance is automatically set to reach and keep the sugge-
sted ideal temperature. When the mode COMFORTEMP is on, the
relevant green pilot light is on. To depress the COMFORTEMP
function and return to manual functioning, depress the COMFOR-
TEMP button once again.
A safety device
A
safety device
switches the heater off in the event of everhea-
ting. To restart the heater, call the nearest Service center.
6. MAINTENANCE AND SERVICE
Always unplug the heater from the power outlet and allow the
radiator to cool. Wipe radiator with a soft damp cloth; do not use
detergents and abrasives. Should the radiator not be in use over
a certain length of time, roll the cable around the holder and store
it in a dry place (see fig. on front page).
This appliance has been built to last for many years of trouble-
free service. In case of malfunction or doubt, do not try to repair
the heater by yourself: this might increase the risk of fire and elec-
tric shock. Call nearest Service Center Visit www.delonghi.com for a
completelist of Service Centers (U.S. Only).
Your product is equipped with a polarized alternating current line plug (a plug having one blade
wider than the other). There is only one way it can be plugged into a power supply. This is a
safety feature. If you are unable to insert the plug fully into the outlet, try again by turning it the
other way. If it would still not go in, it is probably due to an obsolete outlet which should be
replaced. Do not temper with the plug or outlet to defeat the purpose of this safety mechanism.
4
BUTTON
COMFORTEMP
PILOT
LIGHT


