7
inReach Explorer Quick Start Guide
To manually calibrate the altimeter, go to
Settings>Compass
& Altimeter
and choose
Calibrate Altimeter
. There are three
methods to calibrate the altimeter:
• Known Elevation – Enter the true elevation from a source such
as a trail marker or a topographic map.
• Known Pressure – Enter the atmospheric pressure from a
current source such as a local weather report.
• GPS Elevation – Use this option if you do not know the correct
elevation or pressure.
Select a method and follow the on-screen instructions.
Note:
Manually calibrating disables auto calibration until the device
is restarted. Changes in weather conditions can impact barometric
altimeter readings, so consider enabling auto calibration in these
situations.
Step Two: Calibrate your digital compass.
inReach Explorer uses a digital compass to give accurate heading
and bearing information whether you’re stationary or moving. The
device automatically checks compass calibration and will tell you to
calibrate if necessary. For best performance, calibrate your digital
compass any time the device prompts you or manually calibrate
before a trip when you expect compass use to be important.
To manually calibrate the compass, go to
Settings>Compass &
Altimeter
, and then choose
Calibrate Compass
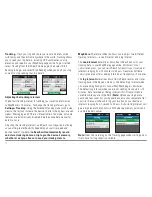
. Rotate inReach in
a figure-8 pattern, turning all sides of the device to the ground, and
continue until the device beeps to report successful calibration.
Step Three: Calibrate your barometric
altimeter.
inReach Explorer uses a barometric altimeter to give accurate
elevation readings when you are climbing or descending. The
device automatically calibrates the barometric altimeter using GPS
elevation each time it is powered on. Auto calibrating with GPS
elevation is a good method if you do not know the correct elevation
or pressure for your location. For best performance, manually
calibrate your barometric altimeter before any trip during which high-
accuracy elevation readings are important.


