background image

Topo USA User Guide 


Why do X marks display on the map when I calculate a route? 


When you place a route point in a location that isn't on a street, Topo 
USA finds the closest street to that location, marks the space between 

the point you clicked and the street with X marks, and starts the route 
at the street. 


If you search for an address that is on a walkway and place a route 
point on it, Topo USA finds the closest street to that location, marks 

the space between the point the clicked and the street with X marks, 
and starts the route at the street. 


Why is the tab area and control panel so narrow?  

Topo USA was designed for resolutions of 800 x 600 or higher. If you are 

using a very high resolution (such as 1920x 1200), the tab area and control 
panel may appear to be very narrow. You can modify the size of the map and 

tab area or use the Windows® Control Panel to adjust your display settings. 


What's the best way to measure the distance of a road or trail? 

The best way to determine the distance of a particular road or trail is to 
create a route. You can create a route using right-click functionality, the 

toolbar, or the Route tab. For more information, see Creating a Route. 


What's the best way to measure a large area on the map? 

The best way to measure a large area on the map is with the area tools on 
the Draw tab (such as the polygon tool). When you draw an area object on 

the map, the area displays next to the object on the map. If you click off the 
object, you can view the area again by clicking the Select tool in the Draw 

tab and then clicking the area object on the map. For more information about 
drawing area objects, see Drawing a Circle, Rectangle, or Polygon on the Map.  


What's the best way to measure a short distance on the map? 

The best way to measure a short distance (that is not made up of a 

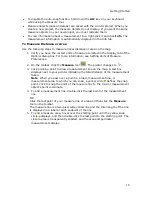
road/trail) on the map is to use the Measure tool 

 on the toolbar. You can 

measure linear distance and area on the map based on the units chosen in 

the Display tab of the Options dialog box. For instructions on using the 
measure tool, see Measuring Distance and Area. 


Why won't 3-D billboards display? 

If you receive a message saying that 3-D billboards cannot be displayed, 

ensure that you have a 32 MB video card with the most recent drivers and 
that it supports DirectX and transparencies.  

Helpful Tips 

These tips may help you use the features in your DeLorme mapping program. The 
Did You Know? pop-up tutorials provide hints while you are working in the 

application.  
Tips   

Summary of Contents for Topo USA 8.0

Page 1: ...Topo USA 8 0 User Guide ...

Page 2: ......

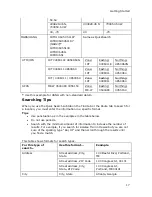
Page 3: ...ats 16 Searching Tips 17 Exiting the Program 18 About the Interface 19 Tab Area 19 Control Panel 20 Overview Map 20 Toolbar 21 Map Legend 23 Map Legend 23 Using the Toolbar 27 Showing Hiding Toolbar Options 27 Reordering the Toolbar Options 27 To Create New Projects 27 To Open a Project 28 To Save a Project 28 To Print 28 To Print the Map Screen 28 To Share Maps 28 To Open the Map Library 29 To Cr...

Page 4: ...howing or Hiding Tabs 47 Importing Exporting Tab Manager Preferences 48 Reordering the Tabs 49 Using Keyboard Shortcuts 51 Selecting a Keyboard Shortcut Scheme 51 Creating a New Custom Scheme 51 Assigning Keyboard Shortcuts in a Custom Scheme 51 Customizing a DeLorme Scheme 53 Renaming a Custom Scheme 53 Deleting a Custom Scheme 54 Importing a Custom Scheme 54 Exporting a Custom Scheme 55 Searchin...

Page 5: ...k 83 Manually Moving a Contact on the Map 83 Relocating Address Book Contacts 84 Deleting a Contact In Your Address Book 84 Showing Hiding Address Book Contacts on the Map 85 Deleting Your Entire Address Book 85 Exporting Your Address Book 85 Printing 87 Printing a Map 87 Printing a Route and Directions 88 Printing a Profile 89 Adding Text or Graphics to Your Map 90 Aligning Text and Graphic Items...

Page 6: ...Draw Objects 123 Deleting Points and Line Segments from Draw Objects 124 Labeling a Draw Object 124 Routable Roads Trails Tracks Lines Arcs and Splines 125 Drawing Routable Roads or Trails on the Map 125 Drawing a Line Arc or Spline on the Map 126 Drawing a Track on the Map 127 Editing a Routable Road Routable Trail Line Arc or Spline 128 Editing a Track 129 Placing a Routable Road Routable Trail ...

Page 7: ...a Route 153 Adding and Inserting Stops and Vias 154 Changing the Routing Method 157 Changing the Properties of a Stop Along Your Route 157 Viewing Route Directions 158 Avoiding a Specified Area When Routing 158 Saving Route Directions as Text 159 Setting Your Routing Preferences 160 Editing a Route 161 Editing Roads 162 Labeling a Route Point with a MapNote 162 Moving Route MapNotes 163 Displaying...

Page 8: ...ing the Speech Recognition Engine 189 Speech Recognition Tips 190 Changing Voice Output 191 Voice Preferences 193 Using Handheld Devices 195 Handheld Export 195 Setting Your Handheld Export Preferences 195 Creating a Map Package 196 Grid Size Comparisons 197 Data Zoom Level Scale Bar Translation 198 Exchanging Information with an Earthmate PN Series GPS 199 Exchanging Maps Tracks Routes and Waypoi...

Page 9: ...25 Sending a Handheld Map 225 Sending Route Information 225 Receiving a GPS Log 226 Sending Waypoints 227 Sending a GPS Log 228 Receiving a Route 228 Receiving Waypoints 229 Profiling Linear Objects 231 Creating a Profile 231 Viewing the Profile Elevation Graphs 232 Statistical Data 234 Manually Setting Minimum and Maximum Elevation 237 Clearing a Profile 237 User Profile Data 238 Viewing Your Map...

Page 10: ...Topo USA User Guide x DeLorme Topo USA 8 0 Single User License Agreement 251 Important Notices 254 Apache License Version 2 0 260 Index 265 ...

Page 11: ... at the same time Create trail road or direct routes by adding start and finish points on your map Customize your route by adding stops and vias Use the toolbar to share maps add data and images to the map open create save projects start stop GPS edit your preferences and more Profile map items and objects you draw add to the map to determine coordinate information linear distance elevation grade ...

Page 12: ... Earthmate PN Series GPS device To get started see these tutorials in the Topo USA 8 0 Help system Tutorial Add a Map to Your PN Series GPS Tutorial Exchange Data with an Earthmate PN Series GPS To learn how to make a custom map see this tutorial in the Topo USA 8 0 Help system Tutorial Create Custom Maps for an Earthmate PN Series GPS For more information see the PN Series GPS Help topics under U...

Page 13: ...10 miles The points of interest display in Find tab results area OR If you are tracking with a GPS device do a radar search to locate points of interest within a designated distance of your current GPS position Where do I find the map settings and other Options settings Click the Options button on the toolbar to modify GPS voice map feature display handheld and keyboard shortcut and 3 D preference...

Page 14: ...s you create new routes or draw layers change preferences or the map center and so on they are added to the current project You can save or discard changes To learn how to create a project see Creating and Deleting Projects What is the difference between a stop and a via When routing in Topo USA you have the option of adding inserting stops or vias in the route A stop is a location in a route wher...

Page 15: ...route With a route start stop via or finish point in an area that you have designated as a Route Avoid That includes route points outside the United States If you have the North American version of Topo USa for routes that include points outside of the United States Canada or Mexico On an island without roads In this case Topo USA looks for the nearest road to that island to place the route point ...

Page 16: ...r more information see Creating a Route What s the best way to measure a large area on the map The best way to measure a large area on the map is with the area tools on the Draw tab such as the polygon tool When you draw an area object on the map the area displays next to the object on the map If you click off the object you can view the area again by clicking the Select tool in the Draw tab and t...

Page 17: ...g the Display tab in the Options dialog box View the last map center Press the middle button in the Compass Rose in the Control Panel to center the map on the previous map view This button performs an undo function for the last pan or zoom up to 256 times Draw If you want to Use this tip Create a route using a road or trail you have added to the map with the Draw tab When drawing a routable road t...

Page 18: ...the bottom of the map just above the tab area Map Files If you want to Use this tip Learn how to add route and or draw layers to your project Add existing route and or draw files to your project by clicking the Add button and selecting the Draw File or Route File option Measurement Tool If you want to Use this tip Measure the area perimeter of a location on the map Use the measure tool to draw a p...

Page 19: ...dded stops vias are placed in the order you add them to the route Inserted stops vias are placed in the order you would approach them between the Start and Finish points of the route View information about your second turn Click the Show Turns button when GPS tracking to view information about the following turn Tab Area If you want to Use this tip Adjust the size of the tab area Adjust the size o...

Page 20: ...s Data from the DVD Choose one of the following ways to access the data using the DVD If you installed a desktop shortcut insert a the Topo USA DVD into your DVD drive and then double click the Topo USA icon OR Insert a Topo USA DVD into your DVD drive From the Start menu point to Programs DeLorme Topo USA 8 0 and then click Topo USA 8 0 Zooming In and Out You can use the drag and zoom feature zoo...

Page 21: ...ap to encompass the area you want to display A view box displays on the screen and changes dimension as you move the mouse A label displays the data zoom level at the current map center 2 Once you reach the map area or data zoom level you want to display release the mouse button The area you selected fills the map window the map re centers and the map view adjusts to show the appropriate level of ...

Page 22: ...ta zoom level of the left map displays in the text area to the left of the buttons Tips Press ALT PAGE UP on your keyboard to zoom out to the next full data zoom level Press ALT PAGE DOWN on your keyboard to zoom in to the next full data zoom level Use the mouse wheel to zoom the map in and out Rotate the mouse wheel to zoom in by individual data zoom level steps or hold the SHIFT key while rotati...

Page 23: ...e with an incremental page number at the end See Printing a Map for information about printing a map without saving it as a file To Save a Map as a Bitmap or JPEG Use the following steps to save a map as an image 1 Locate the area on the map that you want to save as an image 2 Click the Print tab and then click the Map subtab if it is not already selected 3 Under Map select Left Right or Both 4 Un...

Page 24: ...t area and changes the tab label to red Add text or graphics to your map Select the Print Preview check box to zoom the map and view the entire area that will be saved as a bitmap image Clear the check box to return to your previous data zoom level 6 Click the Save button The Save 2D Map Image dialog box opens 7 Type the file name in the File Name text box select to save the file as a bmp or jpg f...

Page 25: ...tool The pointer changes to 3 Click point by point to draw a measurement line on the map A text box displays next to your pointer indicating the total distance of the measurement taken Note When you pass over a point in a road measurement line or measurement area to which you can snap a yellow circle defines the snap point Click to snap the point of the measure line to the road or measurement obje...

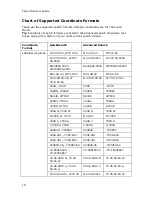
Page 26: ...N43 48 30 W70 9 52 N43 48 30 W70 9 52 N 43 48 29 46 W 70 9 50 64 N 43 48 29 46 W 70 9 50 64 4348 7009 4348 7009 4348N 7009W 4348N 7009W N4348 W7009 N4348 W7009 4348n 7009w 4348n 7009w n4348 w7009 n4348 w7009 4348 N 7009 W 4348 N 7009 W N 4348 W 7009 N 4348 W 7009 4348 n 7009 w 4348 n 7009 w n 4348 w 7009 n 4348 w 7009 434829 700950 434829 700950 4348 491 7009 844 4348 491 7009 844 4348 491 7009 84...

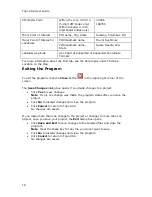
Page 27: ...ck Search subtab on the Find tab or the Route tab to search for a location you must enter the information in a specific format Tips Use punctuation as in the examples in the table below Do not use periods Search with the minimum amount of information to increase the number of results For example if you search for Kalalau Trail in Hawaii but you are not sure of the spelling type Kal HI and then scr...

Page 28: ...the Close button in the upper right corner of the screen The Save Changes dialog box opens if you made changes to a project Click Yes to save changes Note If only one change was made the program closes after you save the project Click No to discard changes and close the program Click Cancel to return to Topo USA No changes are saved If you made more than one change to the project or changes to mor...

Page 29: ...nctions from the tab area at the bottom of the screen To access Help for a specific tab click the Help button on the tab You can also reorder the tabs show or hide individual tabs or show or hide the tab panel Map Files Find Draw Route NetLink Handheld Export Info Profile 3 D Print Voice GPS ...

Page 30: ...rotated map Use the Map Rotation Tool to rotate the map in any direction You can rotate the map by clicking or dragging the square map graphic in the direction you want or by selecting typing the degree of map rotation from the drop down list Map Coordinates Coordinates for the current map cursor position display based on the units of measurement preferences chosen in the Display tab of the Option...

Page 31: ... You can show or hide toolbar options You can change the order of the toolbar options Default Toolbar This is the default toolbars see the Using the Toolbar section of the Help Additional Toolbar Options These button groups are hidden in the default toolbar To show a button group right click the toolbar and click the check box next to the name of the group Print GPS Nav Mode Map Panning ...

Page 32: ......

Page 33: ...reet Colors Description Major Trail National Scenic National Historic etc 4 wheel Drive Trail Trail Walkway Foot Trail Important Some trails may cross private property Contact the applicable trail department to ensure you have the appropriate permissions before following a major trail For contact information see Recreational Contacts Routable Road Features Ferry Passenger Ferry Vehicle Interstate ...

Page 34: ...thru 10 7 Intermittent Water Land Military Area at data zoom level 11 Military Area at data zoom level 2 thru 10 7 n a Mine or Quarry Parks River Stream n a Transitional Area Lava Salt Flats or Mixed Barren Water n a Wetlands Point Features Topo Colors Street Colors Description Amusements Airport private Airport commercial public Airport general aviation public Business Amusement Recreation Specia...

Page 35: ...l Lodging Metropolitan City National Capital data zoom level 7 thru 10 National Capital data zoom levels 2 thru 6 Point of Interest smaller black square Population Center Public Service Religious buildings Rest Area with Facilities at data zoom levels 10 thru 11 Rest Area with Facilities at data zoom level 12 Rest Area without Facilities at data zoom levels 10 thru 11 Rest Area without Facilities ...

Page 36: ...mbols Symbol Description Developed Boat Ramp at data zoom levels 11 and 12 Developed Boat Ramp at data zoom level 13 Freshwater Fishing at data zoom levels 11 and 12 Freshwater Fishing at data zoom level 13 Hunting at data zoom levels 11 and 12 Hunting at data zoom level 13 Saltwater Fishing at data zoom levels 11 and 12 Saltwater Fishing at data zoom level 13 Undeveloped Boat Ramp at data zoom le...

Page 37: ...xt to them are displayed on the toolbar 2 Click an item to activate or inactivate it in the toolbar Reordering the Toolbar Options To reposition the toolbar segments horizontally or vertically just drag the dotted vertical bar that separates each segment to the new location left right up or down To Create New Projects To create a new project click the New button on the toolbar If you made changes ...

Page 38: ... If you want to rename the project type a new name in the File Name text box 3 Click Save To Print To print a map using the current settings in the Print tab click the Print button on the toolbar For more information see Printing a Map The Print button is hidden by default to show it right click the toolbar and click Print To Print the Map Screen To print the current view as it displays on the scr...

Page 39: ...k the Stop button or the Via button and then click the location on the map where you want to add or insert the stop or via Repeat this step for each stop or via you want to add to your route Note If the Add option is selected in the Route tab stops and vias are added in the order they are added to the route If the Insert option is selected in the Route tab stops and vias are added in the order the...

Page 40: ... can view in 2 D or 3 D is the default view when you navigate or track with GPS You can turn off NavMode to display the GPS tab view The NavMode button is hidden by default to show it right click the toolbar and click GPS NavMode To Turn NavMode On Off Click the NavMode button to turn it on or off When the button appears indented NavMode is on Note The button is greyed out unless you have a GPS de...

Page 41: ...e lines travels along the top of the terrain profile These lines indicate the height and distance of the particular location A small crosshair follows along the corresponding object on the map You can also right click a linear object or route on the map and click Profile For more information about profiles see the Help topics under Profiling Linear Objects To Measure Distance Use the following ste...

Page 42: ...ze all of the information categories 4 Optional Repeat steps 1 3 to get information about another location 5 Optional Right click in the information box and click Print to print your map feature information Notes You can also get information about a location using the right click option Just right click the location and click Info The status bar located above the tab area displays draw object type...

Page 43: ...lation You can also customize your interface Show Tab Area Panel Allows you to show or hide all the tabs If Show All Tabs is turned on the check box next to it is selected Click Show Tab Area Panel to show or hide the tab area Show Control Panel Allows you to show or hide the Control Panel If Show Control Panel is turned on the check box next to it is selected Click Show Control Panel to show or h...

Page 44: ......

Page 45: ...rn UMPC Mode on or off To Customize the Interface 1 Click the arrow next to the Options button on the toolbar 2 To turn on an option when it is not selected click it to select the check box OR To turn off an option when it is selected click it to clear the check box Use Tab Manager to show or hide individual tabs or reorder tabs Use Show Tab Area Panel to show or hide the entire tab area Use Show ...

Page 46: ...ecomes visible at data zoom level 6 0 or greater It simulates the effect of sun shining on terrain features and casting shadows providing greater depth perception of the image Lighter shades of gray indicate gentle terrain and darker shades indicate steep terrain Using shaded relief may slow down the draw time of the map screen as you pan Contours Contour lines are available at data zoom level 6 0...

Page 47: ...t data zoom level 10 0 or greater One Ways One ways display as bright green triangles on roads pointing toward the direction of travel most noticeable in large cities They are available at data zoom level 13 0 or greater Places Minor View smaller towns suburbs locales and natural features Zoom levels vary Roads Minor View secondary roads local and rural routes trails and railroads Zoom levels vary...

Page 48: ...k the Done button 1 Click the Options button on the toolbar OR Click the arrow next to the Options toolbar button to open the menu Then click Options to open the dialog box 2 Click the Map Features tab 3 Select the Use Custom Map Features check box and then click Customize Features to display the custom options Note Custom map feature selections override selections in the basic features list 4 To ...

Page 49: ...ject the following feature preferences are saved in reference to map features o Major map features preferences o Individual custom feature preferences o When you create a new project the current map settings are used Click Use Defaults to return to the default settings Changing the Map Colors When you use a laptop computer while traveling it can be difficult to see the map display on your screen T...

Page 50: ...identically to the data that is displayed in the right map window Note The Hybrid Map button is unavailable for vector dataset types Changing the Map Magnification Level If you want to change the size of the map image but not change the degree of geographic detail on the map use the magnification settings in the Options dialog box To Change the Map Magnification Use the following steps to change t...

Page 51: ... the Map You can change the data zoom level at which large POI symbols display on the map To Change the Data Zoom Level for Large POI Symbols Use the following steps to change the data zoom level at which large POI symbols are displayed on the map 1 Click the Options button on the toolbar OR Click the arrow next to the Options toolbar button to open the menu Then click Options to open the dialog b...

Page 52: ...uare symbols only name of the POI and a small square symbol name of the POI and the large symbol name of the POI and the large symbol 17 N A small square symbols and some names of POIs name of the POI and a small square symbol name of the POI and a small square symbol name of the POI and the large symbol Setting Units of Measure Preferences You can change the units of measure used to represent how...

Page 53: ... the Options dialog box OR Click Apply to commit the change and keep working in the Options dialog box Notes UTM UPS and MGRS coordinate systems are best used with NAD27 datum 95 of the USGS quads containing UTM grid lines uses the NAD27 datum which is helpful if you are comparing a map generated from your mapping application to a USGS map If the USNG coordinate system is not matched with NAD83 da...

Page 54: ...dicated from True North or Magnetic North Notes Magnetic declination is the difference in degrees between True North and Magnetic North at a specific location The bearing setting does not affect map appearance Use the following steps to change the bearing 1 Click the Options button on the toolbar and then click Options 2 Click the Display tab 3 Select the bearing from the Bearing drop down list Tr...

Page 55: ... want to see Click the right arrow on the resize tool once to move the secondary map 1 4 of the screen width You can repeat this step until the primary map is no longer visible Click the left arrow on the resize tool once to move the primary map 1 4 of the screen width You can repeat this step until the secondary map is no longer visible Double click the bar above the right arrow to show only the ...

Page 56: ...longer exposed Double click the bar above the right arrow to show only the tab area Double click the bar below the left arrow to show only the overview map Double click the bar between the right and left arrows to return the tab and overview maps to their default views Viewing Two Maps at the Same Time The split window lets you view two maps at the same time You can access the left map using the m...

Page 57: ...m level 8 0 and you click the Zoom Out 1 tool the left map displays at zoom level 5 0 and the right map at 7 0 The overview map in the tab area is always associated with the right map window Other tab functionality may be affected by use of the split screen function as follows Draw The line and polygon draw tools work in either map window The Select tool highlights the same draw object on both map...

Page 58: ...Manager 1 Open Topo USA click the arrow next to the Options button on the toolbar and select Tab Manager from the menu OR From the Start menu point to Programs DeLorme Topo Tools and then click Tab Manager 2 Clear the check box next to each tab you want to hide in the program OR Click Minimum Only the required tabs will display in the program Note Find Map Files Info and NetLink are required tabs ...

Page 59: ...pens 3 Type a name for the configuration preferences file in the File Name text box and then click Save Configuration files are saved by default in C DeLorme Docs Configuration 4 Click OK to close Tab Manager Reordering the Tabs Use the Tab Manager feature to customize your program by reordering tabs You can access Tab Manager During installation After installation using the Tab Manager option in ...

Page 60: ...de 50 4 Repeat steps 2 and 3 for each tab you want to reorder 5 Optional Click Default to cancel the reordering process and use the default tab order showing all available tabs 6 Click OK 7 Exit Topo USA 8 Open Topo USA ...

Page 61: ...oard shortcut scheme for different program uses To Create a Custom Scheme Use the following steps to create a custom scheme 1 Click the Options button on the toolbar OR Click the arrow next to the Options toolbar button to open the menu Then click Options to open the dialog box 2 Click the Keyboard Shortcuts tab 3 Click File and then click New The Scheme drop down list is completed with Custom Sch...

Page 62: ...Customize Shortcut text box 8 Press the shortcut key combination on your keyboard that you want to assign for that command 9 Click Assign The shortcut for that command changes to the combination you assigned and displays as pending 10 Repeat the steps for each command you want to assign 11 Click Apply to save the changes OR Click OK to save the changes and close the Options dialog box OR Click Can...

Page 63: ...w next to the Options toolbar button to open the menu Then click Options to open the dialog box 2 Click the Keyboard Shortcuts tab 3 Select the DeLorme scheme you want to copy from the Scheme drop down list 4 Click File and then click Copy The active scheme changes to Copy of Desktop Mapping Copy of In vehicle Navigation Copy of 3 D Navigation etc depending on the DeLorme scheme you chose to copy ...

Page 64: ...w next to the Options toolbar button to open the menu Then click Options to open the dialog box 2 Click the Keyboard Shortcuts tab 3 Select the custom scheme you want to delete from the Scheme drop down list 4 Click File and then click Delete 5 Click Yes when asked if you are sure you want to delete the scheme Importing a Custom Scheme You can share their keyboard shortcut schemes with other DeLor...

Page 65: ...h for a specific command or command group Note You can sort the command list view at any time by clicking the heading you want to sort by Group Command or Shortcut To Search For a Command or Command Group Use the following steps to search for a command or command group 1 Click the Options button on the toolbar OR Click the arrow next to the Options toolbar button to open the menu Then click Option...

Page 66: ... 6 Optional Print the list from your Web browser Tips for printing a reference card from your Web browser Use the Print Preview functionality in your Web browser to see if the list will display as you want it to If you do not like the way the list looks in the preview for example the list prints without grid lines in the table or does not print in color change the advanced print settings in your W...

Page 67: ...ard drive To Connect Data Use the following steps to connect a dataset 1 Click the Map Files tab 2 Click Add and then click Data Locations The Data Locations dialog box opens a list of the of the data sources on your system 3 If the dataset you want to view displays in the list ensure its check box is selected AND OR If the dataset you want to view does not display in the list click Add select the...

Page 68: ...data and 3 D TopoQuads data To view 3 D TopoQuads data in the right map window you must disable your Topo USA data connection and enable only the 3 D TopoQuads data connection The dataset that displays in the left map window is dependent on the selection made in the data drop down list at the top of the left map window ...

Page 69: ...You can share routes and draw layers between projects using the Add button in the Map Files tab Can I Send Routes or Draw Layers to Another DeLorme User Projects including their routes and draw layers can be packaged into one transfer file for convenience The transfer file facilitates e mailing copying project information to other computers and copying projects between DeLorme programs You can use...

Page 70: ... map view for that project displays OR Click the project to select it and then click Open The last saved map view for that project displays You can also Open a project by clicking the Open button on the toolbar Open a project by dragging and dropping the project into Topo USA from Windows Explorer View the most recently saved projects by clicking File Recent Files and then clicking the project you...

Page 71: ...tton o If you have not saved the project before the Save File dialog box opens Type a file name in the File Name text box and click Save o If you have saved the project before the Save dialog box opens All of the changes made to the current project display as a check list Select the check box next to each change you want to save and clear the check box next to each change you do not want to save C...

Page 72: ...eLorme Docs Projects 5 Click Create Your file is created and saved in the specified location To Maintain the Directory Structure When Creating a Transfer File with Hyperlinked Files When you create a transfer file containing hyperlinked files you can select to maintain part of the directory structure for files with at least a common drive location Use the following steps to create a transfer file ...

Page 73: ...inked files in the transfer file select Do Not Include Directory Info and go to step 7 6 Type the common base directory location of the hyperlinked files up to the folder location that you want to maintain in the text box OR Click the Browse button and browse to the common base directory location 7 Under Select Files to Be Included clear the check box next to each file you do not want to include i...

Page 74: ... Transfer and then click Import The Import Transfer File dialog box opens The default location is C DeLorme Docs Projects Browse to another location as needed Transfer files have dmt extensions 3 Click a file to select it The name displays in the File Name text box 4 Click Import to finish the import process The imported project opens and displays in the map view To Import a Transfer File with Hyp...

Page 75: ...se the following steps to e mail a transfer file 1 Click the Map Files tab 2 Open the project you want to e mail as a transfer file 3 Click File click Transfer and then click E mail A transfer file is created and your computer s default operating system e mail program opens with the transfer file included as an attachment 4 Complete the e mail in accordance with your e mail system ...

Page 76: ......

Page 77: ... area codes street intersections or a category such as Park Interstate and so on use the Advanced subtab To Perform a Basic Search Follow the steps below to use the QuickSearch subtab 1 Click the Find tab and then click the QuickSearch button OR Press CTRL F on your keyboard 2 Type a major trail name mountain name address ZIP Postal Code town name coordinate draw object label address book contact ...

Page 78: ...0 2 Tip You can find major landmarks or points of interest such as Yellowstone National Park and Mount Rushmore without using the state as part of the search criteria Separate street intersections with an ampersand Congress St High St Portland ME or Congress St High St 04101 Avoid entering a period in your text Click the Search For down arrow to view a drop down list of previously used search word...

Page 79: ...d Ct Court Street Intersection Use this search to locate the intersection of two specified roads ZIP Postal Code s Use at least a partial ZIP Postal Code to locate the covered regions The results display in a browse list Use at least a partial ZIP Postal Code to locate the covered regions The results are displayed in a browse list This means you are taken into the ZIP Postal Code database at the c...

Page 80: ...anada Available only when ZIP Postal Code s is selected as the Find parameter City or County Searches for the specified name within the ZIP Postal Codes associated with the city county and state province specified in the text boxes ZIP Postal Code Searches for the specified name within a ZIP Postal Code Displays a ZIP Postal Code text field A U S search for a ZIP 4 Code is treated the same as a fi...

Page 81: ...on your keyboard The Results list displays your search results with closest matching items at the top of the list 6 Scroll or browse through the list of search results until you find the one you want to locate To center an item on the map select it and then click Go To or double click it A yellow MapTag displays at the location if the MapTags check box is selected Tips Single click an item in the ...

Page 82: ... drop down list examples and history 5 Type the distance you want to search in the Distance text box Type the number of miles followed by mi for example 5 mi 6 Select From Map Center or Along Current Route 7 Click Search If your search is Very Successful The results list displays and if there is one excellent match the map centers on that place and a yellow box displays at the location of the POI ...

Page 83: ...n and whether you are searching only in the direction of travel If you are using GPS NavMode a long search will automatically be interrupted click the More Info button on the orange status bar to open the GPS Radar subtab and adjust your settings for a shorter search If you are using GPS tab view click the Interrupt button to interrupt a long search and see a listing of the nearby points Driving d...

Page 84: ...d on a map using the QuickSearch feature on the Find tab For example if you named a symbol My House when you placed it on the map use the following steps for conducting a search on the unique symbol name To Find a Symbol by its Name Use the following steps to find a symbol by its name 1 Click the Find tab 2 Using QuickSearch type the symbol name followed by the town and state abbreviation for exam...

Page 85: ...hout moving the map single click an item in the results list It is highlighted on the map as long as it is in the current map view This is especially helpful when you are at the data zoom level you want but point labels are not displaying Notes To select multiple items press and hold the CTRL key while clicking up to 350 items in the results list If the items are listed continuously click the firs...

Page 86: ...al Code Buildings and Structures Airport Bridge Business Landmark Library Businesses Hotel Gasoline Restaurant Pizza Education and Cultural College Local Park Park School State Park University Natural Features Beach Canyon Crater Desert Forest Glacier Hill Island Mountain River Stream Valley Water Miscellaneous ...

Page 87: ...ot Trail Highway Hiking Interstate One Way Railroad Road Street Trail Tunnel Travel Amenities Airport Exit Landmark Rest Area Unique Natural Features Geographic Feature Landmark Locale Mining Trail Park or Other Open Space Tourist Attraction Notes on Category Searches The following list provides notes you may find helpful for performing category searches Category keyword searches must be at least ...

Page 88: ...le categories For example pizza or fast food MapTags Converting Moving Hiding and Deleting When you search for and go to a Find search result a yellow MapTag displays at that location if the MapTags check box on the Find tab is selected If MapTags are cluttering your view of the map you can move the text area of the MapTag hide them from view or delete one several or all MapTags To Convert MapTags...

Page 89: ...To delete one MapTag click the Select tool click the MapTag click the Delete Tag tool and click the Select tool again OR Right click the MapTag you want to delete and select Delete MapTag To delete several MapTags click the Select tool hold down the SHIFT key on your keyboard while clicking the MapTags click the Delete Tag tool and click the Select tool again To delete all MapTags click the Delete...

Page 90: ......

Page 91: ...k dialog box You can resize the columns inside the Address Book dialog box Importing Existing Address Book Information You can import an existing address book or build a new address book by manually entering each record Imported address book items are merged with your existing address book Items with identical names are not replaced during the import process To Import an Existing Address Book Use ...

Page 92: ...he address book entry some of the information such as coordinates street name city state etc automatically complete the Edit a DeLorme Address Book Entry dialog box To Manually Enter Address Book Information Use the following steps to manually enter address book information 1 Click the Find tab 2 Click the Address Book button The DeLorme Address Book dialog box opens 3 Click New The Edit a DeLorme...

Page 93: ...nd tab 2 Click the Address Book button The DeLorme Address Book dialog box opens 3 Double click the record you want to edit OR Click the record you want to edit and then click Edit 4 Edit the applicable information 5 If you want to move the contact select the method to place it on the map from the Update Location drop down list 6 Click OK Notes The address book has a 200 record limit You can resiz...

Page 94: ...ant If you do not relocate your address book the entries may not be accurately placed according to the latest DeLorme road data To Relocate Contacts In Your Address Book Use the following steps to relocate address book entries except manual entries on the map 1 Click the Find tab 2 Click the Address Book button The DeLorme Address Book dialog box opens 3 Click Relocate All A confirmation message d...

Page 95: ...Route tab and toolbar Notes The address book has a 200 record limit You can resize and move the Address Book dialog box You can resize the columns inside the Address Book dialog box Deleting Your Entire Address Book Once you have created an address book you can delete the records it contains one at a time or all at once To Delete an Entire Address Book Use the following steps to delete an entire a...

Page 96: ...le name for your exported file in the File Name text box 6 Select DeLorme Address Book dab or Comma separated File csv from the Save as Type drop down list DeLorme Address Book files retain all of their information and can be imported into compatible DeLorme programs Comma separated files do not contain coordinate information You can view text files in third party applications such as Microsoft Ex...

Page 97: ...map and the print area for a Screen map display as a blue box on the overview map 6 If you selected Screen in step 5 go to step 7 If you selected Page in step 5 the following options are available Under Print Layout select a layout option Single 2 x 2 or 3 x 3 The print area displays on both the map and the overview map If you selected 2 x 2 or 3 x 3 on the map layout graphic and you do not want t...

Page 98: ...ol and then drag the frame to the new position Printing a Route and Directions You can print maps of your route and route directions for any route you create Additionally you can save your directions or along the way results in a text file For more information see Saving Route Directions as Text For specific recommendations on best printing results see your printer manual To Print a Route Use the ...

Page 99: ...ist Note When setting the number of miles per page keep in mind that the number of miles is not the distance of the route Instead it equals the width of the strip map and determines the scale of the map 6 Select Increasing from the Trip Time Distance drop down list to end the route directions with the total time and distance OR Select Decreasing from the Trip Time Distance drop down list to start ...

Page 100: ...ic items added to your map the same size press and hold the SHIFT key on your keyboard or drag to select two items right click select Make Same Size and select Width Height or Both from the menu After you add text graphic items to your map you can align snap or layer them on the map To Add Text to Your Map Use the following steps to add text to your map 1 Click the Print tab and then click the Map...

Page 101: ...the corners sides of text box To Add a North Arrow to Your Map Use the following steps to add a North arrow to your map 1 Click the Print tab and then click the Map subtab 2 Select your Map and Print Layout options For more information see Printing a Map 3 Under Layout Tools click and hold the text and graphics button to reveal the hidden text and graphic tools 4 Click the North Arrow tool All of ...

Page 102: ...add your image The Select Image File dialog box opens You can reposition the image at any time by dragging it to the new position 6 Select an image file jpg bmp or gif to place on your map and then click Open The image displays on the map and the file name displays in the text box next to the Image tool under Layout Tools You can update the image at any time by clicking the Browse button and brows...

Page 103: ...same size the largest item is always the basis for the size change Important For an item to be made the same size as another item the item must not be locked for example the Maintain Aspect Ratio check box should be cleared for any images only text items with default size text boxes can be resized and so on To delete multiple text or graphic items click the Edit tool drag the mouse on the map to e...

Page 104: ...item you want to display right click and click Bring to Front To reverse this step right click the item and select Send to Back Tips To make multiple text and graphic items the same size press the SHIFT key on your keyboard and select each item Then right click point to Make Same Size and click Width Height or Both When you attempt to make multiple items the same size the largest item is always th...

Page 105: ... page map you are ready to assemble the map Before you begin be sure you have a clear work surface large enough to accommodate the final map size You will need the following tools to assemble your map Pencil Razor knife Straight edge ruler longer than the edge of the longest sheet Permanent tape invisible or magic type Removable tape To Manually Assemble a Multi page Map Use the following steps to...

Page 106: ...djacent sheets placing the trimmed edge on top of the non trimmed edge Notes Piece together the multi page map one seam at a time This is especially important for a 3 x 3 multi page map Build the multi page map from the inside out to minimize any misalignment ...

Page 107: ...he multi page temporarily pieced together use small pieces of removable tape to secure the corners and edges of the multi page map Note Place the removable tape on the corners and edges not along the seams 7 For each seam fix the tape to the work surface not on the sheet so the tape is in alignment with the seam 8 Spool off enough permanent tape to cover the entire seam Be careful not to let the t...

Page 108: ...the tape along the seam to remove any air gaps 11 Repeat steps 6 through 10 until all seams are completely pieced together 12 Using the straight edge ruler carefully trim the edges of the map at the seams where the tape is affixed to the workspace 13 Peel off the removable tape at the corners and the edges You are now ready to display your multi page map ...

Page 109: ...o the map As you create draw files they are added to the current project You can add draw files to multiple projects You can control the creation of new draw files in the draw file editing area Draw files are saved by default in C DeLorme Docs Draw with the default name for example DrawLayer an1 with indicating the number order in which the file was created You can rename draw files to better iden...

Page 110: ...ifferent ways within the various draw objects Click a link below to view additional information Points in Routable Roads Routable Trails Tracks Lines Splines and Polygons Draw objects such as routable roads routable trails tracks lines splines and polygons consist of shape points and end points Shape points are the points you place on the map when creating the object They give the object its shape...

Page 111: ...he total area of the polygon on the map Draw objects such as routable roads routable trails tracks lines splines and polygons consist of shape points and end points Shape points are the points you place on the map when creating the object They give the object its shape When you select a draw object on the map shape points display along the active object as small magenta squares The line object bel...

Page 112: ... map Draw objects such as routable roads routable trails tracks lines splines and polygons consist of shape points and end points Shape points are the points you place on the map when creating the object They give the object its shape When you select a draw object on the map shape points display along the active object as small magenta squares The line object below was drawn with the spline tool E...

Page 113: ...ape points but have a central point that does not display until you snap it see Note below to another object Clicking the circle displays a central crosshair within the circle and a text box containing information on the area and radius of the circle on the map Arcs Contain three shape points When you click any of the points a text box displays the angle or bearing of the selected point the radius...

Page 114: ...ne Tool Polygon Rectangle Circle Tool MapNote Text Label Symbol Image Tool Geocaching Features Geocaching is a fun outdoor activity that uses a GPS device for treasure hunting Geocaching is enjoyed by all kinds of people from families with small children to active outdoor adventurers You use your GPS device to follow clues to caches hidden by other geocachers Your application has several features ...

Page 115: ...ting area is categorized by draw file type For example all roadlayer files are grouped together in the list all drawlayer files are grouped together and so on 3 Click New and then click Draw Road Trail Waypoint or Track The new file is now the active draw file Each draw file type has an active file 4 Optional If you want to rename the draw file Right click the draw file in the draw file editing ar...

Page 116: ... in the list all draw layers are grouped together and so on 4 Select a draw file from the file list and then click Delete Click Yes in the confirmation message box to delete the object or click No to cancel OR Right click the draw file in the list and click Delete Click Yes in the confirmation message box to delete the object or click No to cancel 5 Click Done to return to the main Draw tab area H...

Page 117: ...raw tab area 6 Click the Select tool and then click the draw file object on the map that you want to edit 7 Click File and then click Save to save the changes you made to the draw file 8 Click Done to return to the main Draw tab area To Lock a Draw File Use the following steps to lock a draw file 1 Click the Draw tab 2 Click File to open the draw file editing area 3 Select the Lock check box for e...

Page 118: ...ing steps to export an existing draw file to a text file 1 Click the Draw tab 2 Click File to open the draw file editing area Any draw file with a selected check box displays on the map The Active column shows the active layers 3 From the file list click the track file to export 4 Click Export The Export Draw File dialog box opens 5 Browse to a directory in which to save the file or use the defaul...

Page 119: ...u can import many types of files as draw files The file items display as draw objects within the draw file You can also use the Exchange dialog to download waypoint and tracks to the Draw tab See the Help topics under Using Handheld Devices for more information See the chart at the end of this topic to learn what is imported for each type of file Important To add a track Draw file an1 to a project...

Page 120: ...ng from the start to finish point For more information see Sample Survey File If you import this type of file That results from this source The following is imported Address Book txt csv Address Book File Draw objects display with the current symbol and style selections Notes Files must be tab or comma delimited Format name address city state ZIP Code phone Files must be less than 250 records long...

Page 121: ...cts display with the current symbol and line style selections MapDocs sa7 sa8 sa9 mn5 mn6 mn7 Street Atlas USA 8 0 8 0 and 9 0 AAA Map n Go 5 0 6 and 8 0 Draw objects display with the current symbol and line style selections Formatting a Text File to Import as a Draw File These are the formatting conventions with examples for creating a text file to import as a draw file Draw Object Format Example...

Page 122: ...692 70 165392 END Circle BEGIN CIRCLE LAT LON Radius END BEGIN CIRCLE 43 807662 70 163935 0 114611 END Symbol BEGIN SYMBOL LAT LON Name Symbol Name END BEGIN SYMBOL 43 807662 70 163935 DeLorme Blue Pin END MapNote BEGIN NOTE LAT LON Text END BEGIN NOTE 43 807662 70 163935 DeLorme END Text Label BEGIN TEXT LAT LON Text END BEGIN TEXT 43 807662 70 163935 DeLorme END Copying a Map Line to a Draw File...

Page 123: ... The original track is retained in its draw file and a new GPS log is created Viewing the Contents of a Draw File Once you create a draw file draw road trail waypoint or track layer you can view the contents of that file using the More button in the File view of the Draw tab To View the Contents of a Draw File Use the following steps to view the contents of a draw road trail waypoint or track file...

Page 124: ... the table to center the map on its location OR Right click the draw object in the table and click Go To 6 Optional To sort the columns of data in the table in ascending order click the column header Click the column header again to sort in descending order 7 Optional To modify a draw object s name comment or URL in the table click the draw file in the draw file editing area and then click it agai...

Page 125: ...use the original draw file that you are copying does not contain data that is pertinent to that file type For example you cannot copy a draw layer that contains area objects such as circles to a road layer that requires line objects 5 If you want to create an exact copy of the original file select the layer type that matches the original file A new file is created and inserted into the table OR If...

Page 126: ...ive Track Layer OR To change a routable road track or line to a trail layer right click the object point to Manage Draw and then click Copy to Active Trail Layer OR To change a routable road routable trail waypoint or track to a draw layer right click the object on the map point to Manage Draw point to Copy to Draw Object and then click the object to copy to OR To create a copy of an existing area...

Page 127: ... in its draw file and a new direct route is created 3 To view information about the route click the Route tab and then click the Directions subtab Copying a Draw Object From One Draw File to Another You can copy draw objects from one draw file to another using the right click feature in the draw file list Copying retains the draw object in the original draw file while placing a copy of it in a sel...

Page 128: ...1 Click the Draw tab 2 Click File to open the draw file editing area All the files you have created display in a table A draw file with a selected check box displays on the map 3 Click to select the file that includes the contents you want to copy 4 Click More The tab area increases in height and the file details table displays The information that displays in the table is dependent on the file ty...

Page 129: ...the pasted object the object is placed back on top of the original copied object To copy and move a single object select the draw object you want to copy press the CTRL key on your keyboard and drag the draw object to the new location If the item you copied does not successfully paste it may be because you clicked out of the map display To focus the cursor back on the map click inside the map disp...

Page 130: ...ton Notes You can also move draw objects or their points by typing a new coordinate or distance and bearing angle number within the corresponding text boxes Type new coordinates and click Apply to move circles symbols text and MapNotes The whole object moves to the entered location If you change the distance and bearing numbers the object moves in relationship to the object s last location Type ne...

Page 131: ...he waypoint text box opens Note If you have more than one waypoint close together you may have to select from a list OR Click the Select tool click the waypoint and click the waypoint again do not double click The waypoint text box opens 3 Type the new name in the box and press ENTER on your keyboard OR click away from the box Deleting Draw Objects Once you place a draw object on a draw file you c...

Page 132: ... Delete Draw Object A message box displays asking if you want to delete the draw objects from the current file If you click Yes all selected draw objects in the file are deleted You cannot undo this action If you click No no objects are cleared from the file To Delete All Draw Objects To delete all draw objects from an unsaved draw file click the Draw tab and click a draw object button that repres...

Page 133: ... not snap one end point of an arc to the other end point in the same arc To turn the snapping feature off press the ALT key on the keyboard while dragging the draw object To Snap the Central Shape Point of an Arc to Another Object Use the following steps to snap the central shape point of the arc to another object 1 Click the Draw tab 2 Click the Select tool and then click the arc on the map A box...

Page 134: ...the Select tool and click the draw object you want to edit A box displays around the line indicating it is active The shape points of the linear objects display as small magenta squares 3 Select the shape point The point displays as either a green or red end point depending upon the line segment it is associated with 4 Click Delete in the Draw display area OR Press the DELETE key on your keyboard ...

Page 135: ...rail to a draw layer in the current project You can then incorporate any new roads or trails you add to a route when you create a route You must be at data zoom level 11 0 or greater when adding roads or trails with the Routable Road tool or Routable Trail tool To Draw Routable Roads or Trails Use the following steps to add routable roads trails to a road layer 1 Click the Draw tab 2 Click and hol...

Page 136: ... to mark boundaries or to add railroads or utility lines You can draw lines with varied line styles weights and colors including lines that reflect actual map line types Use arcs to add curved line features to a draw file You can draw arcs with varied line styles weights and colors including lines that reflect actual map line types Note An arc is created by entering only three points on the map Th...

Page 137: ... previous point display in the corresponding text boxes 9 To finish the line arc spline click the last point on the map screen and then click Done OR Click the last point on the map screen and press the ENTER key on your keyboard OR Double click the last point of the line arc spline Drawing a Track on the Map You can add tracks to the map and adjust their line style color width and display them wi...

Page 138: ...e Object Use the following steps to edit the shape of a routable road trail line arc or spline 1 Open the project containing the draw layer with the line object you want to edit 2 Click the Draw tab 3 If the line object you want to edit is not active click File and activate the draw file in the file list Then click Done 4 Click the Select tool and then click the line object you want to edit A box ...

Page 139: ...lays around the selected track The shape points used to create the line display as small magenta squares 5 Change any of the track style color or weight options of the existing track To edit any label on a track click the Select tool select the line twice then type the label in the text box that displays next to the track Reshape the track by dragging any of the points in the line to a new locatio...

Page 140: ...irection to change the radius for this point 4 Click Apply and repeat the procedure for the second point The line object displays on the map at those coordinates distance and bearing or angle OR After placing the first point coordinate move your pointer to the map screen and place the other points by hand by clicking on the screen 5 To place additional points lines or other draw objects on the map...

Page 141: ...ant that you perform steps 2 and 3 consecutively If you pan the map use another tab and so on between steps you may need to repeat the steps again to break your linear object Sending a Track to a PN Series GPS You can use the right click menu to open the Earthmate PN Series GPS Exchange dialog and send tracks from the map or the draw file editing area to an Earthmate PN Series GPS To Send a Track ...

Page 142: ...y time Note The best way to measure a large area on the map is with the circle rectangle and polygon tools in the Draw tab When you draw an area object on the map the area displays next to the object on the map If you click off of the object you can view the area again by clicking the Select tool in the Draw tab and then clicking the area object on the map To Draw a Circle Rectangle or Polygon Use...

Page 143: ...licked if the Show Measurement check box is selected 10 Click the Select tool and then click the area object on the map A box displays around the object indicating that it is active 11 Click the object again A text box displays Type the label in the text box and press the ENTER key on your keyboard Editing a Circle Rectangle or Polygon Once you have created an area draw object you can edit includi...

Page 144: ...ing a Circle Rectangle or Polygon on the Map You can place any area object circle rectangle or polygon at a specific coordinate location To Place an Area Object on the Map Use the following steps to place a circle rectangle or polygon on the map 1 Click the Draw tab 2 Click and hold the Polygon Rectangle Circle tool and select the tool you want 3 Select the circle fill outline and or width options...

Page 145: ...rom the Draw tab 1 Click and hold the MapNote Text Label Symbol Image tool and select the tool you want Then select the font style size and color for your point object s label from the text style options 2 Click the location for the point object on the map The URL Label text box opens 3 Optional Click the Hyperlink button and browse to the document you want to link your point object to Then click ...

Page 146: ...ete 2 Click the location for the point object on the map The URL Label text box opens 3 Optional Click the Hyperlink button and browse to the document you want to hyperlink your point object to The address appears in the URL field 4 Type the name or phrase into the Label field The coordinates or distance and bearing angle numbers of the location appear in the corresponding Coordinate or Distance a...

Page 147: ...e Text Label Symbol Image tool and select the Symbol tool Select the symbol from the Symbol Selection list You can also select a different font style size and color for the symbol name OR To place a text label click and hold the MapNote Text Label Symbol Image tool and select the Text Label tool Select the font style size and color from the text style options A sample of how your text display appe...

Page 148: ...it is a blank MapNote You can search for a MapNote by its label name using the QuickSearch function in the Find tab or by typing the label name in the Start Finish Stop or Via text boxes when creating a route in the Route tab To Move a MapNote Use the following steps to move a MapNote 1 Click the Draw tab 2 Click the Select tool 3 Click the MapNote to select it The MapNote is enclosed with a box 4...

Page 149: ...e OR to select multiple sequential files press and hold the SHIFT key and click the first and last file 6 Click the Send button To Send a Waypoint to a PN Series GPS from the Map 1 Click the Draw tab 2 To send a single waypoint click the Select tool and then click the waypoint on the map A box displays around the active object OR To send multiple waypoints click the Select tool and then drag a box...

Page 150: ...x Tip To close the pop up information box that displays when you click the diagram click outside the image or click another part of the image Creating a New Symbol With DeLorme XSym you can add a new symbol to an existing or new symbol set dim file You can assign a new category name for the symbol to help locate it under the Find tab in the DeLorme mapping program To Create a New Symbol Use the fo...

Page 151: ... on the map retains the new symbol name in addition to the default symbol name of symbol 8 Click OK when finished Notes As you create a symbol an image preview displays to the upper left of the Symbol Editing Grid You can make edits to the symbol in either the Image Preview or the Symbol Editing Grid Any edits done in one view are mirrored in the other view See also Importing a Bitmap Copying and ...

Page 152: ... assign the proper waypoint identification number to each symbol you add to the custom symbol set Important To create a custom symbol set of your third party GPS device s waypoint symbols you must contact the device s manufacturer to obtain the graphic files and the waypoint ID number associated with each symbol To Assign a Waypoint ID to a Custom Symbol Use the following steps to assign a waypoin...

Page 153: ...ol you want to edit 4 Click Edit The DeLorme XSym dialog box opens 5 Select the symbol you want to edit from the symbol selection of the default symbol set or from another symbol set you have created The symbol displays in the Symbol Editing Grid 6 Use the tools in the Draw Tool Box and under Transparency and Anchor to edit the symbol To undo the last action click the Undo button under Edit Symbol...

Page 154: ...e Draw tab a MapTag displays the name at the symbol location If you did not assign a name for the symbol a MapTag displays the Symbol Name at the symbol location Notes If you do not assign a symbol name to a symbol in XSym you can locate it with the generic keyword of symbol or by the name or phrase given the symbol in the Draw tab For more information see Finding a Symbol by its Name If you assig...

Page 155: ... the bitmap is less than 24 x 24 pixels the remaining area is filled to the edge of the Symbol Editing Grid with one of the symbol pixel colors As you create a symbol an image preview displays to the upper left of the Symbol Editing Grid You can make edits to the symbol in either the Image Preview or the Symbol Editing Grid Any edits done in one view are mirrored in the other view Copying and Past...

Page 156: ...ol Ideally the pasted bitmap should be 24 x 24 pixels in size You can assign a new symbol name for the symbol to help locate it under the Find tab in the DeLorme mapping program To Paste a Bitmap into XSym Use the following steps to paste a bitmap into XSym 1 Click the Draw tab 2 Click and hold the Symbol MapNote Text Label Image tool to view its hidden options Select the Symbol tool 3 Under Symbo...

Page 157: ...ally the new bitmap should be 24 x 24 pixels in size You can assign a new symbol name for the symbol to help locate it under the Find tab in the DeLorme mapping program To Drag a Bitmap into XSym Use the following steps to drag a bitmap into XSym 1 Click the Draw tab 2 Click and hold the Symbol MapNote Text Label Image tool to view its hidden options Select the Symbol tool 3 Under Symbols select t...

Page 158: ...ext Label Image tool to view its hidden options Select the Symbol tool 3 Under Symbols select the symbol set that contains the symbol you want to edit 4 Click Edit The DeLorme XSym dialog box opens 5 Select the symbol to remove from the symbol selection The symbol displays in the Symbol Editing Grid 6 Click Remove The symbol disappears from the symbol selection under Symbols in Set and the next sy...

Page 159: ...ol Transparent Use the following steps to make part a symbol transparent 1 Click the Draw tab 2 Click and hold the Symbol MapNote Text Label Image tool to view its hidden options Select the Symbol tool 3 Under Symbols select the symbol set that contains the symbol you want to edit 4 Click Edit The DeLorme XSym dialog box opens 5 Select the symbol you want to edit from the Symbol Selection The symb...

Page 160: ...ng Grid moves from its default anchor position to the new anchor position To Center the Anchor Position Click Center Anchor to place the anchor point in the exact center of the Symbol Editing Grid Cursor Position Any symbol created in XSym is 24 x 24 pixels square Each of these pixels is represented in the Symbol Editing Grid When you move your cursor over the Symbol Editing Grid the cursor positi...

Page 161: ... Label Image tool to view its hidden options Select the Symbol tool 3 Under Symbols select the symbol set you want to copy from the drop down list The DeLorme XSym dialog box opens 4 Under Symbol Set Name type the name for your new symbol set You can edit symbols create symbols or import bitmaps for your new symbol set Opening a Symbol Set Open an existing symbol set dim to add new symbols or edit...

Page 162: ......

Page 163: ... the Start tool and then click the point on the map where you want to begin your route OR To use an address book entry as your start location select Start From Address Book from the Start drop down list click to select an Address Book entry and then click OK OR To use your current GPS position as your start location select Start From GPS Location from the Start drop down list OR Type your start lo...

Page 164: ...p to the current route To Create a Route Using the Right click Function Use the following steps to create a route 1 Right click the map location where you want to begin your route point to Create Route and click Set as Start 2 Right click the map location where you want to end your route point to Create Route and click Set as Finish 3 If the route doesn t automatically calculate right click the ro...

Page 165: ...the order you add them to the route Use the following steps to add a stop or via to your route 1 Create a route 2 In the New Edit dialog area in the Route tab make sure the button next to the Stop tool if you are adding a stop or the Via tool if you are adding a via is labeled Add If it is not click the arrow next to the button and select Add 3 To add a stop or via to the route click the Stop or V...

Page 166: ...ert Stop Via function arranges stops vias geographically in the route Use the following steps to insert a stop or via to your route 1 Create a route 2 In the New Edit dialog area in the Route tab make sure the button next to the Stop tool if you are adding a stop or the Via tool if you are adding a via is labeled Insert If it is not click the arrow next to the button and select Insert 3 To insert ...

Page 167: ...a list of the closest matches Scroll through the list of search results until you find the one you want to locate click the item to select it and then click OK 4 Click Directions to view the route directions AND OR Click Advanced to display the advanced routing options Changing the Routing Method You can change your routing calculation method at any time You may need to do this to update your rout...

Page 168: ...the route is displaying on the map 2 Click a route to select and highlight it OR Double click a route to center it on the map 3 The route directions for the selected route display in the right window Adjust the size of the tab area to expand the view Tip Click the header of a column to open a menu from which you can select the type of information you want to display in each column 4 Click a leg to...

Page 169: ...he right of the circle fill option area OR If you selected the Polygon tool click the map to enter each point of the polygon OR If you selected the Rectangle tool click the location for the rectangle s upper left corner on the map and drag away from the corner to set the width height and area for the rectangle Release as soon as you achieve the size you want 6 Click the Select tool and then click ...

Page 170: ... Road Type drop down list select the road type for which to set preferences 5 If you selected Trail or Road as your route type in step 3 select Preferred Standard or Avoid from the Routing Preference drop down list Preferred favors this type of road whenever possible Standard is the default level and Avoid avoids this type of road whenever possible An avoided road may be used when no other road is...

Page 171: ...ct the route from the Name drop down list box The route becomes active The following list describes the edit functions To change the route name select the name in the Name text box type the new route name and then press the ENTER key on your keyboard To change a route point click the corresponding tool and then click the new spot on the map OR Select a route point on the map and drag it to the new...

Page 172: ...ct No Left Turn or No Right Turn If you select No Way you cannot select any other options Note Click Default to change the road properties to the default settings Click Clear All Edits to remove all road options and return all road properties to their default settings 6 Click Done Labeling a Route Point with a MapNote The easiest way to label your route points start stop via and finish with a MapN...

Page 173: ...s To Move a Route MapNote Use the following steps to move a MapNote 1 Click the Route tab and then click the Advanced subtab 2 Click the Move Route MapNotes button 3 Click the MapNote to select it 4 Drag the text box to the new location Displaying and Centering Routes on the Map All the routes you create are automatically displayed The active route displays as a gold line outlined in red Each inac...

Page 174: ...nges to the most recently used project A separate dialog box asks if you want to save changes to an unsaved route Exiting the application The Save Changes dialog box asks if you want to save your changes You can also save the route using the Route tab Routes have anr extensions and are saved by default in C DeLorme Docs Navigation To Save a Route Using the Route Tab Use the following steps to save...

Page 175: ... the Route tab and then click Plan Trip Select the Estimate End of Day Breaks check box to schedule end of day breaks for your trip Select Hours per day to schedule your end of day breaks after a designated number of hours traveled per day Then type the number of hours you want to travel per day in the Hours Per Day text box Use the Flexibility drop down list to determine the amount of time you wa...

Page 176: ...e Plan Trip subtab on the Route tab 3 Click Fuel Cost 4 Type the fuel rate for your vehicle in the Fuel Rate text box The fuel rate can often be found in the vehicle s owners manual 5 Type the price of your fuel in the Fuel Price text box The estimated fuel cost in U S dollars for your route automatically calculates when the Fuel Rate and Fuel Price text boxes are completed The estimated fuel cost...

Page 177: ... them right click the toolbar and click GPS NavMode The button is greyed out unless you have a GPS device plugged in or are playing back a GPS log file You can also change your GPS view in the Options dialog box 1 Click the Options button on the toolbar and click the GPS tab You can also click the Options button on the GPS tab 2 Clear the Use NavMode check box to turn it off or select the check bo...

Page 178: ...king To Initialize Your GPS Receiver The initializing process can take several minutes before the program detects the correct communications COM port and updates the current settings Use the following procedure to initialize your GPS receiver for use with your application 1 Connect your GPS receiver to your computer set the receiver to the mode specified in your user manual and then turn the on re...

Page 179: ...oute Display GPS Overview 2 D only When selected opens the GPS overview window after the GPS is connected You can adjust the size of the map and overview areas The overview map does not display when you use NavMode in 3 D Disable Screen Saver Overrides the system screen saver so that the display stays activated during GPS tracking Start GPS with the Program Automatically starts GPS tracking each t...

Page 180: ...b 3 Under GPS Options verify that the Automatically Detect GPS check box is cleared 4 Type the coordinates in the text boxes Note Coordinates display in the format specified in the Display tab of the Options dialog box OR Click Use Map Center to set the coordinates to the latitude and longitude of the current map center Update the date time options You can use the date and time on your computer or...

Page 181: ... reserves the COM port If that is the one where the GPS receiver is attached you must exit HotSync manager for the GPS receiver to initialize To do this right click the HotSync icon on the taskbar and click Exit If you have two COM ports verify the correct COM port is selected for use with your application This pertains to older devices Any questions or problems regarding the operation of your GPS...

Page 182: ...ides the Control Panel and shows only the toolbar buttons you need for navigating and tracking on a small screen however you can add or remove tabs show or hide toolbar buttons and customize the interface to meet your needs You can also view an overview map at the same time using the split screen This screen is optimized for UMPC and is displaying GPS with NavMode Your Topo USA license allows you ...

Page 183: ... current project includes hidden routes they may recalculate if you selected the Auto Back on Track check box or if you selected the Recalculate When Off Route check box in the GPS Settings To ensure this does not occur clear these check boxes or delete the routes you do not want to recalculate 2 Connect your GPS device to your computer 3 Initialize the device This step is not necessary if you are...

Page 184: ... Stop Here to insert a stop into your route Click More Info to open the GPS Radar subtab on the Find tab and get more information about the result Click Stop Radar to stop searching Progress Bar The progress bar displays below the orange bar It shows how far along you are in your route by distance Turns The blue area at the bottom of the screen shows the next turn in large text and the following t...

Page 185: ...on the toolbar Notes The GPS and NavMode toolbar buttons are hidden by default To show them right click the toolbar and click GPS NavMode The Center on GPS button displays and is activated by default on the Control Panel when the Recenter Map on GPS option is selected If you deactivate the Center on GPS button you can continue to manually pan the map or use the search function in the Find tab When...

Page 186: ... six hours You can also From the Playback Speed drop down list select an option 2x 5x 10x 25x or 50x to increase the tracking speed accordingly Click the Pause button to pause the tracking of the log file The Pause button turns blue to indicate the file is paused Click the Play button to continue playing back the file Click the Stop button to stop the play back To start the file over click the Pla...

Page 187: ...or a GPS Log Use the following steps to view log file details 1 Click the GPS tab and then click the GPS Log subtab 2 Click Clear Trail to clear any existing GPS points from the map display 3 Click File and then click Open 4 Select the file you want to view details for and then click Open 5 Click File and then click File Details A dialog box shows information about your log 6 Click OK to exit the ...

Page 188: ...log box Heading is provided as a numerical value as well as a compass direction Coordinates Elevation Coordinates The coordinate fields display based on the units you selected on the Display tab in the Options dialog box Elevation Displays the current elevation if the GPS status is 3 D and is based on the selected Units preference Elevation can be displayed with a 2 D status your position is indic...

Page 189: ... Sat Info is a toggle button that switches to Status Click Status to return to the original Status dialog area Dilution of Precision The Dilution of Precision area lists your Position Dilution of Precision your Horizontal Dilution of Precision and your Vertical Dilution of Precision For definitions of these terms see Glossary Terms Satellite Listing The Satellite Listing window displays the satell...

Page 190: ...ceiver is tracking the satellite ephemeris data is available the satellite is being used for navigation and the satellite has DGPS and WAAS corrections available Blue WAAS enabled receivers only Indicates a WAAS satellite used for corrections Viewing Sun and Moon Information You can use the Sun Moon subtab in the GPS tab to view information about the rising and setting of the Sun and Moon relative...

Page 191: ...ation the receiver only knows that it is located somewhere on that sphere Two additional satellites are necessary to narrow down the receiver s possible position Each of these satellites sends a similar radio message containing time and identity information The GPS receiver checks the orbital location of each satellite and uses the elapsed time to create two additional spheres of possible location...

Page 192: ...Topo USA User Guide 182 Standard Positioning Service SPS for civilians and the Precise Positioning Service PPS for military and authorized personnel ...

Page 193: ... Panel for more information about your engine If you have purchased other voices text to speech engines that are SAPI 5 1 compatible they are available in your application You must have a microphone attached to your computer to use speech recognition for input For tips on using the speech recognition feature and setting up your microphone see Speech Recognition Tips If you are having difficulty he...

Page 194: ...vate and monitor the speech recognition feature 1 Click the Voice tab 2 Select the Microphone check box to activate your microphone and to turn on the speech recognition feature The tab name turns red if the microphone is listening to your commands Note If your microphone is active when you exit the program it will still be active when you re enter the application 3 To trigger an audible signal wh...

Page 195: ...and next stop Displays the Directions subtab in the Route tab Center on next stop Centers map on the next stop Displays the Directions subtab in the Route tab After that Speaks the next stop or turn information depending on the previous spoken direction Are we there yet Speaks the finish name time to finish and distance to finish Show finish F8 Displays current location and finish on the map Cente...

Page 196: ...shortcut available it is listed after the command Spoken Command Response Pan left ALT Left Scroll left ALT Left Pans or scrolls the map left Pan right ALT Right Scroll right ALT Right Pans or scrolls the map right Pan up ALT UP Scroll up ALT UP Pans or scrolls the map up Pan down ALT DOWN Scroll down ALT DOWN Pans or scrolls the map down Zoom in ALT PAGE DOWN Zooms in one level Zoom out ALT PAGE ...

Page 197: ... map from recentering on your current GPS location Clear GPS Clears the GPS bread crumb trail from the map Autorotate map on ALT R Turns automatic map rotation on Autorotate map off ALT R Turns automatic map rotation off Autozoom map on ALT Z When GPS tracking turns automatic zoom on Autozoom map off ALT Z When GPS tracking turns automatic zoom off Voice Tab Commands The following table shows Voic...

Page 198: ...ar left Turn right Turn left Turn hard right Turn hard left Go east Go west Go north Go northeast Go northwest Go south Go southeast Go southwest Direction distance modifiers spoken second in distance in tenths of a mile Other spoken alone At finish was Destination reached Last leg Approaching finish Off route ...

Page 199: ...rts multiple user models you can train the engine to recognize more than one speech pattern Use the following steps to train the speech recognition engine to recognize your speech patterns 1 Click the Options button on the toolbar OR Click the arrow next to the Options toolbar button to open the menu Then click Options to open the dialog box 2 Click the Voice Settings tab 3 Select the microphone y...

Page 200: ...puter you would then say Computer zoom in Speech Recognition Tips To use voice navigation you must have a 2 D or 3 D GPS fix and a route calculated The following tips provide information on using the speech recognition feature and setting up your microphone Speech recognition is only active when your application is the active window Commands become enabled based on your current GPS status your dat...

Page 201: ...nds Start With feature in the Voice tab in the Options dialog to clearly distinguish commands from other noise and speech Set the Commands Start With phrase to something like computer or Simon Says to reduce the chances of an unexpected command recognition When choosing a phrase make sure that it is more than one syllable The phrases computer or Simon Says work well But the simple word map probabl...

Page 202: ...are included in this list 4 From the Device drop down list box select the output device from which you want to hear the computer s voice for example your speakers or a headset 5 To preview the voice click Test Voice type a sample sentence and then click OK The sample sentence is spoken in the selected voice 6 Use the Voice Volume spin box to adjust the output volume relative to the other programs ...

Page 203: ...e system on DeLorme voice commands Add Delete Words Opens the Add Delete Words Wizard with the pronunciation wizard specific to your speech recognition engine You can enter edit or view the words in your pronunciation vocabulary Use this wizard when the speech recognition has trouble understanding a specific word that you are saying Recognition Settings Opens the Recognition Profile Settings dialo...

Page 204: ......

Page 205: ...d select only the data types that are in the area you are exporting All user map data types are listed For other data types only connected map data types are listed Tip Topo USA 8 0 Data Series is the same data that is on the detailed data DVDs that came with your PN Series GPS If you installed the detailed data for the map you are creating make sure the Topo USA 8 0 Data Series check box is clear...

Page 206: ... the NetLink tab o USGS Quads 3DTQ 12 14 Color contour topographic maps produced by the United States Geological Survey Downloaded using the NetLink tab o Aerial Imagery DOQQ 15 16 Black and white 1 meter resolution digital aerial photography Downloaded using the NetLink tab o Color Aerial Imagery DOQQ 13 17 True color 1 meter resolution digital aerial photography Downloaded using the NetLink tab ...

Page 207: ... button to select the default export area or click the Select Edit button to add or remove grids Grids selected for export are shaded red Note Click the Clear All button to clear the highlighted grids from the map 4 Type a name for your map package in the Save your map for Exchange box 5 Click Save 6 Send the map package to your Earthmate PN Series device other than PN 20 Earthmate PN 20 Palm OS o...

Page 208: ...12 second 8 100 900 25 1 11 20 12 second N A 202 500 22 500 625 25 13 20 Data Zoom Level Scale Bar Translation Your DeLorme application and your Earthmate PN Series GPS device use different methods for representing the map s scale In Topo USA scale is represented as a data zoom level 1 17 The Earthmate PN Series GPS device uses a scale bar based on the measurement units chosen in Device Setup The ...

Page 209: ...tton on the toolbar to open the Earthmate PN Series GPS Exchange dialog You can also open the Exchange dialog by clicking the Exchange button on the Handheld Export tab or the GPS tab If your project includes a route track or waypoint those items are saved separately from the map package so you can manage them independently When you open the Exchange dialog to send the map package to your device t...

Page 210: ... on the map 3 Click the Handheld Export tab and zoom to the area of interest on the map 4 Click the Options button to open the Handheld tab in the Options dialog box 5 Under Export Map Format and Location select DeLorme Earthmate Note Map packages are saved in the location displayed To change where you save map packages click Browse and navigate to the new location 6 Under Export Data Zooms select...

Page 211: ...the item and click Delete PN Series other than PN 20 Sending Receiving Information Sending Receiving Maps Earthmate PN Series other than PN 20 You can use Topo USA to send custom map packages to your Earthmate PN Series GPS device Use the Handheld Export tab to create custom map packages of any size that cover any location in the U S The data included in a custom map package is dependent on the da...

Page 212: ...In Topo USA click the Exchange button on the Handheld Export tab or click the Exchange button on the toolbar The Earthmate PN Series GPS Exchange dialog box opens 5 To transfer maps to an SD card in the device select the removable drive for example Removable Disk E Removable Disk from the drop down list in the upper right corner of the dialog box OR If you are transferring to internal memory selec...

Page 213: ...ng the Exchange button on the Handheld Export tab or the GPS tab Sending Receiving Routes Earthmate PN Series other than PN 20 You can use Topo USA to exchange routes with a DeLorme Earthmate PN Series GPS device Notes To rename delete or send receive a route right click the item in the Exchange dialog and select the appropriate option You can also delete a map by clicking the item and then clicki...

Page 214: ...pane of the dialog box click the plus sign next to Routes and then click the route you want to send to the device OR To send all routes just click Routes 5 Click Send A progress bar indicates the copy status 6 Click Done To Receive Routes Use the following steps to receive routes from your device 1 Connect the device to your computer and power it on The Connect to Computer screen appears 2 On the ...

Page 215: ...or contents you want to send to the device OR To send all tracks just click Track Layers Note You cannot replace an existing track on the device if the track details page for that track is displaying on the device 5 Click Send A progress bar indicates the copy status 6 Click Done To Receive Tracks Use the following steps to receive tracks from your device 1 Connect the device to your computer with...

Page 216: ...name delete or send receive a waypoint right click the item in the Exchange dialog and select the appropriate option You can also delete a waypoint by clicking it and then clicking the Delete button If you bypassed the Connect to Computer screen on the device press MENU go to Device Setup Connect to Computer and select the option you want from the USB Setting drop down list For more information se...

Page 217: ...eceived in that layer If a non waypoint option is highlighted for example a track layer a new waypoint layer is automatically created 6 Click Receive A progress bar indicates the copy status 7 Click Done Tip You can also open the Exchange dialog by clicking the Exchange button on the GPS tab or the Handheld Export tab Firmware Updates Earthmate PN Series other than PN 20 Occasionally DeLorme relea...

Page 218: ...ade in the Handheld Options settings Notes Because the base maps on the Earthmate GPS PN 20 include only major roads it is important that you send regional map package data and or saved map package data to your device Regional map packages do not contain local roads To create the most efficient routes on the Earthmate GPS PN 20 it is strongly recommended that you have regional maps AND saved map p...

Page 219: ...our device To send all regional map packages just click Regional Map Packages 5 In the right pane of the dialog box under Map Packages select Internal or External memory 6 Click Send The map is sent to the device SD card and a progress bar indicates the copy status 7 Click Done To Receive Maps Use the following steps to receive maps from your Earthmate GPS PN 20 or an SD card 1 To receive a map pa...

Page 220: ...be converted to a direct route if you choose to recalculate If you do not want to change the shape of your trail route be sure to answer No when asked if you would like to recalculate the route See also the Exchange PN Series Data Create a Route and Convert Tracks into Trails tutorials in the Topo USA 8 0 Help system To Send Routes Topo USA supports multiple calculation types including Road Quicke...

Page 221: ...You can use Topo USA to exchange waypoints tracks routes and maps with the DeLorme Earthmate GPS PN 20 Notes To rename delete or send receive a track right click the item in the Exchange dialog and select the appropriate option You can also delete a track by clicking the item and then clicking the Delete button See also the Exchange PN Series Data and Convert Tracks into Trails tutorials in the To...

Page 222: ...rack option is highlighted for example a waypoint layer a new track layer is automatically created If you use the Exchange dialog box to send the active track to Topo USA the file name displays as a time date stamp based on the time date information in the active track 5 Click Receive A progress bar indicates the copy status 6 Click Done 7 Tip You can also open the Exchange dialog by clicking the ...

Page 223: ...ypoints and then click the waypoint you want to receive OR If you want to receive all waypoints just click Waypoints 4 In the left pane of the dialog box click the plus sign next to Waypoint Layers and then click the layer where you want to send the waypoint If you want to copy the waypoint to a new waypoint layer click New and then click Waypoint Layer Note If you do not select a layer and an exi...

Page 224: ... Carolina South Carolina East 3B Alabama Louisiana Mississippi East 4A Iowa Michigan Minnesota Wisconsin East 4B Arkansas Illinois Missouri West 1A North Dakota Nebraska South Dakota West 1B Idaho Montana Wyoming West 2A Kansas Oklahoma West 2B Colorado Nevada Utah West 3A Arizona New Mexico West 3B Texas West 4A Alaska Oregon Washington West 4B California Hawaii Firmware Updates Earthmate PN 20 O...

Page 225: ...Exchanging Information with a Third party GPS Device Sending Route Information Third party GPS If you have a compatible GPSor athletic device you can use the Exchange Wizard to send route points or route directions to your device ...

Page 226: ...vices support starting points For more information see your device manual 11 Click Send to Device 12 Repeat the steps for every route file you want to send to your device 13 Click Finish To Send Route Directions Use the following steps to send route directions to your GPS device 1 Connect your device to your computer 2 If you are using a third party GPS receiver you may have to use specific settin...

Page 227: ...ace to GRMN GRMN For more information see your device manual 3 Click the Exchange button on the toolbar 4 Click Use Other Device to open the Exchange Wizard 5 Under Select Device select GPS or point to Athletic Device and then select your device 6 Select Send to Device 7 Select User Map Data Track from the Object drop down list 8 Click Next 9 Select the track file you want to send to your device f...

Page 228: ...evice manual 11 Click Send to Device 12 Repeat the steps for every route file you want to send to your device 13 Click Finish Tip You can also open the Exchange dialog by clicking the Exchange button on the GPS tab or the Handheld Export tab Receiving a Route Third party GPS If you have a compatible GPSor athletic device you can use the Exchange Wizard to receive routes created on your device Once...

Page 229: ...apping Draw Objects To Receive a Track Use the following steps to receive a track from your device and save it as a track 1 Connect your device to your computer 2 If you are using a third party GPS receiver you may have to use specific settings For example if you are using a GARMIN GPS receiver set your GARMIN receiver interface to GRMN GRMN For more information see your device manual 3 Click the ...

Page 230: ...5 Under Select Device select GPS or point to Athletic Device and then select your device 6 Select Receive from Device 7 Select Waypoints from the Object drop down list 8 Select User Map Data Waypoints from the Save As drop down list 9 Click Next 10 Select the waypoint file you want to add the waypoint information to from the Waypoint File drop down list To create a new Waypoint file select New fro...

Page 231: ...ou want to send to your handheld device from the Handheld Map drop down list The maps saved in the specified location display in the list To view maps saved in an alternate location click the browse button and browse to the location Then select the map from the Handheld Map drop down list 8 Select the user you want to send the map to from the User drop down list 9 Select the media destination from...

Page 232: ...open the Exchange Wizard 3 Under Select Device select Palm OS 4 Select Send to Device 5 Select Route Directions from the Object Type drop down list 6 Click Next 7 From the Route drop down list select the route file that contains the route directions you want to send to your device 8 Select the User Profile the route file will sync to from the User drop down list 9 Click Prepare for Sync 10 Repeat ...

Page 233: ...e Use the following steps to receive GPS logs from your Palm OS device 1 Click the Exchange button on the toolbar 2 Click Use Other Device to open the Exchange Wizard 3 Under Select Device select Palm OS 4 Select Receive from Device 5 Select GPS Logs from the Object Type drop down list 6 Click Next 7 Select the GPS log you want to receive from the GPS Log drop down list 8 Click Receive From Device...

Page 234: ...owing steps to receive waypoints from your Palm OS device 1 Click the Exchange button on the toolbar 2 Click Use Other Device to open the Exchange Wizard 3 Under Select Device select Palm OS 4 Select Receive from Device 5 Select Waypoints from the Object Type drop down list 6 From the Save As drop down list select to save the waypoints as User Map Data Waypoints 7 Click Next 8 Select the waypoint ...

Page 235: ...her Device to open the Exchange Wizard 3 Under Device Type select Pocket PC 4 Select Send to Device 5 Select Handheld Map from the Object Type drop down list 6 Click Next 7 Under Source select the map you want to send to your handheld device from the Handheld Map drop down list The maps saved in the specified location display in the list To view maps saved in an alternate location click the browse...

Page 236: ...ollowing steps to send route directions to your Pocket PC device 1 Click the Exchange button on the toolbar 2 Click Use Other Device to open the Exchange Wizard 3 Under Device Type select Pocket PC 4 Select Send to Device 5 Select Route Directions from the Object Type drop down list 6 Click Next 7 From the Route drop down list select the route file that contains the route directions you want to se...

Page 237: ... Waypoints Pocket PC Use the Exchange Wizard to send waypoints to your Pocket PC device To Send Waypoints Use the following steps to send waypoints to your Pocket PC device 1 Click the Exchange button on the toolbar 2 Click Use Other Device to open the Exchange Wizard 3 Under Device Type select Pocket PC 4 Select Send to Device 5 Select User Map Data Waypoints from the Object Type drop down list 6...

Page 238: ...GPS Log drop down list 8 Click Prepare for Sync 9 Click OK to return to the Exchange Wizard 10 Repeat the steps for each GPS log you want to send to your device 11 Click Finish The GPS log is available on your handheld device after your next synchronization operation Tip You can also open the Exchange dialog by clicking the Exchange button on the GPS tab or the Handheld Export tab Receiving a Rout...

Page 239: ...points from the Object Type drop down list 6 From the Save As drop down list select to save the waypoints as User Map Data Waypoints 7 Click Next 8 Select the waypoint file you want to add the waypoint information to from the Waypoint File drop down list If you want to create a new waypoint file select New from the Waypoint File drop down list and type the new waypoint file name in the text box 9 ...

Page 240: ......

Page 241: ...s created with the Measure tool Notes You can create profiles only on 2 D maps however with split screen functionality you can view the highlight of the profiled object on a 3 D map To profile an object or route at any time right click the item and click Profile The Profile graph automatically updates when you select a new object to profile Double click a location on the Profile graph to center th...

Page 242: ...isplay in the Profile graph indicating the beginning and end of each chosen segment To make it easier to profile multiple linear objects use the Draw tab to join them To clear one of the multiple objects you have profiled press the CTRL key on your keyboard while clicking the profiled object on the map Viewing the Profile Elevation Graphs The Profile tab lets you view two profile elevation graphs ...

Page 243: ...markers indicating the start and finish for the route as well as any waypoints it contains 5 Optional If the profile object contains additional supported data such as that downloaded from an athletic device a toolbar appears above the graph See User Profile Data for more information about viewing and managing this data 6 View the current statistical information options you have selected to the rig...

Page 244: ...ot viewing in the main graph is highlighted with grey in the overview graph When you hover your cursor over the area within the bars the cursor changes to a hand Left click to grab the area and drag it horizontally to reposition the border focus area or to center the selection on that point 3 To hide the overview profile graph click Less Statistical Data You can manage the type of statistical data...

Page 245: ...to delete An X appears in the cell 2 Click the X to remove the option To Add an Option When one or more options have been removed use the following steps to made add an option to the statistics list 1 Move your cursor over Click to add statistics and click A list of available statistic options opens 2 Click an option to add it 3 Repeat steps 1 2 to add more options ...

Page 246: ...nt grade rise over run 100 x rise run For example 6 means that for every 100 ft you gain 6 ft in elevation Average Grade Average of the grade from the start to the current cursor position or finish Minimum Elevation The elevation of the lowest point on a profile Maximum Elevation The elevation of the highest point on a profile Zone A named grid system of any of the UTM UPS MGRS or State Plane coor...

Page 247: ...tude format is selected as the coordinate system in the Display tab of the Options dialog box Note For information on manually setting your minimum and maximum elevation see Manually Setting Minimum and Maximum Elevation Manually Setting Minimum and Maximum Elevation You can manually set a maximum or minimum elevation to display in your profile graph To Manually Adjust Minimum and Maximum Elevatio...

Page 248: ...file that includes the data the profile graph displays a colored line for each type of data The types of data their scales and default graph colors modifiable are Data Type Default Color Scale Map Elevation Default type from map topographic data Black ft mi m or km Matches the units set on the Display tab in the Options dialog box Track Elevation Green ft mi m or km Matches the units set on the Di...

Page 249: ...e toolbar The scale for the currently followed data type displays to the right of the profile graph 2 To hide or show a data type on the toolbar click the data type button to toggle it on or off To Change the User Data Type Color You can change the user data type default colors or change from a user defined color back to the default 1 Profile a track with user data The data types display in the pr...

Page 250: ......

Page 251: ...Expose the left map window using the map resize tool and then select 3 D from the drop down list at the top of the left map window A progress bar displays in the lower left corner of the map to display the 3 D drawing status OR Click the 3 D tab and then click Show 3 D A progress bar displays in the lower left corner of the map to display the 3 D drawing status 2 On the 3 D tab under 3 D View sele...

Page 252: ...ng the Elevation up down buttons by clicking the Elevation graphic at the elevation or by dragging the numeric elevation display in the Elevation graphic Note Elevation indicates the height above terrain not the height above sea level 6 To pan the 3 D map and simulate a fly over drag the circle in the Pan graphic in the direction you want 7 Click Hide 3 D when finished The map changes to a 2 D vie...

Page 253: ...n your keyboard OR To decrease the distance elevation press ALT Page Down on your keyboard 8 To pan the map to the right press ALT Right the right arrow on your keyboard OR To pan the map to the left press ALT Left on your keyboard 9 To pan the map forward press ALT Up on your keyboard OR To pan the map backward press ALT Down on your keyboard To Fly Over a 3 D Map Using the Pan Tool Use the follo...

Page 254: ...st the zoom level of the 3 D map If you want to view billboards on your 3 D map select the Show Billboards check box Note If you receive a message saying that 3 D billboards cannot be displayed ensure that you have a 32 MB video card with the latest drivers and that it supports DirectX and transparencies To select the cursor graphic that you want to display on the 3 D map when GPS tracking select ...

Page 255: ...r 40 worth of data downloads This gives you the opportunity to see how imagery and data can enhance your maps Purchase You can always purchase downloads If you prefer to receive your datasets on DVD you must use this method Datasets The following datasets are available USGS 1 24K Scanned Maps 7 5 minute 1 24 000 scale quadrangle series SAT10 Satellite Imagery True color 10 meter resolution imagery...

Page 256: ...e downloads and software updates If you have an Earthmate PN Series GPS you can also access firmware updates Support Your connection to DeLorme links to technical support the forums the DeLorme blogs and more You can also submit a map correction to us ...

Page 257: ...set Tagging an Image Once you successfully tag your digital images to a GPS log file or track file you can view the points at which the photos were taken on the map in your DeLorme program Before you begin you must download the GPS log file or track file and digital photographs to your computer See Receiving a Track From Your Third party GPS Device for information on using the Exchange Wizard to t...

Page 258: ...e timestamps for the camera and the file or track do not match Tagging Data Once you successfully tag your data to a GPS log file or track file you can view the points where the data was recorded on the map and in the Profile tab in your DeLorme program Before you begin you must download the GPS log file or track file and the data file Suunto sdf Timex Trainer CSV csv or Generic CSV File csv to yo...

Page 259: ...isplays telling you that you successfully tagged your data Click Finish You can view the data on the Profile tab OR An error message displays usually this is because the timestamps for the device and the file or track do not match Calculate the Timestamp Offset The time on your camera or data device must match the time in the track or GPS log so the images or data display in the correct place If t...

Page 260: ...cture or recorded data 4 Make a note of the time 5 Start the GeoTagger Wizard and follow the on screen steps until you get to the screen with the offset option 6 Highlight the image or data point in the file list The image or data timestamp displays in the Data Timestamp box 7 Type the time you made a note of in the Matching GPS Time text box ...

Page 261: ...and effect YOUR USE OF THE SYSTEM Permitted Use This Agreement permits a registered user to use the System on a non exclusive basis for personal reference or business purposes on a single computer at one time You may install the System on an auxiliary computer in addition to your principal computer However one of these two computers must be portable and the software may not be used simultaneously ...

Page 262: ... site at www delorme com from any page featuring a DeLorme map image If you subcontract a web developer to display map images said web developer must purchase a license Legend Any System output that is provided to a third party must include the following credit and copyright notice 2008 DeLorme www delorme com TOPO USA You may not remove alter or conceal any copyright or trademark notices appearin...

Page 263: ... OR DIRECTION OR FOR PRECISION IN ADDRESS LOCATION OR IN THE DEPICTION OF GEOGRAPHIC FEATURES ROUTING DIRECTIONS SHOULD BE USED ONLY AS A TRAVEL AID AND MUST ALWAYS BE VISUALLY VERIFIED BY THE USER ON THE GROUND AND EXECUTED WITH DUE REGARD TO TRAFFIC AND ROAD CONDITIONS ROAD SIGNS AND REGULATIONS Please note that the Data is merely a graphical representation of geographic features appearing on th...

Page 264: ... Maine and the parties consent to the personal jurisdiction of either such court U S Government Rights in Commercial Software Use duplication or disclosure by the Government of all parts of the Licensed Data except any USGS data is subject to restrictions set forth in the commercial computer software license agreement under which the software is delivered by DeLorme and as provided in DFARS 227 72...

Page 265: ... use copy modify distribute and sell this software and its documentation for any purpose is hereby granted without fee provided that i the above copyright notices and this permission notice appear in all copies of the software and related documentation and ii the names of Sam Leffler and Silicon Graphics may not be used in any advertising or publicity relating to the software without the specific ...

Page 266: ...license the Software to use reproduce display distribute execute and transmit the Software and to prepare derivative works of the Software and to permit third parties to whom the Software is furnished to do so all subject to the following The copyright notices in the Software and this entire statement including the above license grant this restriction and the following disclaimer must be included ...

Page 267: ... CLAIMS BROUGHT BY ANY OTHER ENTITY BASED ON INFRINGEMENT OF INTELLECTUAL PROPERTY RIGHTS OR OTHERWISE AS A CONDITION TO EXERCISING THE RIGHTS GRANTED HEREUNDER EACH USER HEREBY ASSUMES SOLE RESPONSIBILITY TO SECURE ANY OTHER INTELLECTUAL PROPERTY RIGHTS NEEDED IF ANY THE SOFTWARE IS NOT FAULT TOLERANT AND IS NOT INTENDED FOR USE IN MISSION CRITICAL SYSTEMS SUCH AS THOSE USED IN THE OPERATION OF N...

Page 268: ...License Copyright 2002 Industrial Light Magic a division of Lucas Digital Ltd LLC All rights reserved Redistribution and use in source and binary forms with or without modification are permitted provided that the following conditions are met Redistributions of source code must retain the above copyright notice this list of conditions and the following disclaimer Redistributions in binary form must...

Page 269: ...ICULAR PURPOSE ARE DISCLAIMED IN NO EVENT SHALL THE COPYRIGHT OWNER OR CONTRIBUTORS BE LIABLE FOR ANY DIRECT INDIRECT INCIDENTAL SPECIAL EXEMPLARY OR CONSEQUENTIAL DAMAGES INCLUDING BUT NOT LIMITED TO PROCUREMENT OF SUBSTITUTE GOODS OR SERVICES LOSS OF USE DATA OR PROFITS OR BUSINESS INTERRUPTION HOWEVER CAUSED AND ON ANY THEORY OF LIABILITY WHETHER IN CONTRACT STRICT LIABILITY OR TORT INCLUDING N...

Page 270: ...n and distribution as defined by Sections 1 through 9 of this document Licensor shall mean the copyright owner or entity authorized by the copyright owner that is granting the License Legal Entity shall mean the union of the acting entity and all other entities that control are controlled by or are under common control with that entity For the purposes of this definition control means i the power ...

Page 271: ...ensor and subsequently incorporated within the Work 2 Grant of Copyright License Subject to the terms and conditions of this License each Contributor hereby grants to You a perpetual worldwide non exclusive no charge royalty free irrevocable copyright license to reproduce prepare Derivative Works of publicly display publicly perform sublicense and distribute the Work and such Derivative Works in S...

Page 272: ...Works as a whole provided Your use reproduction and distribution of the Work otherwise complies with the conditions stated in this License 5 Submission of Contributions Unless You explicitly state otherwise any Contribution intentionally submitted for inclusion in the Work by You to the Licensor shall be under the terms and conditions of this License without any additional terms or conditions Notw...

Page 273: ...y or Additional Liability While redistributing the Work or Derivative Works thereof You may choose to offer and charge a fee for acceptance of support warranty indemnity or other liability obligations and or rights consistent with this License However in accepting such obligations You may act only on Your own behalf and on Your sole responsibility not on behalf of any other Contributor and only if...

Page 274: ......

Page 275: ...utes on the Map 163 Centering the Map 12 Centering the Map on an Address Book Contact 82 Changing Draw Object Types 115 Changing How POIs Display on the Map 41 Changing the Background Color of a Printed Map 94 Changing the Map Colors 39 Changing the Map Magnification 40 Chart of Supported Coordinate Formats 16 Clear Trail 175 Clearing a Profile 237 Climbing Distance 234 Climbing Elevation 234 Comp...

Page 276: ... 115 117 118 119 120 121 122 123 124 126 127 132 133 135 144 148 151 158 Draw Layer 105 Draw Tool Box 148 E Easting 234 Editing a Contact In Your Address Book 83 Editing a Route 161 Editing a Symbol 143 Editing Draw Objects 128 129 133 136 Editing Roads 162 Editing Locking Draw Files 107 Elevation 20 177 237 Elevation Gain 234 Elevation Graphs 232 E mailing a Transfer File 64 Enable LED on GPS Dev...

Page 277: ... 75 L Labeling a Draw Object 124 Labeling a Route Point with a MapNote 162 Land Cover 36 Large POI Symbols 41 Latitude 234 Layering Multiple Text and Graphic Items on a Printed Map 94 Legend 23 Line 126 Linear Distance 234 Longitude 234 M Magnification 40 168 Make Stop 161 Make Via 161 Map Center Crosshair 36 Map Colors 39 Map Coordinates 20 Map Features 36 38 Map Files 59 60 Map Legend 23 Map Rot...

Page 278: ...und 94 Print Maps With a Yellow Black Background 94 Profile 31 231 232 234 237 Projects 59 60 Publicly Managed Lands 36 Q QuickSearch 67 74 R Recalculate When Off Route 168 Receiving a GPS Log 223 226 Receiving a Route 218 223 228 Receiving a Track 219 Receiving Waypoints 220 224 229 Recenter Map on GPS 168 174 Rectangle 132 133 Reference Card 55 Relocating Address Book Contacts 84 Removing a Symb...

Page 279: ... Start GPS 168 174 Statistical Data Options 234 Stops 154 Street Colors 39 Strip Maps 88 Sun Moon 180 Supported Coordinate Formats 16 Symbol 135 T Tab Configuration 44 47 48 Tab Manager 47 48 Terrain Distance 234 Text Label 135 Tips on Viewing Search Results 74 Toolbar 21 27 28 29 30 31 32 33 Topo Colors 39 Town Borders 36 Track 108 113 127 129 173 174 199 217 219 TrackLayer 105 TrailLayer 105 Tra...

Page 280: ...Topo USA User Guide 270 Z ZIP Postal Codes 36 Zone 234 Zoom Tools 10 20 Zooming In and Out 10 ...

Reviews: