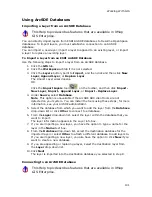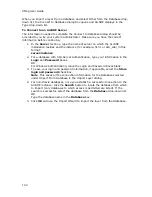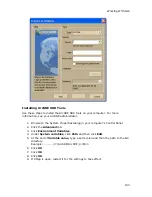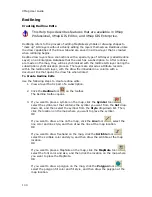
XMap User Guide
90
3.
At the bottom of the dialog box, select New from the Target Database
drop-down list.
The Create Database dialog box opens.
4.
Select the server you want the database to be created on from the Server
drop-down list.
If the server you want to use does not display in the list, type the server
name in the text box.
Note If SQL Server was installed on your local machine, type
localhost\xmap6 (or localhost\delormemapping if SQL Server was installed in
a previous version of XMap). If you are connecting to a remote server, see
your Database Administrator to obtain the server name information.
5.
Select the authentication method; Windows authentication or SQL Server
authentication (Windows Authentication (NTLM) is an authentication process
used by all members of the Windows NT family of products. It uses a
challenge/response process to prove the client’s identity without requiring
that either a password or a hashed password be sent across the network. If
Use Windows Authentication is selected, the user does not need to provide
login name or password information to create a new database on the specified
server machine. This is because SQL Server revalidates the Windows user
account name and password. SQL Server Authentication uses credentials
stored in a SQL Server database to get access to the server. When this choice
is selected, the Login and Password text boxes are enabled.)
.
6.
If you selected to use SQL Server Authentication, type a login name in the
Login text box and a password in the Password text box.
7.
Type a name for the new database in the Database Name text box. The
name should be alphanumeric (not case sensitive), may include underscores,
has a 128 character limit, and cannot include spaces or start with a number.
8.
From the Compatibility drop-down list:
Select XMap 6 if you want the layers you import into this database to have
access to all of the features of XMap 6.
OR
Select XMap 5 if you want the layers you import into this database to have
access to all of the features of XMap 5.
OR
Select XMap 4.5 if the layers that you import into this database need to be
accessed from that version of XMap. This option is only available if you are
using Microsoft SQL 2000.
Note XMap 4.5 databases will not have access to all of the functionality
available in XMap 5 and above. See XMap Database Limitations for more
information.
9.
Click OK.
The database is added to the server.
To Create a New Database with Database Manager
Use the following steps to create a new database.
1.
Click the GIS tab.
2.
Click the Workspace subtab if it is not selected.
3.
Click DB Manager to open Database Manager.
4.
Connect to the server where your new database will be stored.
Summary of Contents for XMap 6
Page 8: ......
Page 361: ...Using Voice Navigation and Speech Recognition 353 Approaching finish Off route ...
Page 428: ......

