background image

13

ENGLISH

13

13

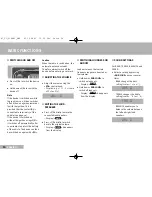
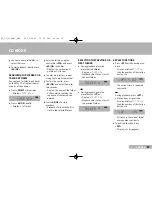
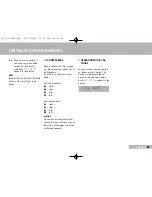
RADIO MODE

SWITCHING THE AF FUNCTION

OFF AND ON

1

Hold down »

TP/AF

«.

– The function is deactivated.
– »

« is not displayed.

2

Hold down »

TP/AF

«.

– The function is activated.
– Display: »

«.

Note

The AF function is only displayed
for radio stations which transmit
an AF signal.
»

« flashes if the AF function is

set but no AF signal is available.

AF

III

VIPRADIO

AF

AF

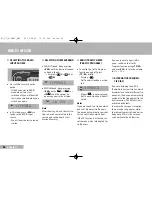
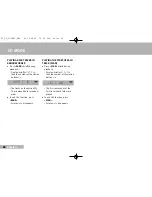
SETTING AND STORING

RADIO STATIONS

STORING STATIONS WITH THE

AUTOMATIC STATION SCAN

1

Press »

RAD

«  to select the

frequency band.
– Display: »

I

«, »

II

«, »

III

«,  »

I

«, »

II

« or 

»

III

«.

2

To start the search, press and
hold down »

AS/OK

«  for more

than 2 seconds.

– The device searches on all

three levels of the FM
waveband or in the AM wave-
band for stations and stores
them on the station buttons.

II

95

.

60

AM

AM

AM

FM

FM

FM

– In the FM waveband, the devi-

ce gives RDS stations priority
in the search. After the search
has finished, you will hear the
RDS station stored at preset
position 1 (FM1).

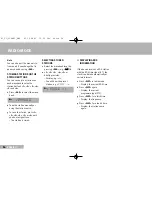
TUNING WITH THE STATION

SEARCH

1

Press »

RAD

« to select the

frequency band.
– Display: »

I

«, »

II

«, »

III

«,  »

I

«, »

II

« or 

»

III

«.

2

Start the search in the desired
direction by pressing »

TUNE 

a

«

oder »

TUNE 

s

« briefly.

– If an RDS station with a name

identification is found, this is
shown in the display.

II

RADIO 11

AM

AM

AM

FM

FM

FM

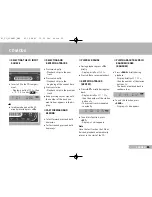
TUNING STATIONS MANUALLY

1

Hold down »

TUNE 

a

« or 

»

TUNE 

s

« until »

MAN

« appears

in the display.
– The manual station search is

activated.

2

Press »

TUNE 

a

« or »

TUNE 

s

« to

select a station.
– Keep them hold down for fast

tuning. Each time you press
»

TUNE 

s

« the FM frequency

increases by 50 kHz. Press
»

TUNE 

a

« to lower the

frequency by the same
increment.

– The device automatically quits

the manual station search
mode after 1 minute.

II

MAN 92

.

90

FM

AF

FM

FM

FM

01_CL_210MP3_ENG  06.12.2006  13:39 Uhr  Seite 13

Summary of Contents for CL 210 MP3

Page 1: ...CL 210 MP3 ENGLISH FRAN AIS DEUTSCH NEDERLANDS ESPA OL ITALIANO PORTUGU S SVENSKA POLSKI CAR INTERMEDIA 01_CL_210MP3_ENG 06 12 2006 13 39 Uhr Seite 1...

Page 2: ...2 ENGLISH OVERVIEW 1 4 7 6 8 9 10 11 12 13 14 15 17 18 CL 210 MP3 16 2 3 5 01_CL_210MP3_ENG 06 12 2006 13 39 Uhr Seite 2...

Page 3: ...NFORMATION AND SAFETY 7 OVERVIEW Controls Display 10 BASIC FUNCTIONS Switching on and off Adjusting the volume Muting the loudspeakers Switching Loundness on and off Sound settings Setting the time 12...

Page 4: ...4 ENGLISH CL 210 MP3 10 PACKING CONTENTS 1 Car radio 2 Mounting frame 3 Two removal hooks 4 4 screws 4 x M5 x 6 mm 5 Instruction manual 1 5 4 3 2 01_CL_210MP3_ENG 06 12 2006 13 39 Uhr Seite 4...

Page 5: ...knob VOL on the left of the device Traffic announcements may be considerably louder than normal playback Multimedia CDs not only contain audio tracks but also data tracks If despite the warning instru...

Page 6: ...s are played back individual tracks may be skipped or incorrectly played back This can be due to the disc configuration the encoder software or the hard ware used for the recording Audio CDs CD DA mee...

Page 7: ...d MP3 RADIO MODE RAD Selects RADIO as the AS OK input source selects the waveband FM MW LW Starts the automa tic station scan TUNE Start the automatic a s station search for manually setting the fre q...

Page 8: ...h back to the previous folder F 2 Briefly press to select the next folder RAND For playing back CD tracks or all tracks in the current folder in random order SCAN For playing CD tracks or all tracks i...

Page 9: ...received CD MODE READ CD function A CD is inserted CD symbol lights up when a CD is inserted moves while playing back a CD RDM ON The CD tracks are played back in random order SCAN ON The intro ducti...

Page 10: ...TING THE VOLUME 1 Adjust the volume using the VOL control knob Display e g VOL 10 scale 00 to 63 MUTING THE LOUD SPEAKERS 1 Press I O briefly to mute the connected loudspeakers Display 2 Press I O bri...

Page 11: ...ly five seconds the device quits the selected func tion BASS TREBLE BALANCE or FADER automatically II RADIO 11 SETTING THE TIME 1 Press DISP briefly Display the time 2 Press and hold down DISP for 2 s...

Page 12: ...n on and off press TP AF briefly Display Traffic news standby is activa ted When is not displayed traffic news standby is deacti vated Notes If you are tuned to a station which does not broadcast traf...

Page 13: ...the FM waveband the devi ce gives RDS stations priority in the search After the search has finished you will hear the RDS station stored at preset position 1 FM1 TUNING WITH THE STATION SEARCH 1 Pres...

Page 14: ...n Display the current programme type PTY 3 Press DISP for a third time Display the frequency 4 Press DISP for a fourth time Display the station name again Note You can also quit the manual sta tion se...

Page 15: ...rewind press and hold down a PLAYBACK PAUSE 1 During playback press CD briefly Display briefly PAUSE 2 Press CD to resume playback REPEATING TRACKS REPEAT 1 Press RPT briefly during play back Display...

Page 16: ...ber Press DISP to call up further information track playing time ID3 tag etc Keep pressing DISP to do this MP3 T O2 CHER BELIEVE READ TRACK BROWSER 1 Press SELECT briefly Display TRK SCH 2 Press VOL b...

Page 17: ...their names 1 Press SELECT three times Display CHAR SCH 2 Press AS OK briefly Display A flashes CHAR SCH SELECTING THE PREVIOUS OR NEXT FOLDER 1 During playback press the preset button F 2 Display FO...

Page 18: ...in random order 2 To end this function press RAND Display 3 disappears 3MP3 T 10 PLAYING THE START OF EACH TRACK SCAN 1 Press SCAN briefly during playback Display briefly SCAN ON then the number of t...

Page 19: ...c tion cables to the device Note the correct polarity 6 Push the device into the fitted mounting frame b as far as it will go The device latches in Note The device is very powerful This means that it...

Page 20: ...to terminal 15 of the vehicle if you want the device to switch on and off with the ignition A 6 If A 6 is connected to terminal 58 of the vehicle the brightness of the buttons and display lighting on...

Page 21: ...c signal power Front loudspeakers B 3 rigth B 4 right B 5 left B 6 left Rear loudspeakers B 1 right B 2 right B 7 left B 8 left Caution Do not connect the loudspeaker connections to each other or eart...

Page 22: ...tion does not provide traffic news EON switches automatically to the traffic news of another station After the bulletin has finished it switches back to the current station The traffic news standby fu...

Page 23: ...or reception Incorrect BALANCE and FADER settings The CD is dirty The device is not firmly mounted The device is too hot temperature above 70 C Problem with the CD mechanism Playback errors Dirty CD C...

Reviews: