


4
PREPARATION
Tools Required for Assembly (not included): Hammer,
Flathead Screwdriver, Wire Nuts, Nails, Duct Tape,
Phillips Head Screwdriver, Utility Knife
Helpful Tools (not included): Electric Drill, Drill Bits
WARNING: Turn off electricity at breaker box
before beginning installation.
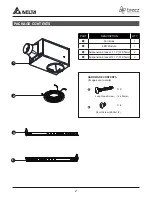
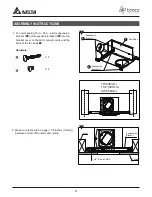
Carefully remove unit from carton.
Check area above installation location to be sure that
wiring can run to the planned location and that duct
proper ventilation.
Inspect duct work and wiring before proceeding with
installation.
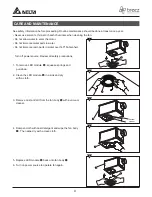
Before installation, provide inspection and future
maintenance access at a location that will not
interfere with installation work.
You may need the help of a second person to install
this fan: one person on the attic side and one on the
room side.
Note: Installations may vary depending on how the
previous bath fan was installed. Supplies necessary
for the installation of your bath fan are not all included.
However, most are available at your local home
improvement or hardware store.
Properly insulate around the fan to minimize building
heat loss and gain.
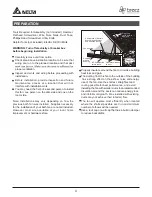
The ducting from this fan to the outside of the building
has a strong effect on the airflow, noise and energy
use of the fan. Use the shortest, straightest duct
routing possible for best performance, and avoid
installing the fan with smaller ducts than recommended.
Insulation around the ducts can reduce energy loss
and inhibit mold growth. Fans installed with existing
ducts may not achieve their rated air flow.
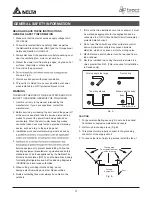
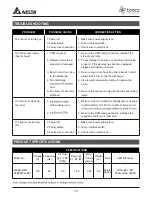
The fan will operate most efficiently when located
where the shortest possible duct run and minimum
number of elbows will be needed.
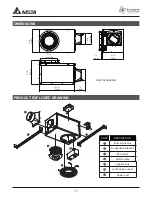
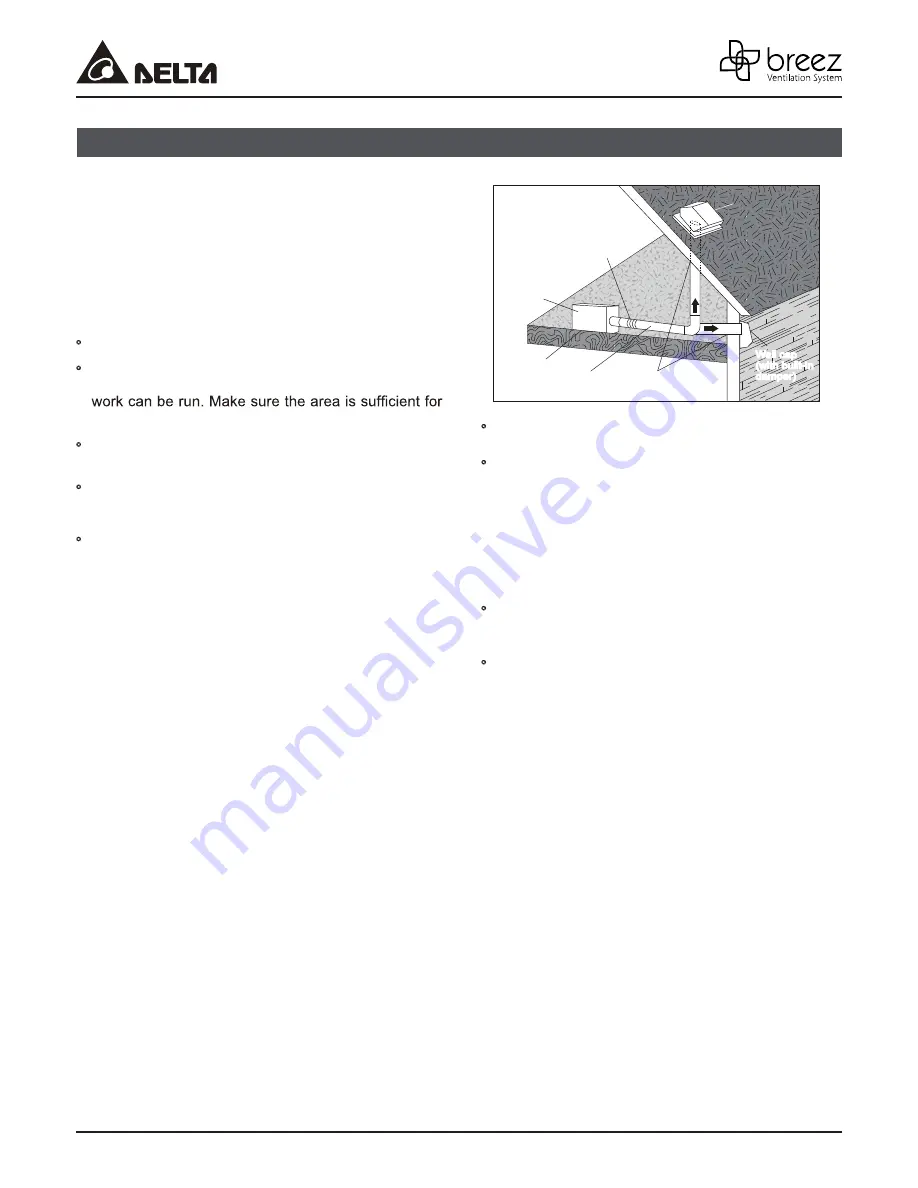
Use a roof cap or wall cap that has a built-in damper
to reduce backdrafts.
Roof cap
(with built-in
damper)
Seal gap
around
housing
Caulk termination
to duct
Fan housing
Short piece of flexible
duct helps alignment
and absorbs sound
or
Wall cap
(with built-in
damper)
Wall cap
(with built-in
damper)
2~3 ft straight run
before elbow


