4
Model:
RAD80L
PREPARATION
Tools Required for Assembly (not included): Hammer, Flathead Screwdriver, Wire Nuts, Nails, Duct Tape,
Phillips Head Screwdriver, Utility Knife
Helpful Tools (not included): Electric Drill, Drill Bits
WARNING: Turn off electricity at breaker box before beginning installation.
Before installation, provide inspection and future maintenance access at a location that will not interfere with
installation work.
You may need the help of a second person to install this fan: one person on the attic side and one on the room side.
Remove ceiling section using dimensions provided below. Be careful to cut hole exactly. If hole is too big, the fan
grille will not hide it.
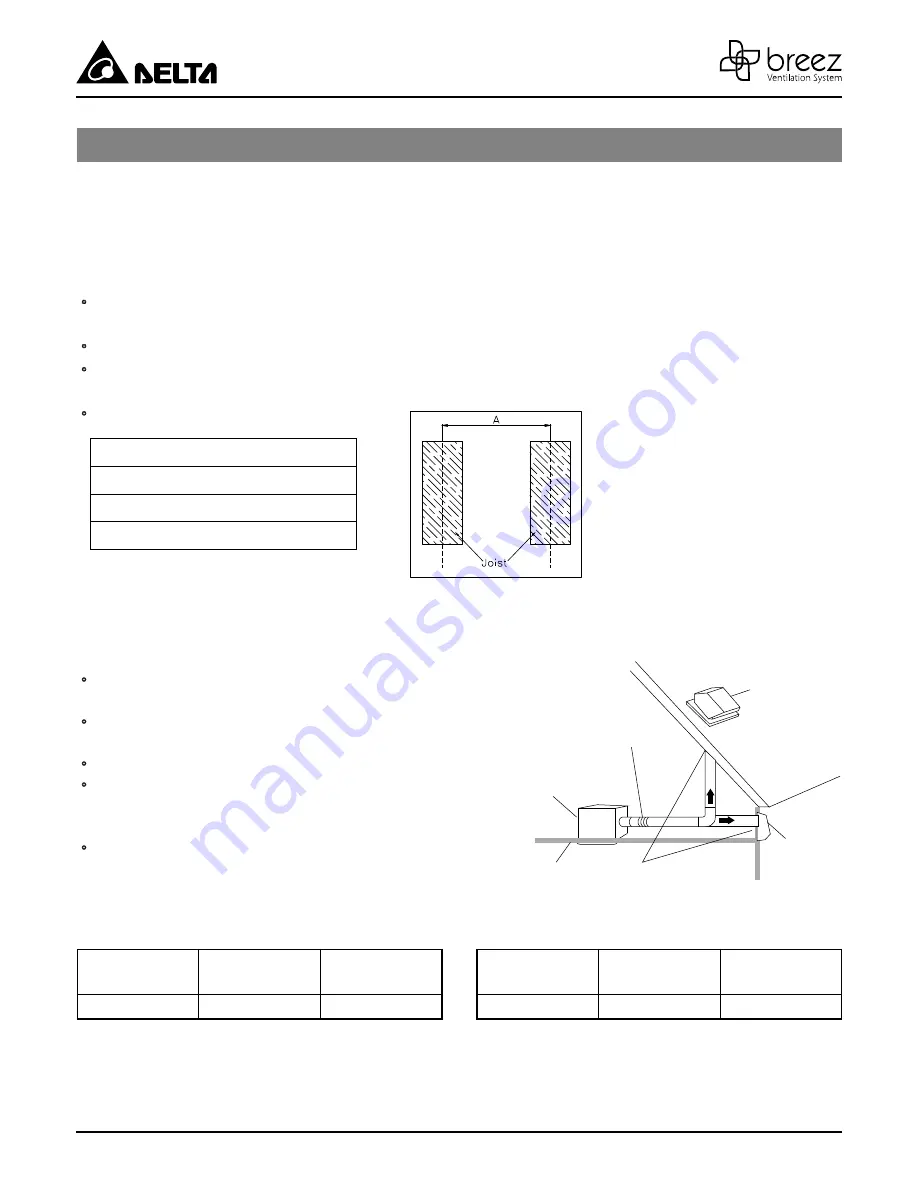
Determine the distance between your joists.
DIMENSION REQUIREMENTS
WARNING
Ceiling
Opening (L)
Ceiling
Opening (W)
Ceiling
Opening (H)
14.62 in.
8.50 in.
5.50 in.
Housing
Dimension (L)
Housing
Dimension (W)
Housing
Dimension (H)
14.38 in.
8.25 in.
5.50 in.
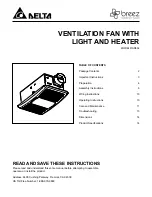
Proper insulation around the fan to minimize building heat
loss and gain.
Locate unit above (GFCI-protected circuit required) or
within 5 feet of the shower head.
Locate unit away from heating or cooling sources.
The fan will operate most efficiently when located where
the shortest possible duct run and minimum number of
elbows will be needed.
Use a roof cap or wall cap that has a built-in damper to
reduce backdrafts.
Roof cap
(with built-in
damper)
Seal gap
around
housing
Caulk termination
to duct
Fan housing
Short piece of flexible
duct helps alignment
and absorbs
sound
Wall cap
(with built-in
damper)
or
Spacing A on center joists
16.0 inches
19.2 inches
24.0 inches
Note: Installations may vary depending on how the previous bath fan was installed. Supplies necessary for the
installation of your bath fan are not all included. However, most are available at your local home improvement or
hardware store.
Be careful to cut hole exactly. If the hole is too big, the fan grille will not hide it.


