


21
Customer Service gcs@DeltaChildren.com
www.DeltaChildren.com
6
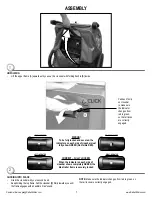
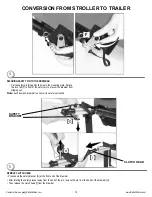
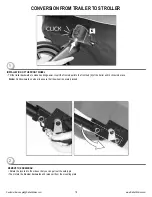
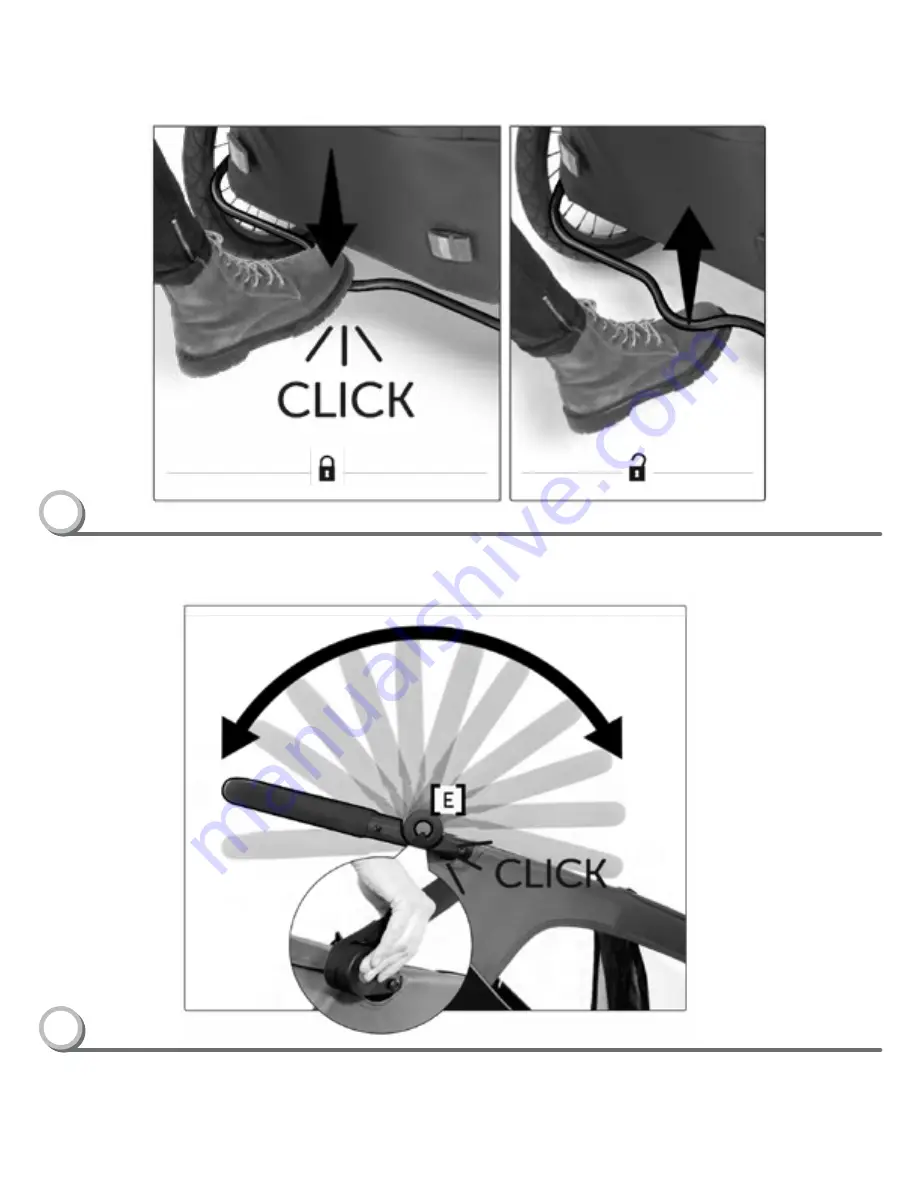
ADJUSTMENT OF THE HANDLEBAR
• Press and hold the push buttons [E] on the left and right of the handle. Move the handle to the desired position and make sure it locks in with an
audible “click” sound.
Note: Handle can move to 11 different positions
5
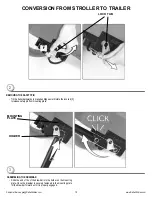
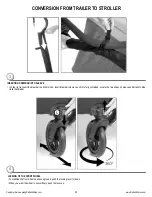
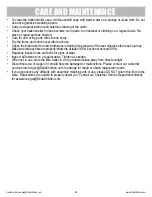
USAGE OF THE BRAKE
• By pressing the brake lever, the brake locks in with a clear “click” sound. To release the brake, push the brake lever up again.
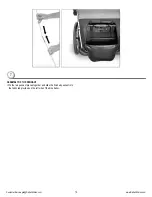
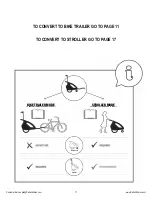
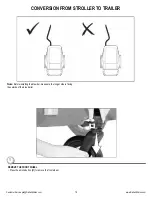
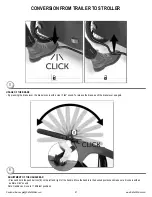
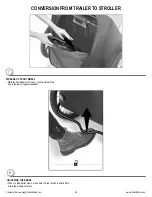
CONVERSION FROM TRAILER TO STROLLER


