background image

25

Customer Service gcs@DeltaChildren.com

www.DeltaChildren.com

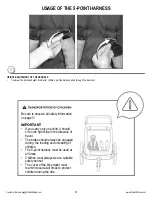
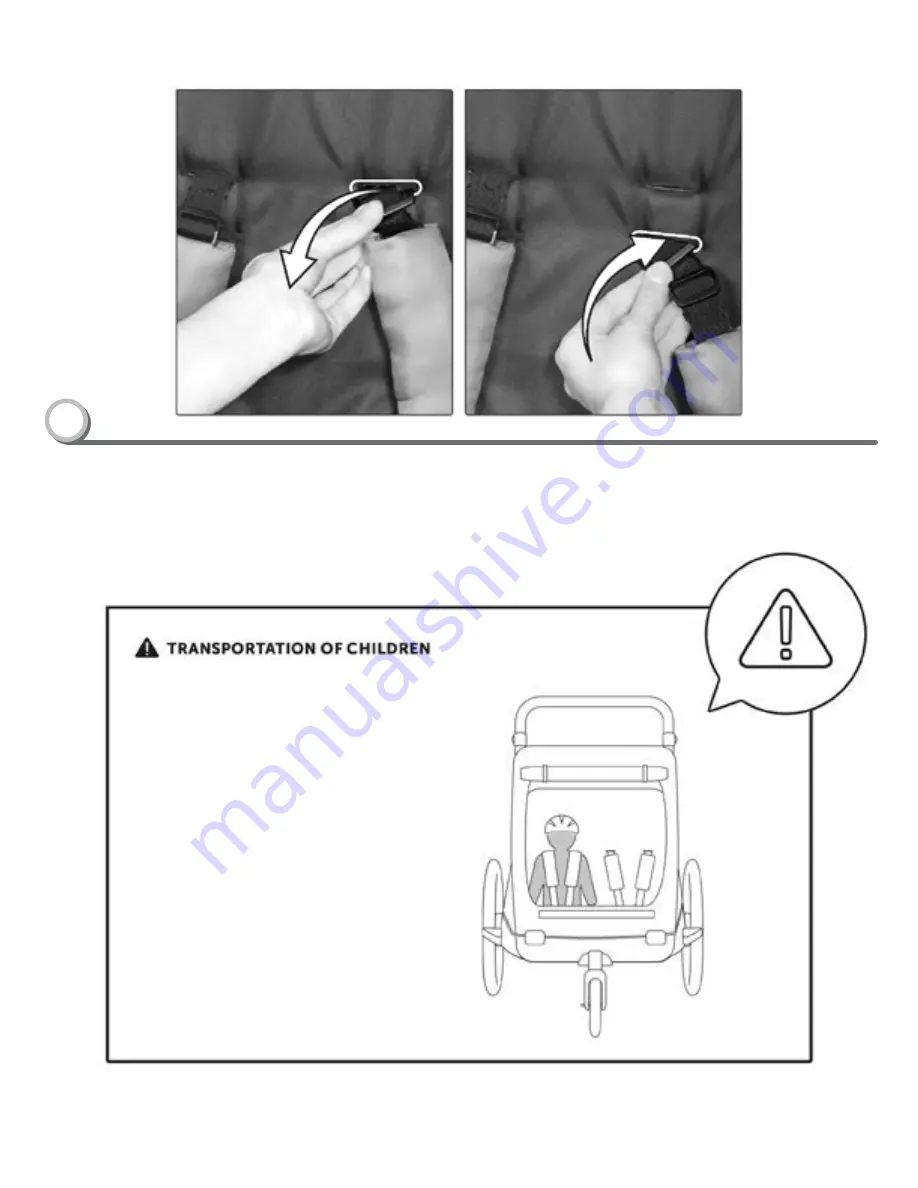
HEIGHT-ADJUSTMENT OF THE HARNESS

•  To adjust the harness height for smaller children, pull the harness ends through the backrest.

1

USAGE OF THE 5-POINT HARNESS

Be sure to observe all safety information 

on page 3!

IMPORTANT

•  If you carry only one child, it should 

sit on the right side in the direction of 

travel.

•  The brake should always be engaged 

during  the loading and unloading of 

children.

•  The 5-point harness must be used at 

all times.

•  Children must always wear a suitable 

safety helmet

•  The cover of the bike trailer must 

reamin closed at all times to protect 

children during the ride. 

Summary of Contents for 85000

Page 1: ... DCP IM 07152021 V6 WARNING Adult assembly required because of small parts Keep assembly parts out of reach of children under 3 years CHOKING HAZARD EVEREST 2 IN 1 BIKE TRAILER AND STROLLER Read all instructions BEFORE assembly and USE of product KEEP INSTRUCTIONS FOR FUTURE USE 85000 ADULT ASSEMBLY REQUIRED STYLES AND COLORS MAY VARY PASSENGERS MUST WEAR APPROPRIATE HELMET AND SAFETY EQUIPMENT AT...

Page 2: ... under 50 lbs each and the rear cargo compartment Before attaching the bike trailer to to bicycle have a professional bike mechanic perform a safety inspection NEVER use the bike trailer stroller on stairways or escalators NEVER allow your bike trailer stroller to be used as a toy NEVER use the bike trailer stroller in conjunction with bicycles skateboards roller skates or in line skates Please di...

Page 3: ...ice gcs DeltaChildren com www DeltaChildren com Max 2passengers Minimumage 9minstrollermode 12minBikeTrailermode Max 42 inches Max 50 lbs Max 50 lbs Max 13 lbs Max 113 lbs Total loaded weight including trailer 154 lbs ...

Page 4: ...eltaChildren com To better assist you please have your Style Lot and Manufacturer Date information available along with the part number that you need assistance with In the event we do not have a replacement part available You may need to return your product to the retailer for an exchange or refund Warranty In order to protect your investment don t forget to register your product You may also wis...

Page 5: ...com TO REPORT A PROBLEM please log on to www deltachildren com and click the Consumer Care Tab or contact us by email at gcs DeltaChildren com Date of Purchase _____________ you should also keep your receipt DON T MISS YOUR CHANCE TO BE COVERED FOR ALL OF LIFES MISHAPS With Delta s Extended Warranty you re covered for mechanical failure from normal use or if your item stops working due to normal w...

Page 6: ...embly and each use inspect this product for damaged hardware loose joints missing parts or sharp edges NEVER use if any parts are missing or broken Contact manufacturer for replacement parts and instructions if needed Never substitute parts IMPORTANT Adult assembly is required PARTS IMPORTANT Please remove all parts from the package and identify them before assembly ...

Page 7: ...lick sound Pull back firmly on crossbar to make sure the indicator changes from red to green so that all locks are correctly engaged 2 NOTE Make sure the indicator changes from red to green so that all locks are correctly engaged A B WRONG To be fully locked and secured the indicators on each side of crossbar must fully show GREEN No Visible RED LEFT INDICATOR LEFT INDICATOR RIGHT INDICATOR RIGHT ...

Page 8: ...ctly installed pull it away from the wheel It must not detach itself from the frame ASSEMBLY OF WHEEL PROTECTION 3 Hold down the central button C and push the wheel to the axle NOTE To check if the wheel is correctly installed pull it away from the body it must not detach itself from the axle NOTE Make sure that rear tires are properly inflated to at least 36 Psi but do not exceed 50 Psi ASSEMBLY ...

Page 9: ...ttons pressed rotate the handle up or down to desired position The buttons will CLICK on both sides once it is in a fully locked position Note Confirm both buttons are depressed and handlebars are in a locked position before use 6 5 REMOVE THE FRONT WHEEL Press the unlock button M to remove the front wheel Then follow the instructions from step 1 on page 12 to mount the drawbar M ...

Page 10: ...r Service gcs DeltaChildren com www DeltaChildren com ASSEMBLY OF THE PENNANT Pin the two pennant pieces together and slide the finished pennant into the fabric tab provided on the left side of the bike trailer 7 ...

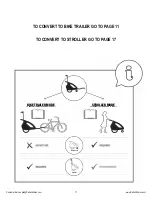
Page 11: ...en com www DeltaChildren com TO CONVERT TO STROLLER GO TO PAGE 17 TO CONVERT TO BIKE TRAILER GO TO PAGE 11 TO CONVERT TO BIKE TRAILER GO TO PAGE 11 TO CONVERT TO STROLLER GO TO PAGE 17 Front wheel Pennant BIKE TRAILER MODE STROLLER MODE ...

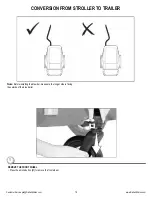
Page 12: ...m www DeltaChildren com CONVERSION FROM STROLLER TO TRAILER Note Before installing the drawbar make sure the longer side is facing the outside of the bike trailer 1 REMOVE THE FRONT WHEEL Press the unlock button M to remove the front wheel M ...

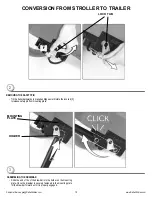
Page 13: ...lease safety pin from mounting plate 2 REMOVING THE SAFETY PIN F LOCK TAB CONVERSION FROM STROLLER TO TRAILER 3 Slide the end of the of the drawbar into the holder on the mounting plate Once the drawbar is securely fastened to the mounting plate tilt the drawbar forward until it is properly engaged ASSEMBLING THE DRAWBAR HOLDER MOUNTING PLATE ...

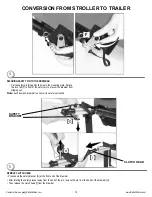
Page 14: ...ng out Note push down on drawbar to ensure it is securely attached SECURING SAFETY PIN TO THE DRAWBAR F CONVERSION FROM STROLLER TO TRAILER 5 REMOVE CLUTCH HEAD Press down the safety bracket G at the front end of the drawbar After rotating the safety bracket away from the end of the pin remove the pin from the head of the drawbar H Then release the clutch head I from the drawbar SAFETY BRACKET CLU...

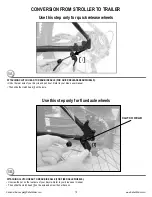
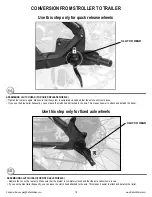
Page 15: ...UTCH HEAD TO REAR BIKE AXLE FOR QUICK RELEASE REAR WHEELS CONVERSION FROM STROLLER TO TRAILER Use this step only for fixed axle wheels Use this step only for quick release wheels 5B Unscrew the nut on the rear axle of your bicycle Refer to your bike s user manual Then slide the clutch head I on the axle and screw the nut back on ATTACHING CLUTCH HEAD TO REAR BIKE AXLE FOR FIXED AXLE WHEELS CLUTCH ...

Page 16: ...xle This makes it easier to attach and detatch the trailer 6B Replace the nut on the rear axle Make sure that the system is completely closed and that the axle cannot come loose If you use the bike trailer frequently you can leave the clutch head attached to the axle This makes it easier to attach and detatch the trailer ASSEMBLING CLUTCH HEAD FOR FIXED AXLE WHEELS CLUTCH HEAD CLUTCH HEAD I CONVER...

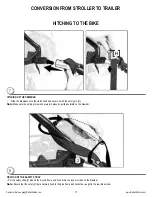
Page 17: ...d on the drawbar Note Ensure that the safety strap is securely fixed to the bike frame and cannot be caught in the rear bike wheel CONVERSION FROM STROLLER TO TRAILER 7 HITCHING OF THE DRAWBAR Slide the drawback onto the clutch head and secure it with the safety pin H Note Make sure the safety pin is well secured in place by pulling outward on the drawbar HITCHING TO THE BIKE ...

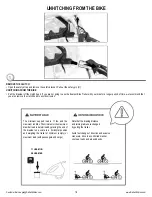
Page 18: ...inimum or the maximum drawbar load is determined by placing the end of the drawbar on a scale in a horizontal position and weighing the trailer at minimum empty or maximum load with passengers and cargo UNHITCHING FROM THE BIKE 1 REMOVE THE CLUTCH Open the safety strap and remove the safety bracket Pull out the safety pin H UNHITCHING FROM THE BIKE Pull the drawbar off the clutch head If you are n...

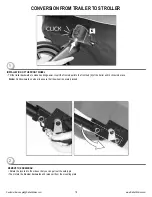
Page 19: ...o that you can pull out the safety pin Then rotate the drawbar backwards and release it from the mounting plate 1 INSTALLATION OF THE FRONT WHEEL Tilt the trailer backwards to make handling easier Insert the front wheel into the front hub K of the trailer until it clicks into place Note Pull downward on wheel to ensure that the wheel is securely locked K ...

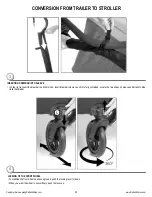
Page 20: ...abilize the front wheel on uneven ground push the locking lever L down When you want the wheel to swivel freely push the lever up 3 INSERTING DRAWBAR INTO SLEEVE In order to transport the drawbar in stroller mode insert drawbar into sleve until it is fully contained Locate the two straps on sleeve and attach to bike trailer handlebar ...

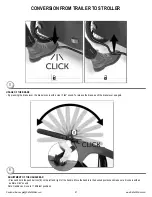
Page 21: ...nd right of the handle Move the handle to the desired position and make sure it locks in with an audible click sound Note Handle can move to 11 different positions 5 USAGE OF THE BRAKE By pressing the brake lever the brake locks in with a clear click sound To release the brake push the brake lever up again CONVERSION FROM TRAILER TO STROLLER ...

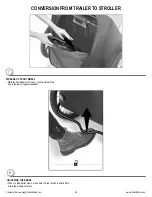
Page 22: ...VERSION FROM TRAILER TO STROLLER 7 While the front wheel is not in use it can be stored in the bag in the rear storage compartment STORAGE OF FRONT WHEEL 8 UNLOCKING THE BRAKE When in bike trailer mode make sure the rear brake is unlocked to allow the wheels to rotate ...

Page 23: ...r protection N and mosquito net O To open the canopy loosen the Velcro and roll it upwards and fasten with toggle and loops on both sides PANORAMA WINDOW The cover of the window can be rolled upwards and be fastened with the middle toggle and loop STORAGE COMPARTMENT A load of 13lbs is permitted in the rear storage space of the trailer N O ...

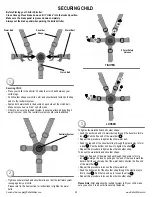
Page 24: ...sen the waist belts and shoulder straps Feed the free end of the waist belt up through the buckle to form a loop A Enlarge the loop by pulling on the end of the loop toward the buckle Pull the anchored end of the waist belt to shorten the free end of the waist belt B Repeat this procedure to loosen the other waist belt Feed the bottom end of the shoulder strap through the plastic stay to form a lo...

Page 25: ...Be sure to observe all safety information on page 3 IMPORTANT If you carry only one child it should sit on the right side in the direction of travel The brake should always be engaged during the loading and unloading of children The 5 point harness must be used at all times Children must always wear a suitable safety helmet The cover of the bike trailer must reamin closed at all times to protect c...

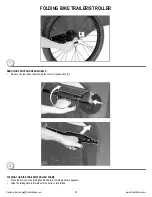
Page 26: ...TROLLER REMOVING FRONT AND REAR WHEELS Remove the rear wheel by pressing the center release button C 1 FOLDING THE BIKE TRAILER STROLLER FRAME Press the button on the folding handle and turn the folding handle upwards Slide the folding handle forward until the trailer is fully folded 2 C ...

Page 27: ...l up rain guard and fasten rolled up guard to toggle and loop P 1 WHEN USING THE RAIN GUARD Roll the rain guard all the way down Fasten the velcro strip on the underside of the rain guard to the strip at the bottom of the opening 2 P TOGGLE AND LOOP VELCRO STRIP UNDER RAIN GUARD VELCRO STRIP UNDER OPENING ...

Page 28: ...ar wheels before each journey Make sure that each tire are properly inflated to at least 36 Psi but do not exceed 50 Psi Regularly inspect locks and belts for signs of wear Inspect all fasteners on a regular basis Tighten as needed When not in use store the bike trailer in a dry protected place away from direct sunlight Discontinue use of wagon if it should become damaged or malfunctions Please co...

Page 29: ...29 Customer Service gcs DeltaChildren com www DeltaChildren com ...

Page 30: ...30 Customer Service gcs DeltaChildren com www DeltaChildren com ...

Page 31: ...31 Customer Service gcs DeltaChildren com www DeltaChildren com ...

Page 32: ... 2021 Delta Children s Products All rights reserved Delta Children s Products Corp 114 West 26th Street New York NY 10001 gcs DeltaChildren com www DeltaChildren com ...

Reviews: