background image

2

  WARNING:

*

Infants can suffocate on soft bedding. Never add a pillow or comforter. Never place additional padding under an 

infant.

*

Failure to follow these warnings and the assembly instructions could result in serious injury or death. 

DO NOT use 

this crib if you cannot exactly follow the accompanying instructions.

*

To reduce the risk of SIDS, pediatricians recommend healthy infants be placed on their backs to sleep, unless 

otherwise advised by your physician.

*Strangulation Hazard:

 STRINGS CAN CAUSE STRANGULATION! 

Do not

 place items with a string around a 

child's neck, such as hood strings or pacifier cords. 

Do not

 suspend strings over a crib or attach strings to toys.

*Strangulation Hazard:

 To help prevent strangulation tighten all fasteners. A child can trap parts of the body or 

clothing on loose fasteners.

*Strangulation Hazard:


Do not

 place crib near window 

or patio door  

where cords from blinds or drapes may 

strangle a child.

*Fall Hazard:

 When child is able to pull to a standing position, set mattress to lowest position and remove bumper 

pads, large toys and other objects that could serve as steps for climbing out. This crib has an adjustable mattress 

support. For the convenience of the parent when the baby is very small, the mattress support may be used in the 

highest position.  Important:  with the mattress support and mattress in the highest position, be absolutely sure that 

the top of the front crib side is at least 3 inches higher than the top surface of the mattress.  If it is not, lower the 

mattress support and the mattress to the next highest position.

*Fall Hazard:

 Stop using crib when child begins to climb out or reaches a height of 35in. (89cm),  whichever occurs 

first. The child should be placed in a youth or regular bed. 

*

Check this product for damaged hardware, loose joints, loose bolts or other fasteners, missing parts, or sharp edges 

before and after assembly and frequently during use.  Securely tighten loose bolts and other fasteners. 

Do not use 

crib

 if any parts are missing, damaged or broken.  Contact Simmons Kids Furniture for replacement parts and 

instructional literature if needed.  Do not substitute parts.

*Follow warnings on 

all 

products in a crib.

*If refinishing, use a non-toxic finish specified for children's products.

*

Never

 use plastic shipping bags or other plastic film as mattress covers because they can cause suffocation.

*Infants can suffocate in gaps between crib sides and a mattress that is too small.

*Ensure a safe environment for the child by checking regularly, before placing the child in the crib, that every 

component is properly and securely in place.

*To avoid head injury, do not allow any child to play underneath the crib.

*

Never

 add an accessory such as a bassinet or changing table that extends over the sleeping area.

*

In Canada Only

 - Use a crib mattress that is no thicker than 15 cm and is of such a size that, when it is pushed 

firmly against any side of the crib, it does not leave a gap of more than 3 cm between the mattress and any part of 

the sides of the crib. Do not use this crib for a child who can climb out of it or who is taller than 90 cm.

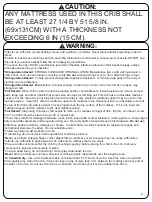
 CAUTION:

ANY MATTRESS USED IN THIS CRIB SHALL 

BE AT LEAST 27 1/4 BY 51 5/8 IN. 

(69x131CM) WITH A THICKNESS NOT 

EXCEEDING 6 IN (15 CM).

Summary of Contents for Gramercy 82160

Page 1: ...contacting Delta Consumer Care please ensure that the information above matches the information found on the label on the Crib End bottom rail please reference the information found on the product wh...

Page 2: ...support and the mattress to the next highest position Fall Hazard Stop using crib when child begins to climb out or reaches a height of 35in 89cm whichever occurs first The child should be placed in...

Page 3: ...s assurer que le sommet du c t lat ral avant du lit se trouve au moins 7 6 cm 3 pouces plus haut que la surface sup rieure du matelas Si ce n est pas le cas abaisser le support du matelas et le matel...

Page 4: ...erior del colch n En caso contrario baje el soporte del colch n y el colch n hasta la siguiente posici n m s alta Peligro de ca das deje de utilizar la cuna cuando el ni o comience a trepar o alcance...

Page 5: ...a full size crib mattress at least 51 5 8 in 1310mm in length 27 1 4 in 690mm in width and a max thickness of 6 in 150mm TODDLER BED CHANGING TABLE WARNING FALL HAZARD to prevent death or serious inju...

Page 6: ...doit tre un matelas de lit de b b de format standard d au moins 51 5 8 po 1310 mm de long 27 1 4 po 690 mm de large et 6 po 150mm d paisseur maximum LITS POUR ENFANTS TABLE LANGER RISQUE DE CHUTE Afi...

Page 7: ...brechas peligrosas el colch n que se use en esta cama debe ser de tama o completo de al menos 51 5 8 pulg 1310 mm de largo 27 1 4 pulg 690 mm de ancho y 6 pulg 150 mm de grosor CAMBIADOR PELIGRO DE C...

Page 8: ...CUIDADOS Y MANTENIMIENTO El uso de un vaporizador cerca de los muebles puede causar que la madera se hinche y que el acabo do se pele No almacene la cuna en reas donde las temperaturas y las condicion...

Page 9: ...erse sup rieure de la table langer Barra superior del cambiador 25489 F Changer Lower Shelf Rail x4 Traverse de la tablette inf rieure de la table langer Barra del estante inferior del cambiador 25491...

Page 10: ...dor 25488 W Changer Pad x1 Matelas langer Almohadilla del cambiador 24661 N Stabilizer Bar x1 Barre stabilisatrice Barra estabilizadora 25494 P Mattress Support x1 Support de Matelas Soporte para el C...

Page 11: ...aillerie correspond la pi ce n 24664 987 pour la couleur 2053 El kit de herramientas es la Pieza 24664 987 para el color 2053 R M6 x 75mm Bolt x16 Boulons M6 x 75mm Pernos M6 x 75mm T M6 x 18mm Bolt x...

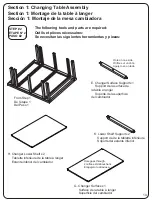
Page 12: ...as y piezas STEP 1 TAPE N 1 PASO 1 Note Fasteners are shown full size Remarque Les dispositifs de fixation sont Montr s en taille r elle Nota Los pernos se muestran en tama o real C Changer Top and Bo...

Page 13: ...t te plate pour tenir l crou port e cylindrique dans son bon alignement Serrez tous les boulons avec la cl hexagonale M4 Ensuite installez 2 traverses de support du plan langer Pi ce D et 4 traverses...

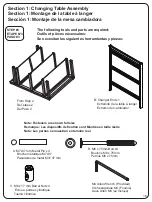
Page 14: ...ces n cessaires Se necesitan las siguientes herramientas y piezas STEP 2 TAPE N 2 PASO 2 H Changer Lower Shelf x2 Tablette inf rieure de la table langer Estante inferior del cambiador G Changer Surfa...

Page 15: ...s Pi ces G et H avec les sillons sur les traverses de support Glissez les tablettes sur le c t Alignez les chevilles sur le support de la surface du plan langer Pi ce E et les supports de la tablette...

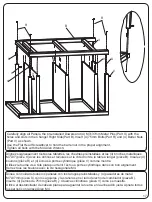
Page 16: ...ch Provided Cl hexagonale M4 Fournie Llave Allen M4 se Incluye The following tools and parts are required Outils et pi ces n cessaires Se necesitan las siguientes herramientas y piezas STEP 3 TAPE N 3...

Page 17: ...s et rainures sur le c t droit de la table langer pi ce B Ins rez 4 boulons pi ce R et 4 crous port e cylindrique pi ce V comme montr Utilisez le tourne vis t te plate pour tenir l crou port e cylindr...

Page 18: ...Arandela de nylon T M6 x 18mm Bolt x1 Boulons M6 x 18mm Pernos M6 x 18mm M4 Allen Wrench Provided Cl hexagonale M4 Fournie Llave Allen M4 se Incluye The following tools and parts are required Outils e...

Page 19: ...len Wrench Installez la ceinture de s curit pi ce J en utilisant 1 rondelle en nylon pi ce Y et 1 boulon 18mm pi ce T Serrez l aide de la cl hexagonale M4 Instale la correa de seguridad pieza J utiliz...

Page 20: ...de b b Extremo de la cuna R M6 x 75mm Bolt x4 Boulons M6 x 75mm Pernos M6 x 75mm M4 Allen Wrench Provided Cl hexagonale M4 Fournie Llave Allen M4 se Incluye The following tools and parts are required...

Page 21: ...art L and 1 Crib End Part M to the assembly from Section 1 Step 4 using 2 M7 x 37mm Metal Pins Part X 4 75 mm Bolts Part R and 4 Barrel Nuts Part V Tighten with the m4 Allen Wrench Use the Flat Head S...

Page 22: ...veAllenM4 T M6 x 18mm Bolt x4 Boulons M6 x 18mm Pernos M6 x 18mm M4 Allen Wrench Provided Cl hexagonale M4 Fournie Llave Allen M4 se Incluye Section 2 Crib Assembly Section 2 Montage du lit de b b Sec...

Page 23: ...endre le matelas au fil de la croissance de l enfant Las Advertencias impresas en la bolsa unida al soporte del colch n deben quedar boca arriba y los resortes boca abajo La cuna tiene 3 posiciones de...

Page 24: ...lave Allen M4 se Incluye Section 2 Crib Assembly Section 2 Montage du lit de b b Secci n 2 Montaje de la cuna The following tools and parts are required Outils et pi ces n cessaires Se necesitan las s...

Page 25: ...n M4 Utilice el destornillador de cabeza plana para aguantar la tuerca cil ndrica debidamente alineada Fixez 1 c t lat ral du lit de b b pi ce L l assemblage de la tape 2 en utilisant 2 broches m tall...

Page 26: ...lave Allen M4 verifique que el perno que asegura la correa est apretado 2 Inserte la correa a trav s del agujero de la almohadilla de cambiador Pieza W 3 Coloque la almohadilla sobre la superficie del...

Page 27: ...EA JALE LA HEBILLA ASEG RESE DE QUE EST TOTALMENTE AJUSTADA PARA GARANTIZAR LA SEGURIDAD DEL NI O 2 1 3 W 27 Always secure the pad to the changing surface by inserting the strap through the hole in th...

Page 28: ...____ A REV Read all instructions before assembly and use KEEP INSTRUCTIONS FOR FUTURE USE ADULT ASSEMBLY REQUIRED Due to the presence of small parts during assembly keep out of reach of children until...

Page 29: ...Paso 3 de la secci n 2 del armado de la cuna PULL GENTLY Tirez doucement Tire con delicadeza M4 Allen Wrench Provided Cl hexagonale M4 Fournie Llave Allen M4 se Incluye Section 3 Toddler Bed Conversi...

Page 30: ...sion Section 3 Conversion en lit d enfant Secci n 3 Conversi n en cama de beb The following tools and parts are required Outils et pi ces n cessaires Se necesitan las siguientes herramientas y piezas...

Page 31: ...ches m talliques M4X30mm pi ce U 2 boulons 75mm pi ce R et 2 crous port e cylindrique pi ce V Serrez l aide de la cl hexagonale m4 Utilisez le tourne vis t te plate pour tenir l crou port e cylindriqu...

Page 32: ...TAPE N 3 PASO 3 The mattress support must be in the lowest position Store all hardware safely Read all warnings on page 5 As shown use as a day bed or love seat sofa Do Not use without stabilizer bar...

Page 33: ...ersion180128 lekitincluttouslespoteaux lestraverses dulitetlesinstructionsdeconversion Estacunasepuedeconvertirencamadetama ofull Sigalasinstruccionesqueseincluyenenelkitdeconversi n delacuna Estacuna...

Page 34: ...t sous condition d une utilisation normale Cette garantie concerne seulement l acheteur d origine et est valide uniquement sur pr sentation de la preuve d achat ou si re u en cadeau lorsque l enregist...

Reviews: