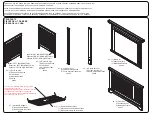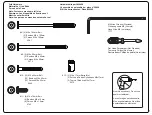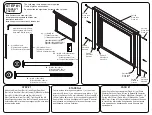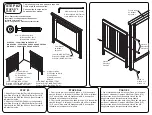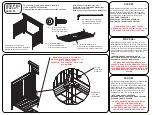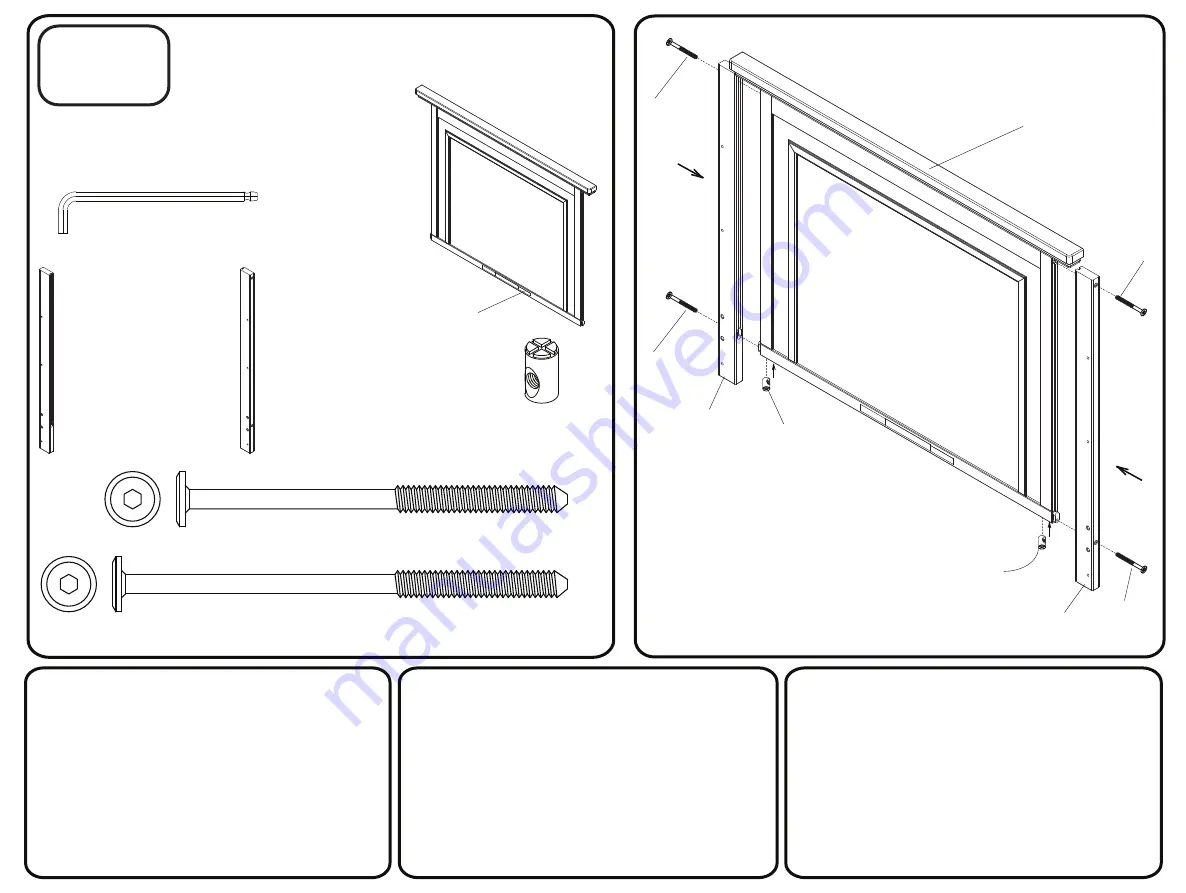
The following tools and parts are required:
Outils et pièces nécessaires:
Se necesitan las siguientes herramientas y piezas:
STEP #1
ÉTAPE N°1
PASO #1
Note: Fasteners are shown full size
Remarque: Les dispositifs de fixation sont
Montrés en taille réelle
Nota: Los pernos se muestran en tamaño real
STEP #1
ÉTAPE No1
PASO #1
Label “INSIDE BOTTOM”
Étiquette « INSIDE BOTTOM »
Etiqueta " INSIDE BOTTOM "
Part #3
Pièce No3
Pieza #3
Part #2
Pièce No2
Pieza #2
Part #1
Pièce No1
Pieza #1
Part #9
Pièce No9
Pieza #9
Part #9
Pièce No9
Pieza #9
Part #8
Pièce No8
Pieza #8
Part #8
Pièce No8
Pieza #8
Part #12
Pièce No12
Pieza #12
M4 Allen Wrench (Provided)
Clé hexagonale M4 (Fournie)
Llave Allen M4 (se Incluye)
#3 - (1) Back Rail
(1) Panneau Arrière
(1) Barandilla Posterior
#1 - (1) Left Rear Post
(1) poteau arrière gauche
(1) Poste Posterior Izquierdo
#2 - (1) Right Rear Post
(1) poteau arrière droit
(1) Poste Posterior Derecho
#8 - (2) M6 x 105mm Bolt
(2) Boulons M6 x 105mm
(2) Pernos M6 x 105mm
#12 - (2) M6 x 17mm Barrel Nut
(2) Écrous à Portée
Cylindrique M6x17mm
(2) Tuerca Cilíndrica M6x17mm
Part #12
Pièce No12
Pieza #12
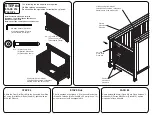
Attach Left Rear Post (Part #1) and Right Rear Post
(Part #2) to Back Rail (Part #3) using (2) M6x90mm Bolts
(Part #9), (2) M6x105mm Bolts (Part #8) and (2)
M6x17mm Barrel Nuts (Part #12). Tighten with the M4
Allen Wrench provided. Use the Flat Head Screwdriver to
hold the Barrel Nut in the proper alignment. Be sure label
is towards the inside.
Fixer le poteau arrière gauche (pièce n° 1) et le poteau
arrière droit (Pièce n° 2) au panneau arrière (pièce n° 3) à
l'aide (2) boulons M6 x 90 mm (pièce #9), (2) boulons M6 x
105 mm (pièce #8) et deux (2) écrous de baril (pièce #12).
Serrer à l’aide de la clé hexagonale M4 fournie. S’assurer
que l’étiquette est orientée vers l’intérieur. Assurez-vous
que l'étiquette soit vers l'intérieur.
Una el Poste Posterior Izquierdo (Pieza #1) y el Poste
Posterior Derecho (Pieza #2) con la Barandilla Posterior
(Pieza #3) utilizando (2) Pernos M6x90mm (Pieza #9), (2)
Pernos M6x105mm (Pieza #8) y (2) Mangos de Tuerca
M6x17mm (Pieza #12). Aprietetodos los pernosutilizando
la Llave Allen M4 incluida.Asegúrese de que la etiqueta
mire haciaadentro. Asegúrese de que la etiqueta mire
hacia adentro.
#9 - (2) M6 x 90mm Bolt
(2) Boulons M6 x 90mm
(2) Pernos M6 x 90mm
Summary of Contents for Simmons Juvenile Crib 'N' More
Page 22: ......


