TROUBLE SHOOTING
SM6000
18 / 21
DELTA ELEKTRONIKA B.V.
rev. Nov. 2020
5
TROUBLE SHOOTING
5.1
GENERAL
If you have a question about the unit, please contact our
engineers using the address Support@Delta-Elektronika.nl.
In case the unit is defect, please first fill out the RMA-form
before sending the unit to us. Adding a detailed fault
description will help us to repair the unit as soon as
possible. Do not try to repair the unit yourself.
On our website the RMA-form can be found under
'Support'.
5.2
NO DC OUTPUT (manual control)
Check the LED’s ‘Remote CV’ and ‘Remote CC’ on the
front panel, they should be off. Disable Keylock and press
the REMOTE/LOCAL switch to turn both LED’s off.
The LED ‘Output On’ should be on. If this LED is off,
disable Keylock and push the button ‘OUTPUT ON/OFF’.
Check the connections on the SENSE BLOCK (at rear
panel), there should be a link b and S+ and
between
– and S– (see fig. 5 - 3).
Check if there is a link in the Interlock connector (if not, the
RSD LED will be on).
Set both the CV- and CC-limit potentiometer (at front panel)
at maximum (fully clockwise).
Turn both the CV and CC potentiometers a few turns
clockwise.
A voltage should be present on the output (for sm300-20 /
sm600-10 and units with Option P220 first remove the
Keylock function before the CV and CC knobs can be
turned, see par.5 in previous chapter "operating manual").
Turn both the CV and CC potentiometers a few turns
clockwise. A voltage should be present on the output.
5.3
PROGRAMMING DOES NOT WORK OK
Check the unit is in Remote mode (Remote CV and/or
Remote CC LED should be on).
The unit works OK in manual control, but in programming
mode the output voltage / current has a large error.
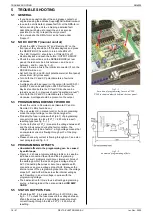
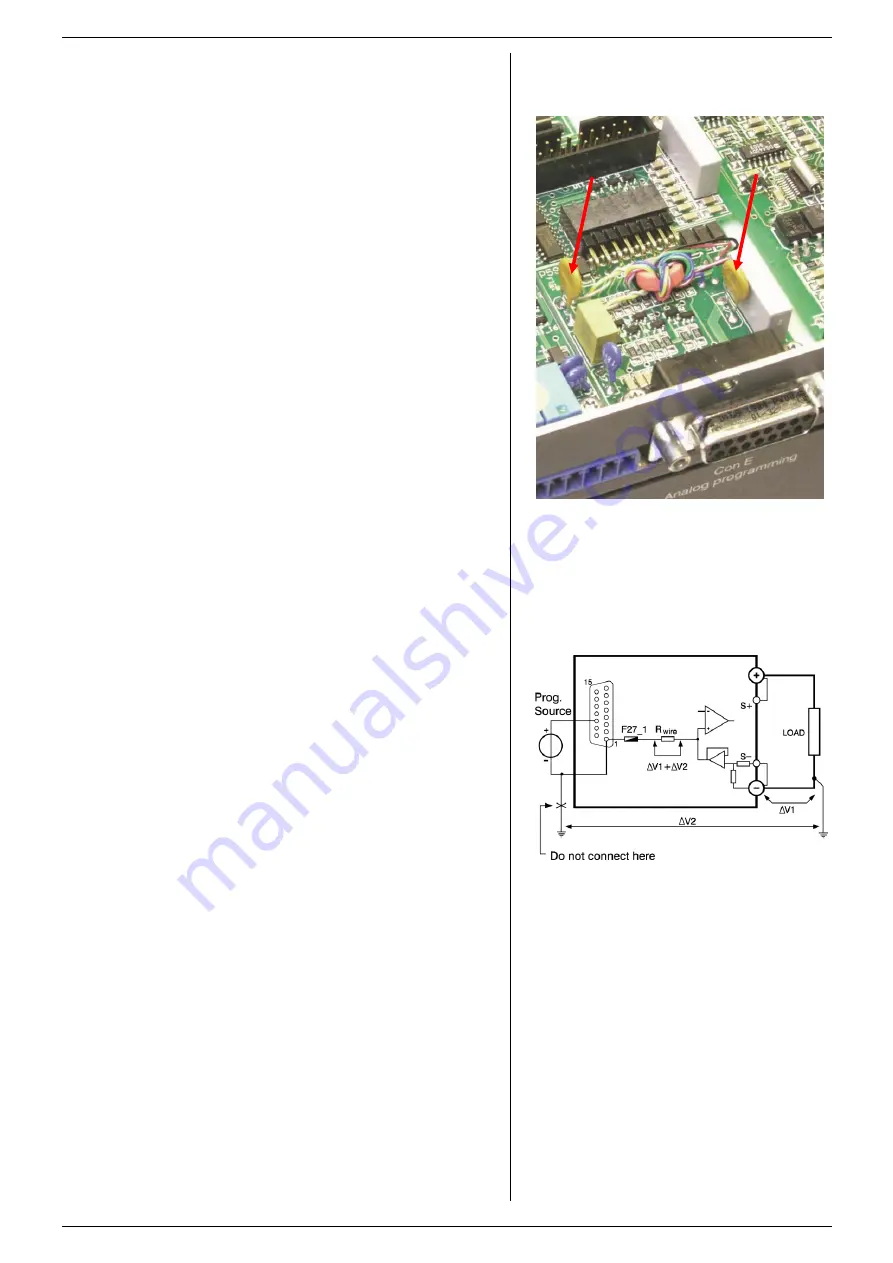
Probably the fuse in series with Ø (pin 1) of programming
connector tripped, the fuse (F27_1 = 650 mA) is a self-
resetting type (see fig. 5 - 1).
To check the fuse (F27_1) measure the voltage between Ø
and the minus output, during the fault condition. The
voltage should only be a few mV, a high voltage means that
an unwanted current is flowing through pin 1 of the prog.
connector.
Please check why current is flowing through pin 1, see also
next paragraph and fig. 5 - 2.
5.4
PROGRAMMING OFFSETS
Unwanted offsets in the programming can be caused
by earth loops.
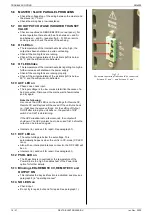
Figure 5 - 2 shows a typical earthing problem. In case the
load has a connection to earth and the programming
source as well, problems could occur. Improper choice of
the earthing point of the load can give a voltage drop of
ΔV1. Connecting the minus or zero to a separate earth
connection can give a voltage drop of
ΔV2. Because the
internal wires of the programming input are thin, the voltage
drops
ΔV1 and ΔV2 will be across the internal wiring as
well. Resulting in an error voltage in series with the
programming voltage.
The best solution for this is to use a floating programming
source, a floating load or the optional internal
ISO AMP
CARD
.
5.5
STATUS OUTPUTS FAIL
Check fuse F27_2 in series with Ø (pin 8 of CON E), see
fig. 5 - 1. To check the fuse measure the voltage between
Ø and the minus output, a high voltage means too much
current flowing through the fuse. F27_2 = 650 mA, self
resetting.
fig 5 - 2
unwanted programming offsets.
fig 5 - 1
Location of programming fuses on P598.
P598 is situated directly behind the rear panel.


