background image

18

Congratulations!
You have chosen to purchase a high-quality 
product. Familiarise yourself with the product 
before using it for the first time. 

Read the following operating 

instructions carefully. 

Use the product only as described and only 
for the given areas of application. Store these 
operating instructions carefully. When passing 
the product on to third parties, please also hand 
over all accompanying documents.

Package contents (Fig. A)

1 x quadcopter (1)
1 x remote control (2)
2 x replacement rotor (description A, B) (3)
2 x replacement rotor (description A, B) (4)
2 x battery (1.5V 

 LR6, AA) (5)

1 x USB charging cable (6)
1 x Phillips screwdriver (7)
1 x rechargeable battery (8)
1 x operating instructions

Quadcopter (Fig. B)

• rotor blade B (1a)
• rotor blade A (1b)
• rotor guards (1c)
• on/off  switch (1d)
• indicator light (1e)
• quadcopter foot (1f)
• rechargeable battery compartment (1g)

Remote control (Fig. C/D)

• on/off  switch (2a)
• no function (2b)
• headless mode/automatic return (2c)
• rotation (fi ne tuning clockwise rotation) (2d)
• switch for reducing speed (2e)
• rotation (fi ne tuning anti-clockwise rotation) 

(2f)

• switch for increasing speed (2g)
• throttle (control for up/down/right turn/left 

turn) (2h)

• ‘START/LAND’ – take-off /landing (2i)
• display (2j)
• ‘FLIP’ – 360° rollover (2k)
• control lever (forwards/backwards/sideways 

left/sideways right) (2l) 

• direction (fi ne tuning forwards/right/back-

wards/left) (2m–2p)

• battery compartment cover (2q)
• battery compartment (2r)

Technical data

Power supply for controller (battery):
2 x 1.5V 

 LR6, AA

Power supply for drive (rechargeable battery):
3.7V 

 Li-polymer 550mAh

Range: approx. 50m
Flight time: approx. 7–8 min.
Maximum transmission capacity: 6.82dBm
USB cable:
Type C
Input: 5V 

 1A

Do not use power supply units with an output 
current of > 1A
Radio frequency: 2.400–2.483GHz
Software version (remote control): V1.0
Operating temperature range: 10°C to 45°C

Optimum storage temperature: 10°C to 25°C
UA weight/MTOM (max. permissible take-off  
weight): 110g

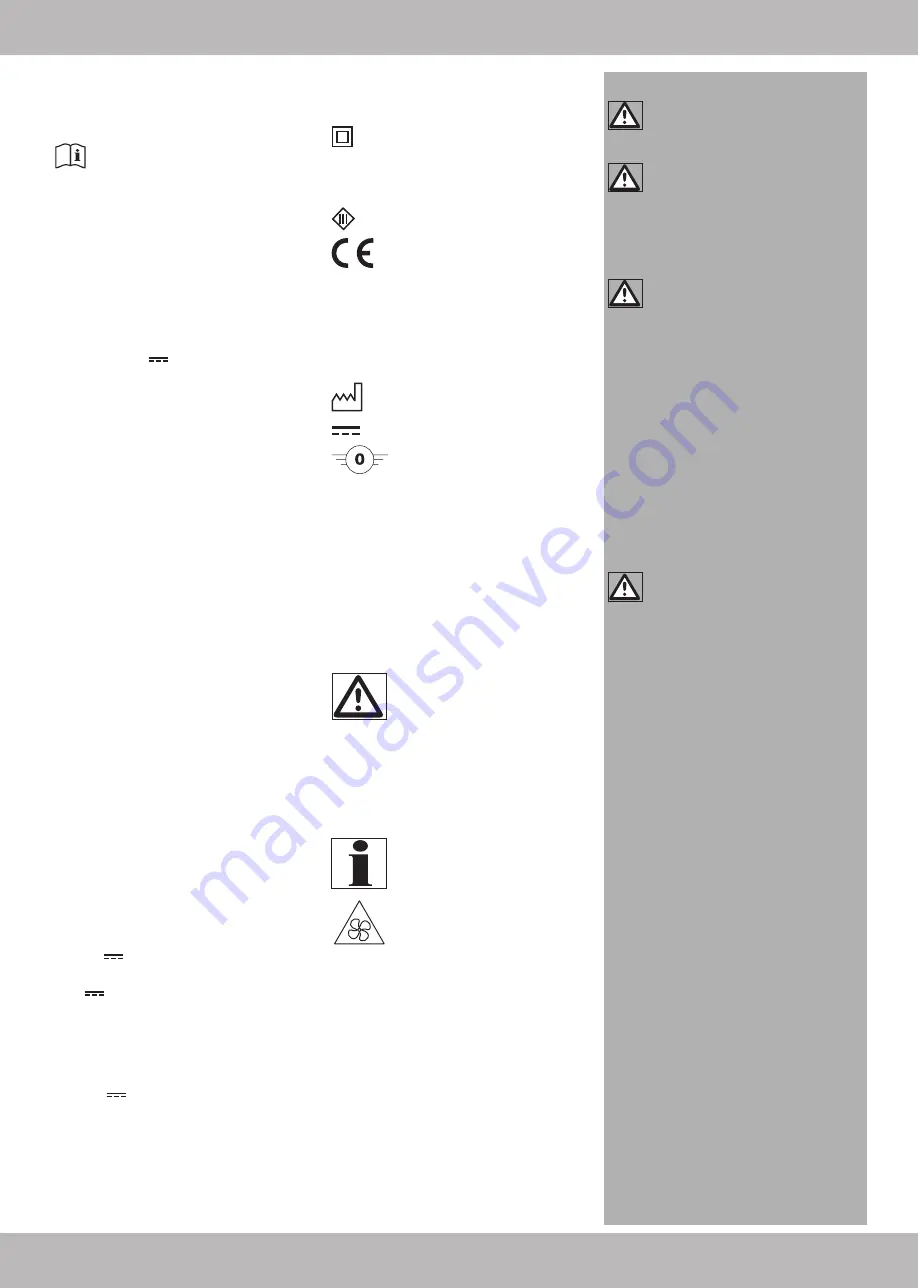
 = protection class II

This product may only be connected to protec-
tion class II devices bearing this symbol.
USB charging cable:

 = protection class III

Delta-Sport Handelskontor GmbH 
hereby declares that this product meets 
the following basic requirements, as 

well as other important regulations:
2014/53/EU – RED Directive
2011/65/EU – RoHS Directive
Full declarations of conformity are available at:
http://www.conformity.delta-sport.com

 Date of manufacture (month/year): 
11/2020

 Symbol for DC voltage

Quadcopter Class: 

C0

Intended use

This is a recreational product for persons aged 
12 years. and over and is intended for private, 
domestic use only. 
This product must only be used in suitable weath-
er conditions and in authorised areas. Further 
information is provided under the headings 
‘Safety information’, ‘Foreseeable misuse’ and 
‘Suitable fl ight environment’.

Symbols used

WARNING:

This signal word indicates a hazard 
with a medium risk level, which, if 
not avoided, can result in death or 
serious injury.

CAUTION:

This signal word indicates a hazard 
with a low risk level, which, if not 
avoided, can result in minor or 
moderate injury.

NOTE:

Further information on the use of the 
device!

Moving parts. Hold away 

from your body! Do not touch 

the rotor while it is rotating.

Safety information

WARNING:

 not suitable for children 

under 12 years. of age. 

• Caution. Read the operating instructions care-

fully before using the product for the first time.

WARNING:

 none of the packaging 

materials or attachments are part of the 
product itself, and must be removed for 
safety reasons before the product is 
used.

• The product is intended for home use only 

(house and garden).

WARNING:

 practise in an open area 

until you are familiar with the model.

• Flying the quadcopter requires skill and the 

user must be guided under the direct supervi-
sion of an adult. 

• Use only under adult supervision.
• Note for adults supervising: before each 

fl ight, check that the toy and rotors have been 
assembled as instructed. Adult supervision is 
required when installing the rotor blades and 
protective rings. 

• If you do not yet have adequate knowledge 

of handling remote-controlled quadcopters, 
please get in touch with an experienced mod-
el enthusiast or a model club.

• Ensure that the quadcopter has been as-

sembled in accordance with the operating 
instructions.

WARNING:

 risk of eye injuries. To 

prevent injury to the eyes, do not use in 
close proximity to your face.

• Make sure weather conditions are suitable. 

The product must not get wet.

• Check that the rotors are correctly and secure-

ly fi tted before each use.

• Do not operate the quadcopter if it is dam-

aged.

• Do not make any alterations or modifi cations 

to the quadcopter.

• Check that your quadcopter and the remote 

control are in reliable working order before 
each use. Pay attention to visible damage, 
such as faulty connectors or damaged cables. 
All movable parts on the product must move 
smoothly, but there must be no play in the 
bearing.

• If cables or connections are damaged, have 

them replaced by authorised service person-
nel or by customer service.

• Always switch on the remote control fi rst. The 

rechargeable battery in the model can then 
be connected and the quadcopter switched 
on. If the procedure is not followed in this or-
der, the product may react unpredictably and 
the rotors could start unintentionally!

• When the rotors are running, make sure that 

there are no objects or body parts in the 
rotational and suction area of the rotors. Keep 
hands, face, hair and loose clothing away 
from the rotors. Do not touch any moving 
parts.

• Always remove the rechargeable battery 

from the quadcopter during maintenance or 
cleaning.

• Do not take any risks when operating the 

quadcopter! Your own safety and the safety 
of your immediate environment depends on 
your responsible handling of the quadcopter.

GB/IE

Summary of Contents for 345898 2004

Page 1: ...ístroje Skôr než začnete návod čítať si ho otvorte na strane s obrázkami a oboznámte sa so všetkými funkciami prístroja DE AT CH Bedienungs und Sicherheitshinweise Seite 12 GB IE Operating and safety information Page 18 FR BE Consignes d utilisation et de sécurité Page 24 NL BE Bedienings en veiligheidstips Pagina 31 PL Wskazówki dot obsługi i bezpieczeństwa Strona 37 CZ Pokyny k obsluze a bezpečn...

Page 2: ...B G F H I J K E A C D ...

Page 3: ...5 L N M P O R Q ...

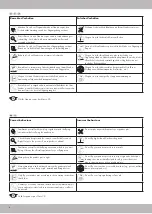
Page 4: ...d die nationale Luftfahrtbehörde Ihres Landes wenn Ihr Quadrocopter in einen schweren Personenscha den involviert ist oder ein Flugzeug tangiert Gilt für Quadrocopter der Klasse C0 Valid for quadcopter Class C0 Correct behaviour Incorrect behaviour Familiarise yourself with the safety regulations and the flying environment before flying the quadcopter Do not make any modifications to your quadcopt...

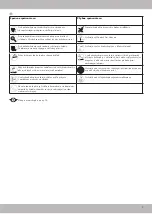
Page 5: ...es nationales de votre pays lorsque votre quadricoptère est impliqué dans des préjudices corporels graves ou s il affecte un avion Valable pour les quadricoptères de la catégorie C0 Goed gedrag Verkeerd gedrag Zorg ervoor dat u vertrouwd bent met de quadrocopter de veiligheidsbepalingen en de vliegomgeving voordat u gaat vliegen Breng geen modificaties aan uw quadrocopter aan Controleer de quadroc...

Page 6: ...ować się z krajowymi władzami lotniczymi swojego kraju jeśli quadrocopter spowoduje poważne obrażenia ciała lub dotknie samolotu Dotyczy quadrocoptera klasy C0 Správné chování Nesprávné chování Před zahájením letu se seznamte s kvadrokoptérou bezpečnostními pokyny a letovým prostředím Neprovádějte na své kvadrokoptéře žádné modifikace Před každým letem zkontrolujte kvadrokoptéru a dálkové ovládání...

Page 7: ...vždy na dohľad S vašou kvadrokoptérou nelietajte v blízkosti letísk pristávacích plôch pre helikoptéry v oblastiach ktoré môžu ovplyvniť verejnú bezpečnosť alebo na miestach nešťastia s prebiehajúcimi záchrannými akciami Vždy dodržiavajte bezpečnú vzdialenosť od vašej kvadrokoptéry ako aj od iných osôb zvierat a lietajúcich zariadení Nelietajte nad citlivými alebo stráženými miestami napr väznice ...

Page 8: ...ling 22 Possible errors 23 Zakres dostawy rys A 37 Quadrocopter rys B 37 Pilot zdalnego sterowania rys C D 37 Dane techniczne 37 Użytkowanie zgodne z przeznaczeniem 37 Zastosowane symbole 37 Wskazówki bezpieczeństwa 37 39 Ostrzeżenia dotyczące baterii akumulatora 38 39 Możliwe do przewidzenia użycie niewłaściwe 39 Wkładanie baterii do pilota zdalnego sterowania rys D 39 Wkładanie akumulatora rys E...

Page 9: ...nie akumulátora obr E 51 Vybratie akumulátora obr E 51 Nabíjanie akumulátora 51 Výstraha pri nízkom napätí 51 Vhodné letové prostredie 51 Príprava letu 51 Začiatok letu a ovládanie kvadrokoptéry 51 52 Začiatok letu obr H 51 52 Ovládanie kvadrokoptéry 52 Nastavenie rýchlosti obr M 52 Premet 360 obr N 52 Kalibrácia 52 Ukončenie letu 52 Chránič rotora 52 Čistenie oprava a skladovanie 52 53 Výmena rot...

Page 10: ...te Flugumgebung Verwendete Symbole WARNUNG ACHTUNG Das Signalwort bezeichnet eine Gefährdung mit einem mittleren Risikograd die wenn sie nicht vermieden wird den Tod oder eine schwere Verletzung zur Folge haben kann VORSICHT Das Signalwort bezeichnet eine Gefährdung mit einem niedrigen Risikograd die wenn sie nicht vermieden wird eine geringfügige oder mäßige Verletzung zur Folge haben kann HINWEI...

Page 11: ...Störung zu beseitigen bevor Sie den Quadrocopter wieder starten Setzen Sie den Quadrocopter und die Fern steuerung nicht über längere Zeit der direkten Sonneneinstrahlung oder großer Hitze aus Bei einem schweren Absturz z B aus großer Höhe kann die Kalibrierung beschädigt bzw verstimmt werden Vor einem erneuten Flug ist daher unbedingt die volle Funktion zu prüfen Bei einem Absturz ist das Gas sof...

Page 12: ... das Batteriefach 2r der Fernsteuerung 2 ein Einsetzen der Batterien 1 Lösen Sie mithilfe des Kreuzschlitz Schrauben drehers 7 die Schraube des Batteriefachde ckels 2q auf der Rückseite der Fernsteuerung 2 und entfernen Sie den Batteriefachdeckel 2q 2 Legen Sie die 2 x 1 5V Batterien 5 vom Typ LR6 vorsichtig in das Batteriefach 2r Die Batterien müssen sich komplett im Batteriefach 2r befinden VORS...

Page 13: ...rzei gersinn so drücken Sie die Gier Trimmtaste nach links 2f dreht er sich gegen den Uhr zeigersinn drücken Sie die Gier Trimmtaste nach rechts 2d Sie kontern so die ungewoll te Gier Bewegung mit einer Trimmung in die entgegengesetzte Richtung Richtung Roll und Nick Trimmung Abb P Sollte eine Vor oder Rückwärtsbewegung stattfinden obwohl Sie den Steuerhebel 2l gar nicht benutzen so können Sie die...

Page 14: ...ung Materialteile ablösen und zu Beschädigung oder Gefährdung der Umgebung führen Zum Wechseln eines Rotorblattes 1a 1b gehen Sie wie folgt vor 1 Lösen und entfernen Sie mit dem Kreuzschlitz Schraubendreher 7 die Schraube des auszu tauschenden Rotorblattes 1a 1b 2 Ziehen Sie das beschädigte Rotorblatt 1a 1b vom Quadrocopter 1 3 Setzen Sie das neue Rotorblatt 3 4 auf die Position wo vorher das besc...

Page 15: ...che Schieben Sie an der eingeschalteten Fernsteuerung 2 gleichzeitig den Gashebel 2h nach hinten links und den Steuerhebel 2l nach hinten rechts Die Kontrollleuchten 1e des Quadrocopters 1 blinken ca 3 Sekunden auf So bald die Kontrollleuchten 1e dauerhaft leuchten ist die Kalibrierung abgeschlos sen und der Quadrocopter 1 flugbereit HINWEIS Wiederholen Sie die Kalibrierung wenn der Quadrocopter 1...

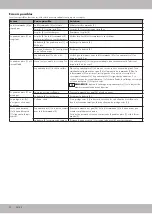
Page 16: ...ment Symbols used WARNING This signal word indicates a hazard with a medium risk level which if not avoided can result in death or serious injury CAUTION This signal word indicates a hazard with a low risk level which if not avoided can result in minor or moderate injury NOTE Further information on the use of the device Moving parts Hold away from your body Do not touch the rotor while it is rotat...

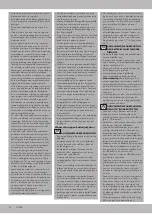
Page 17: ... to deep discharge always keep a close eye on the under voltage indicator lights see section on Under voltage warning In some countries insurance is mandatory for model aircraft and model helicopters which are flown outdoors Please consult your personal liability insurer and ensure that your quadcopter is included in this insurance In the event of loss of data or a connection failure between the r...

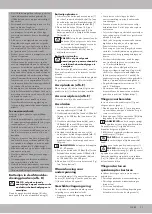
Page 18: ...r 1 Fig E 2 Connect the end 6a of the USB cable 6 to the USB socket 8a of the rechargeable battery 8 Fig F 3 Plug the other end 6b of the USB cable 6 into a USB port on a powered on computer or charging station with a USB port Fig F 4 The charging indicator light of the recharge able battery 8 switches on during charging Fig F and lights up red Once charging is complete the charging indicator ligh...

Page 19: ...ut the quadcop ter 1 and the remote control 2 one behind the other and press the button 2c on the remote control 2 The HEADLESS display 2j message lights up and the quadcopter 1 lights flash slowly as long as the mode is activated 2 To deactivate Headless mode press the button 2c again On the display 2j NOR MAL is lit up and the quadcopter lights light up continuously again Automatic return to the...

Page 20: ...pursuant to Directive 2006 66 EC and changes to it Return batteries and or the product via the collecting sites provided Packaging materials such as plastic bags must be kept away from children Keep the packaging materials out of reach of children Environmental damage caused by improper disposal of batteries Batteries may not be disposed of with household waste They may contain toxic heavy metals ...

Page 21: ...evel surface On the powered on remote control 2 simultaneously slide the throttle 2h to the left and back and the control lever 2l to the right and back The indicator lights 1e on the quadcopter 1 will flash for approx 3 seconds Once the indicator lights 1e are steadily illuminated the calibration is complete and the quadcopter 1 is ready to fly NOTE repeat the calibration if the quadcopter 1 stil...

Page 22: ...sécurité Mauvais usage prévisible et Environnement de vol approprié Pictogrammes utilisés AVERTISSEMENT ATTENTION Ce mot clé désigne un danger présentant un risque moyen qui s il n est pas évité peut entraîner la mort ou des blessures graves PRUDENCE Ce mot clé désigne un danger ayant un degré de risque bas qui s il n est pas évité peut entraîner une blessure minime ou modérée REMARQUE Information...

Page 23: ...e avant de redé marrer le quadricoptère N exposez pas le quadricoptère et la télé commande au rayonnement direct du soleil ou à une température élevée pendant une durée prolongée En cas de chute importante par exemple de puis une hauteur élevée le calibrage risque d être endommagé ou déréglé Avant de refaire un vol il convient donc impérativement de vérifier qu il est pleinement fonctionnel En cas...

Page 24: ... place des piles 1 À l aide du tournevis cruciforme 7 dévissez la vis du couvercle du compartiment à piles 2q au dos de la télécommande 2 et retirez le couvercle du compartiment à piles 2q 2 Insérez soigneusement 2 piles LR6 de 1 5V 5 dans le compartiment à piles 2r Les piles doivent se trouver entièrement dans le compartiment à piles 2r PRUDENCE faites attention aux pôles plus moins des piles 5 e...

Page 25: ...e lacet Si le quadricop tère 1 tourne dans le sens horaire appuyez sur le bouton de trim de lacet pour le ramener vers la gauche 2f Si le quadricoptère tourne dans le sens antihoraire appuyez sur le bouton de trim pour le ramener vers la droite 2d Vous contrez ainsi le déplacement en lacet non désiré avec un trim dans la direction opposée Direction trim de tangage et de rou lis fig P Si le quadric...

Page 26: ... à l endroit où se trouvait la pale de rotor endom magée 1a 1b 4 Vissez la pale de rotor neuve 3 4 avec la vis sur le quadricoptère 1 PRUDENCE placez toujours les pales du rotor portant le mar quage A sur les bras de rotor portant un A Placez les pales du rotor portant le marquage B sur les bras de rotor portant un B Mise au rebut Afin de protéger l environnement ne jetez pas votre article avec le...

Page 27: ...égard aux déclara tions publiques faites par le vendeur par le producteur ou par son représentant notam ment dans la publicité ou l étiquetage 2 Ou s il présente les caractéristiques définies d un commun accord par les parties ou être propre à tout usage spécial recherché par l acheteur porté à la connaissance du vendeur et que ce dernier a accepté Article L217 12 du Code de la consommation L acti...

Page 28: ... plane Tirez simultanément la manette des gaz 2h et la manette de commande 2l de la télécommande 2 en arrière et vers la gauche et en arrière et vers la droite Les voyants lumineux 1e du quadricoptère 1 clignotent pendant env 3 se condes Dès que les voyants lumineux 1e restent allumés le calibrage est complet et le quadricoptère 1 est prêt à voler REMARQUE répétez le calibrage si le quadricoptère ...

Page 29: ...anneer niet vermeden kan leiden tot licht tot matig letsel AANWIJZING Uitgebreide informatie voor het gebruik van het apparaat Bewegende delen Uit de buurt van het lichaam houden Raak de ronddraai ende rotorbladen niet aan Veiligheidstips WAARSCHUWING niet geschikt voor kinderen jonger dan 12 jaar Pas op Lees voor het eerste gebruik de bedie ningshandleiding zorgvuldig door WAARSCHUWING de verpakk...

Page 30: ...e Waarschuwing voor onderspanning om schade aan de quadrocopter door een crash vanwege onderspanning of om schade aan de accu vanwege diepontlading te voorko men In sommige landen bestaat een verze keringsplicht voor modelvliegtuigen en helikopters waarmee buiten wordt gevlogen Raadpleeg uw WA verzekeraar en controleer of in deze verzekering uw quadrocopter is meeverzekerd Als gegevens verloren ga...

Page 31: ...mplaren 5 uit het artikel Accu plaatsen afb E Plaats de accu 8 in het accuvak 1g van de quadrocopter 1 tot deze hoorbaar vastklikt Accu verwijderen afb E Neem de accu 8 uit de quadrocopter 1 Accu laden 1 Verwijder de accu 8 uit het accuvak 1g van de quadrocopter 1 afb E 2 Sluit het kabeluiteinde 6a van de USB kabel 6 aan op de USB bus 8a van de accu 8 afb F 3 Steek het andere kabeluiteinde 6b van ...

Page 32: ...fb Q Het gaat hierbij om een vlieghulp waarmee de quadrocopter 1 zodra deze is ingescha keld altijd in de aangestuurde richting vliegt Deze hulp wordt aanbevolen wanneer de piloot weinig vliegervaring heeft De quadro copter 1 vliegt bijvoorbeeld vanuit de piloot gezien altijd naar rechts wanneer met de knop 2c de headless modus is ingeschakeld en met de stuurhendel 2l naar rechts wordt gestuurd on...

Page 33: ...hroef het nieuwe rotorblad 3 4 met de schroef vast op de quadrocopter 1 PAS OP plaats altijd de met een A gemarkeerde rotorbladen op de met een A gemarkeerde rotorarmen Plaats altijd de met een B gemarkeerde rotorbladen op de met een B gemar keerde rotorarmen Afvalverwerking Gooi uw afgedankte artikel ter bescher ming van het milieu niet bij het huisafval maar breng het naar een erkende afvalinzam...

Page 34: ...die waterpas is Beweeg op de ingeschakelde afstandsbediening 2 tegelijkertijd de gashendel 2h naar linksachter en de stuurhendel 2l naar rechtsachter De controlelampjes 1e van de quadrocopter 1 knipperen gedurende ca 3 se conden Zodra de controlelampjes 1e ononderbroken branden is de kalibratie afgesloten en is de quadrocopter 1 gereed om te vliegen AANWIJZING herhaal de kalibratie wanneer de quad...

Page 35: ...żliwe do przewidzenia użycie niewłaściwe i Odpowiednie środowisko lotu Zastosowane symbole OSTRZEŻENIE To hasło ostrzegawcze wskazuje na niebezpieczeństwo o średnim stopniu zagrożenia które jeśli się mu nie zapobiegnie może doprowadzić do śmierci lub poważ nych obrażeń OSTROŻNIE To hasło ostrzegawcze wskazuje na niebezpieczeństwo o niskim stopniu zagrożenia które jeśli się mu nie zapobiegnie może ...

Page 36: ...ierw ustalić przyczynę usterki zanim ponownie uruchomi się Quadrocopter Nie wystawiać Quadrocoptera ani pilota przez dłuższy okres na bezpośrednie oddzia ływanie światła słonecznego lub wysokich temperatur Podczas poważnego upadku np z dużej wysokości kalibracja może ulec uszkodzeniu lub rozstrojeniu Dlatego przed kolejnym lotem konieczne jest pełne sprawdzenie funk cjonowania urządzenia W razie u...

Page 37: ...ucjami publicznymi i zawsze zachować odległości boczne patrz Wskazówki bezpieczeństwa Nie wolno naruszać prywatności innych osób Produkt nie może trafić w ręce osób poniżej 12 roku życia Obciążanie Quadrocoptera jakimikolwiek ładunkami i wprowadzanie jakichkolwiek modyfikacji są zabronione Nie należy używać produktu jeśli jego części są poluzowane lub wadliwe np po kolizji lub upadku Wkładanie bat...

Page 38: ...Quadrocop ter 1 obraca się w prawo lub w lewo Przemieszczanie do przodu lub do tyłu pochylenie rys K Po przesunięciu dźwigni gazu 2l do przodu lub do tyłu Quadrocopter leci 1 do przodu lub do tyłu Przemieszczanie w lewą prawą stro nę skręt rys L Aby wykonać ruch w prawo lub w lewo bez obracania Quadrocoptera 1 czyli przesunąć go bokiem w zawisie przesu nąć prawą dźwignię sterującą 2l w lewo lub w ...

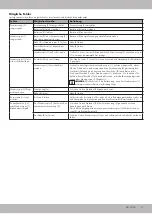
Page 39: ...bracające się w prawo oraz śmigła wirnika 4 obracające się w lewo Są one tutaj w instrukcji obsługi wyszarzone dla lepszego uwidocznienia Oba rodzaje mają oznaczenia na dolnej stronie A i B na które należy zwrócić uwagę podczas wymiany i które muszą zgadzać się z oznacze niami na Quadrocopterze 1 OSTRZEŻENIE jeśli śmigła wirników są uszkodzone to istnieje ryzyko że pod czas użytkowania ich części ...

Page 40: ...wić włączony Quadrocopter 1 na płaskiej i równej powierzchni Na włączo nym pilocie zdalnego sterowania 2 przesunąć jednocześnie dźwignię gazu 2h do tyłu w lewo oraz dźwignię sterowania 2l do tyłu w prawo Kontrolki 1e Quadrocoptera 1 powinny migać przez ok 3 sekundy Gdy kon trolki świetlne 1e świecą w sposób ciągły kalibracja jest zakończona a Quadro copter 1 jest gotowy do lotu WSKAZÓWKA powtórzyć...

Page 41: ...užité symboly VÝSTRAHA UPOZORNĚNÍ Signální slovo označuje riziko středního stupně které pokud se ho nelze vyvarovat může mít za následek smrt nebo závažné poranění UPOZORNĚNÍ Signální slovo označuje riziko nízkého stupně které pokud se ho nelze vyvarovat může mít za násle dek mírně nebo středně závažné poranění UPOZORNĚNÍ Další informace k použití přístroje Pohyblivé díly Udržujte v dostatečné vzd...

Page 42: ...se prosím u svého poskytovatele po jištění osobní odpovědnosti a ujistěte se že je váš quadrocopter zahrnut do tohoto pojištění V případě ztráty dat resp přerušení spojení mezi dálkovým ovládáním a kvadrokoptérou půjde kvadrokoptéra na přistání Výstražná upozornění pro baterie akumulátor OBECNÁ VÝSTRAŽNÁ UPOZOR NĚNÍ Uchovávejte baterie vždy mimo dosah dětí Čištění a uživatelskou údržbu nesmějí pro...

Page 43: ... 6 vytáhněte z portu USB 6 Vložte akumulátor 8 řádně do přihrádky akumulátoru 1g viz Vložení akumulátoru Varování před podpětím Signálky 1e začnou rychle blikat pokud je akumulátor 8 téměř vybitý Jakmile toto zjistíte quadrocopter 1 ihned dobijte Vhodné prostředí pro let Pro optimální let by mělo prostředí splňovat následující kritéria Téměř bezvětří maximální síla větru 3 Před letem zkontrolujte ...

Page 44: ... z celkem čtyř stupňů rychlosti je rychlost 2 Na displeji 2j se rozsvítí příslušné stupně Rychlost 1 zvukový signál zazní jednou Pro první pokusy s malými zkušenostmi s létáním Rychlost 2 zvukový signál zazní dvakrát Pro piloty s prvními zkušenostmi s létáním Rychlost 3 zvukový signál zazní třikrát Pro zkušené piloty Rychlost 4 pípnutí zazní čtyřikrát Pro velmi zkušené piloty UPOZORNĚNÍ Po vypnutí...

Page 45: ...kvidovány spolu s komunálním odpadem Mohou obsahovat toxické těžké kovy a podléha jí zpracování nebezpečného odpadu Chemické symboly těžkých kovů jsou následující Cd kad mium Hg rtuť Pb olovo Použité baterie akumulátory proto likvidujte v místním sběrném místě Výrobek a obal zlikvidujte ekologicky Při třídění odpadu dodržujte označení balicích materiálů které jsou označeny zkratkami a a čísly b s ...

Page 46: ...1 na vodorovnou plochou plochu Na zapnutém dálko vém ovládání 2 současně přesuňte plynovou páčku 2h směrem dozadu doleva a ovládací páčku 2 l dozadu doprava Na cca 3 sekundy se rozsvítí signálky 1e quadrocopteru 1 Jakmile signálky 1e svítí trvale je kalibrace dokončena a quadrocopter 1 je připraven k letu UPOZORNĚNÍ Kalibraci opakujte pokud quadrocopter 1 stále nekontrolovaně letí jedním směrem Qu...

Page 47: ... smrť alebo vážne zranenie POZOR Výstražný signál označuje nebez pečenstvo s nízkym stupňom rizika ktoré v prípade ak sa mu nevyhne te môže mať za následok ľahké alebo stredne ťažké zranenie UPOZORNENIE Ďalšie informácie o použití zariadenia Pohyblivé častí Udržujte mimo tela Nedotýkajte sa rotujúceho rotora Bezpečnostné pokyny UPOZORNENIE Nie je vhodné pre deti do 12 rokov Pozor Pred prvým použit...

Page 48: ...u Prosím informujte sa u svojho poisťovateľa osobnej zodpovednosti a uistite sa či je vaša kvadrokoptéra zahrnutá v tomto poistení V prípade straty dát resp prerušenia spojenia medzi diaľkovým ovládaním a kvadrokopté rom začne kvadrokoptér pristávať Výstražné upozornenia k batériám akumulátoru VŠEOBECNÉ VÝSTRAŽNÉ UPO ZORNENIA Batérie uchovávajte vždy mimo dosahu detí Čistenie a údržba užívateľa ne...

Page 49: ...eným svetlom Keď je nabíjanie ukončené kontrolná žiarovka nabíjania akumulátora 8 svieti zeleným svetlom UPOZORNENIE Čas nabíjania je cca 50 až 80 minút 5 Po nabití odpojte USB zdierku 8a od konca 6a USB kábla 6 a koniec 6b USB kábla 6 vytiahnite z USB portu 6 Vložte akumulátor 8 správne do priehradky na akumulátor 1g pozri Vloženie akumu látora Výstraha pri nízkom napätí Kontrolky 1e začnú blikať...

Page 50: ...tieť späť do výcho dzieho bodu stlačte aktívne tlačidlo 2c cca na 3 sekundy UPOZORNENIE Zoberte na vedomie že otáčaním kvadrokoptéry 1 sa môže cesta späť odlišovať Opakovaným stlačením tlačidla 2c alebo pohybom ovládacej páky 2l sa postup preruší Nastavenie rýchlosti obr M Na diaľkovom ovládači 2 môžete nastaviť rýchlosti pre let opakovaným stlačením tlačidla 2e 2g V základnom nastavení je nastave...

Page 51: ...iály ako napr plastové vrecká nepatria do rúk deťom Uchovávajte obalový materiál mimo dosahu detí Škody na životnom prostredí nesprávnou likvidáciou batérií akumulátorov Batérie akumulátory sa nesmú likvidovať spolu s domovým odpadom Môžu obsahovať toxické ťažké kovy a podliehajú spracovaniu špeciálne ho odpadu Chemické symboly ťažkých kovov sú nasledovné Cd kadmium Hg ortuť Pb olovo Použité batér...

Page 52: ...aná Postavte zapnutú kvadrokoptéru 1 na vodorovný rovný povrch Na zapnutom diaľkovom ovládači 2 posuňte súčasne plynovú páku 2h dozadu doľava a ria diacu páku 2l dozadu doprava Kontrolky 1e kvadrokoptéry 1 blikajú cca 3 sekundy Keď kontrolky 1e trvalo svietia je kalibrácia ukončená a kvadrokoptéra 1 pripravená na let UPOZORNENIE Zopakujte kalibráciu ak kvadrokoptéra 1 ešte stále nekontrolovane lie...

Page 53: ...55 ...

Page 54: ...56 03 09 2021 AM 11 32 ...

Reviews: