background image

5

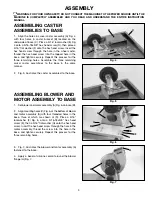
Fig. 4

Fig. 5

Fig. 6

Fig. 7

ASSEMBLING CASTER
ASSEMBLIES TO BASE

1.

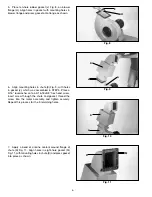
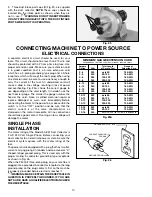
Align the holes in swivel caster assembly (A) Fig. 4,

with four holes in caster bracket (B) located on the
underside of base (C). Place a 5/16" lockwasher (E) Fig.
4 onto a 5/16-18x5/8" hex head screw (D), then place a
5/16" flat washer (F) onto the hex head screw. Insert the
hex head screw through the hole in the wheel caster,
thread the hex head screw into the tapped hole in the
base, and tighten securely. Repeat this process for the
three remaining holes. Assemble the three remaining
swivel caster assemblies to the base in the same
manner.

2.

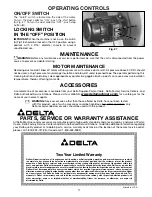
Fig. 5, illustrates the caster assembled to the base.

ASSEMBLING BLOWER AND
MOTOR ASSEMBLY TO BASE

1.

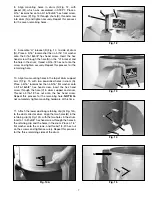
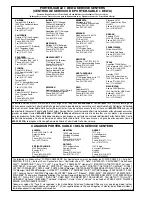
Set blower and motor assembly (A) Fig. 6, on base (B).

2.

Align mounting holes (C) Fig. 6, at the bottom of blower

and motor assembly (A) with four threaded holes in the
base, three of which are shown at (D). Place a 5/16"
lockwasher (F) Fig. 6, onto a 5/16-18x5/8" hex head
screw (E), then a 5/16" flat washer (G) onto the hex head
screw. Insert the hex head screw through the hole in the
motor assembly, thread the screw into the hole in the
base, and tighten securely. Repeat this process for the
three remaining holes.

3.

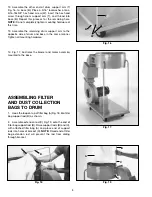
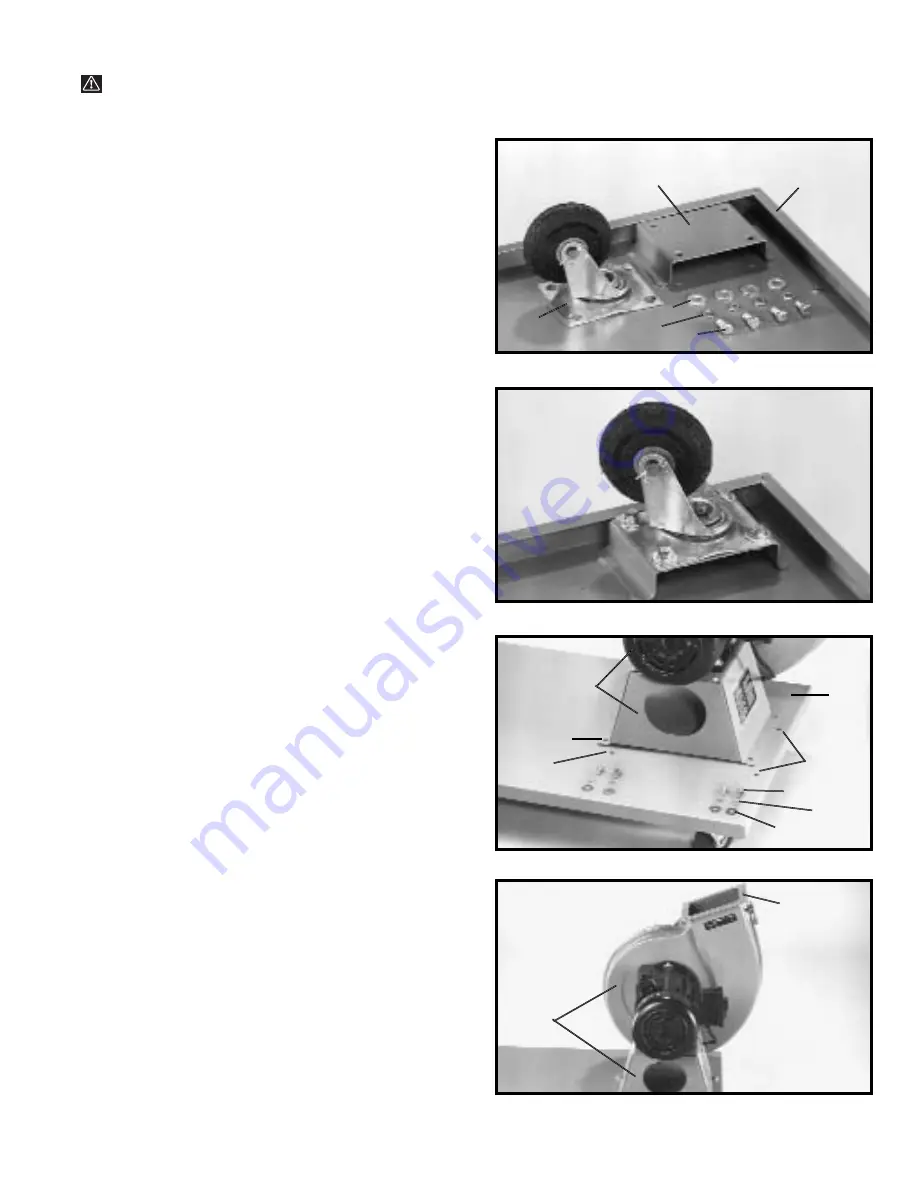
Fig. 7, illustrates the blower and motor assembly (A)

fastened to the base.

4.

Apply a bead of silicone sealant around the blower

flange (H) Fig. 7.

A

B

C

F

E

D

A

C

D

B

D

E

F

G

H

A

ASSEMBLY

WARNING: FOR YOUR OWN SAFETY, DO NOT CONNECT THE MACHINE TO THE POWER SOURCE UNTIL THE

MACHINE IS COMPLETELY ASSEMBLED AND YOU READ AND UNDERSTAND THE ENTIRE INSTRUCTION
MANUAL.

Summary of Contents for 50-851

Page 1: ...r Model 50 851 PART NO 902114 07 01 02 Copyright 2002 Delta Machinery To learn more about DELTA MACHINERY visit our website at www deltamachinery com For Parts Service Warranty or other Assistance please call 1 800 223 7278 In Canada call 1 800 463 3582 ...

Page 2: ... with padlocks master switches or by removing starter keys 9 DON T FORCE TOOL It will do the job better and be safer at the rate for which it was designed 10 USE RIGHT TOOL Don t force tool or attachment to do a job for which it was not designed 11 WEAR PROPER APPAREL No loose clothing gloves neckties rings bracelets or other jewelry to get caught in moving parts Nonslip footwear is recommended We...

Page 3: ...or plug If the dust collector is not operating properly or has been damaged left outdoors or has been in contact with water take it to an Authorized Service Center for service 14 DO NOT use the dust collector as a toy DO NOT use near or around children 15 DO NOT insert fingers or foreign objects into the dust intake port or discharge port Keep hair loose clothing fingers and all body parts away fr...

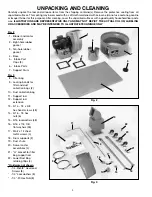
Page 4: ...ilter bag support rod 22 Lower Dust Bag retaining Clips 4 Hardware not shown 1 4 20x5 8 Hex Head Screws 8 1 4 Lockwashers 8 1 4 20 Hex Nuts 8 1 2 3 4 5 6 7 8 9 10 11 12 13 14 15 16 17 18 19 20 21 UNPACKING AND CLEANING Carefully unpack the tool and all loose items from the shipping container s Remove the protective coating from all unpainted surfaces This coating may be removed with a soft cloth m...

Page 5: ...TOR ASSEMBLY TO BASE 1 Set blower and motor assembly A Fig 6 on base B 2 Align mounting holes C Fig 6 at the bottom of blower and motor assembly A with four threaded holes in the base three of which are shown at D Place a 5 16 lockwasher F Fig 6 onto a 5 16 18x5 8 hex head screw E then a 5 16 flat washer G onto the hex head screw Insert the hex head screw through the hole in the motor assembly thr...

Page 6: ...asket J which was assembled in STEP 5 Place a 5 16 lockwasher onto a 5 16 18x5 8 hex head screw insert screw through the chute and gasket thread the screw into the motor assembly and tighten securely Repeat this process for the 9 remaining holes 7 Apply a bead of silicone sealant around flange of chute K Fig 11 Align holes in eight hole gasket M Fig 11 with mounting holes in chute K and press gask...

Page 7: ...oles in the top of drum support arm T Fig 15 with two pre drilled holes in drum N Place a 5 16 lockwasher then a 5 16 flat washer onto a 5 16 18x5 8 hex head screw insert the hex head screw through the hole V in drum support and drum Thread a 5 16 18 hex nut onto the hex head screw Repeat this process for the remaining hole NOTE Do not completely tighten mounting hardware at this time N K M N P K ...

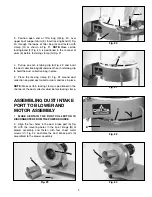
Page 8: ...he opposite side of drum and base in the same manner Tighten all mounting hardware 14 Fig 17 illustrates the blower and motor assembly mounted to the base ASSEMBLING FILTER AND DUST COLLECTION BAGS TO DRUM 1 Hook the loop on top of filter bag A Fig 18 into filter bag support rod B as shown 2 Assemble extension rod C Fig 19 onto the end of filter bag support rod B Raise support rods B and C with at...

Page 9: ...HE POWER SOURCE 2 Align the four holes in the dust intake port A Fig 23 with the mounting holes in the lip of flange B of blower assembly and fasten with four sheet metal screws C Fig 24 illustrates the dust intake ports A assembled to the blower assembly 4 Pull up on each retaining clip A Fig 22 and insert the dust collection bag B underneath each retaining clip to hold the dust collection bag in...

Page 10: ...an 12 wire and should be protected with a 20 amp time lag fuse Use proper extension cords Make sure your extension cord is in good condition and is a 3 wire extension cord which has a 3 prong grounding type plug and a 3 hole receptacle which will accept the tool s plug When using an extension cord be sure to use one heavy enough to carry the current of the tool An undersized cord will cause a drop...

Page 11: ...ice Stations To obtain additional information regarding your Delta quality product or to obtain parts service warranty assistance or the location of the nearest service outlet please call 1 800 223 7278 In Canada call 1 800 463 3582 Printed in U S A A B LOCKING SWITCH IN THE OFF POSITION IMPORTANT When the machine is not in use the switch A Fig 18 should be locked in the OFF position using a padlo...

Page 12: ...hern Avenue Suite 105 Phone 602 437 1200 Fax 602 437 2200 CALIFORNIA Ontario 91761 Los Angeles 3949A East Guasti Road Phone 909 390 5555 Fax 909 390 5554 San Leandro 94577 Oakland 3039 Teagarden Street Phone 510 357 9762 Fax 510 357 7939 COLORADO Arvada 80003 Denver 8175 Sheridan Blvd Unit S Phone 303 487 1809 Fax 303 487 1868 FLORIDA Davie 33314 Miami 4343 South State Rd 7 441 Unit 107 Phone 954 ...

Reviews: